- [Case Studies](https://www.mergado.com/category/case-studies)
- [eCommerce tips](https://www.mergado.com/category/ecommerce-tips)
- [Online Store Solutions and Platforms](https://www.mergado.com/category/online-store-solutions-and-platforms)
- [Mergado Pack](https://www.mergado.com/category/mergado-pack)
- [Mergado tips](https://www.mergado.com/category/mergado-tips)
- [Mergado News](https://www.mergado.com/category/mergado-news)
- [eCommerce News](https://www.mergado.com/category/ecommerce-news)
- [How to use Mergado](https://www.mergado.com/category/how-to-use-mergado)
- [Interviews with e‑commerce gurus](https://www.mergado.com/category/interviews-e-commerce-gurus)
- [Extensions](https://www.mergado.com/category/apps-bidding-image-marketing-and-more)
- [Expansion with Mergado](https://www.mergado.com/category/expansion-with-mergado)
- [Mergado Lifestyle](https://www.mergado.com/category/mergado-lifestyle)
1. [ Home ](https://www.mergado.com/)
2. [ Mergado Blog ](https://www.mergado.com/blog)
3. [ Mergado Pack ](https://www.mergado.com/category/mergado-pack)
4. **Implement Biano Pixel and Button with Mergado Pack and Google Tag Manager**
# **Implement Biano Pixel and Button with Mergado Pack and Google Tag Manager**
[  Petr Mindl ](https://www.mergado.cz/blog/petr-mindl) [Mergado Pack](https://www.mergado.com/category/mergado-pack)
5. 8. 2021
4 minutes read

Do you want to **customize the product display** on the [Biano](https://www.mergado.com/tag/biano) based on customer preferences? You can do this with the Biano Pixel remarketing service and the similarity of the Biano Button function. You can only achieve the desired results by **proper implementation**.
function tableOfContents() {
return {
headings_menu: [],
heading_active: '', // Added to track the active section
shouldBeSticky: false,
generateToC() {
const headings = document.querySelectorAll('.js-article-full-headings h2, .js-article-full-headings h3');
let headingMap = {};
headings.forEach((heading) => { // Use an arrow function to maintain `this` context
// Normalize heading text to remove diacritics, then replace non-alphanumeric characters with dashes
var normalizedText = heading.textContent.normalize("NFD").replace(/[\u0300-\u036f]/g, ""); // Remove diacritics
var id = heading.id ? heading.id : normalizedText.trim().toLowerCase()
.split(' ').join('-').replace(/[^a-z0-9\-]/ig, ''); // Updated regex to replace non-alphanumeric characters
headingMap[id] = headingMap[id] !== undefined ? ++headingMap[id] : 0;
// Use the updated `id` with diacritics removed for the heading id and the TOC
const finalId = headingMap[id] ? `${id}-${headingMap[id]}` : id;
this.headings_menu.push({
id: finalId,
title: heading.textContent,
level: heading.tagName.toLowerCase(), // Track heading level
active: false, // Initially set active to false
});
heading.id = finalId;
});
},
checkStickyNeeded() {
const ul = this.$el.querySelector('ul');
if (ul) {
this.shouldBeSticky = ul.scrollHeight < window.innerHeight;
}
},
setActiveHeading() {
// disabled not working with active state on click
// add @scroll.window="setActiveHeading()" to the parent div
// const headings = document.querySelectorAll('.js-article-full-headings h2');
// let activeHeading = '';
// let closestHeadingDistance = Infinity;
// headings.forEach((heading) => {
// const rect = heading.getBoundingClientRect();
// const offset = rect.top - window.innerHeight / 2; // Consider heading in the middle of the screen as active
// if (offset < 0 && Math.abs(offset) < closestHeadingDistance) {
// activeHeading = heading.id;
// closestHeadingDistance = Math.abs(offset);
// }
// });
// // Update the active state in headings_menu
// if (activeHeading !== this.heading_active) {
// this.headings_menu = this.headings_menu.map(item => ({
// ...item,
// active: item.id === activeHeading,
// }));
// this.heading_active = activeHeading;
// }
},
setActiveItem(clickedId) {
this.headings_menu.forEach(item => {
item.active = (item.id === clickedId);
});
this.heading_active = clickedId; // Optionally update the heading_active property if used
},
};
}
1. —
Do you want to **customize the product display** on the [Biano](https://www.mergado.com/tag/biano) based on customer preferences? You can do this with the Biano Pixel remarketing service and the similarity of the Biano Button function. You can only achieve the desired results by **proper implementation**. [Mergado Pack](https://pack.mergado.com) and [Google Tag Manager](https://tagmanager.google.com/#/home) are a great help.
The described implementation is allowed in **[PrestaShop](https://pack.mergado.com/prestashop)** and **[WooCommerce](https://pack.mergado.com/woocommerce)** Mergado Pack modules.
## Work with the web data layer
For smooth implementation, it is advisable to look into the **data layer** of your website.
1. You can use the **preview mode** of the GTM itself or an **add-on** to the Chrome browser — [dataslayer](https://chrome.google.com/webstore/detail/dataslayer/ikbablmmjldhamhcldjjigniffkkjgpo).
2. In addition, we recommend having instructions for implementing GTM from Biano **open**.
### In general:
You must first **install** *the Mergado Pack*, and **activate the GTM container**. For the GTM function in the module administration, it is necessary to have all Ecommerce Tracking functions activated.
## **Procedure for Biano Pixel:**
**1.** In the tag manager (GTM), we first **define** the necessary variables (VARIABLES):
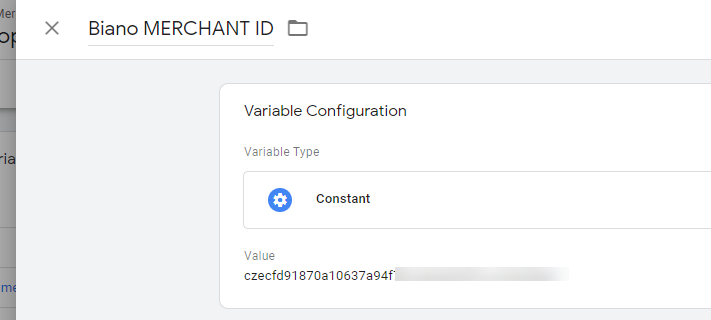
- ### a. Biano MERCHANT ID
This is an ordinary constant whose value is our Merchant ID.
- ### b. Product ID
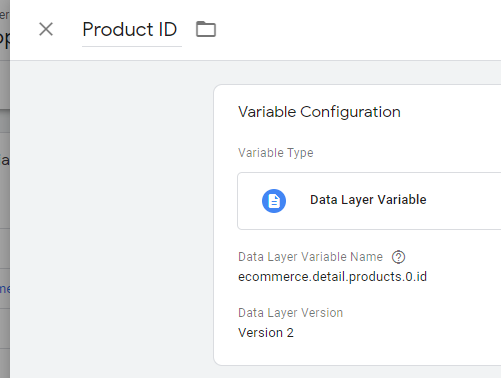
This variable must be defined as a **Data Layer Variable**. The just mentioned dataslayer will help us with that. On the product page, open the developer tools (right-click and select Explore or press the f12 function key).
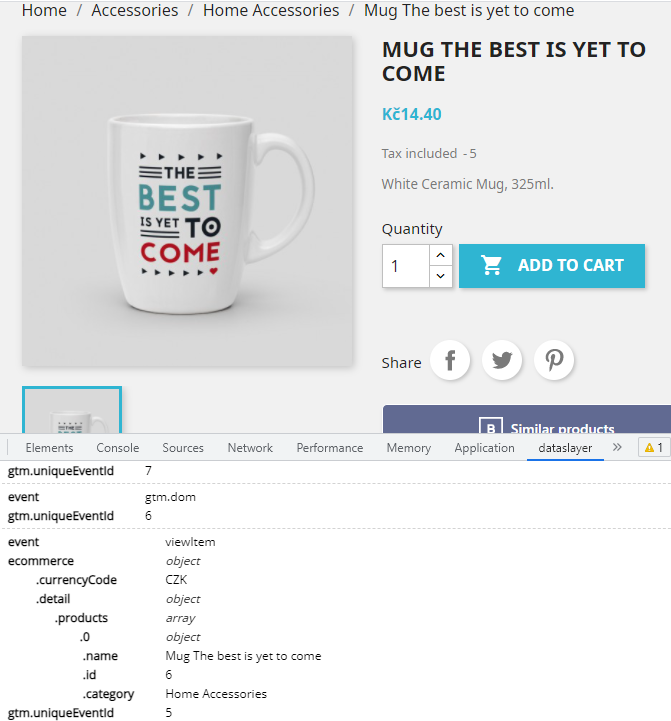
We see that the product ID is structured to “5. level” — i. e. ecommerce.detail.products.0.id. We are looking for value for the **viewItem** event.
We create a **new variable** and name it, for example, Product ID. Select Data Layer Variable, the variable name ecommerce.detail.products.0.id, and the version of data layer 2 as the type.
We proceed in the same way for the other variables of the data layer.
- ### c. Another variables of Data layer
- **Product ID** **- AddToCart** — variable name *ecommerce.add.products.0.id*
- **Quantity** - name *ecommerce.add.products.0.quantity*
- **Unit price** — name *ecommerce.add.products.0.price*
- **Currency** — name *ecommerce.currencyCode*
- **Order ID** — name *ecommerce.purchase.actionField.id*
- **Total Order Price** - name *ecommerce.purchase.actionField.revenue*
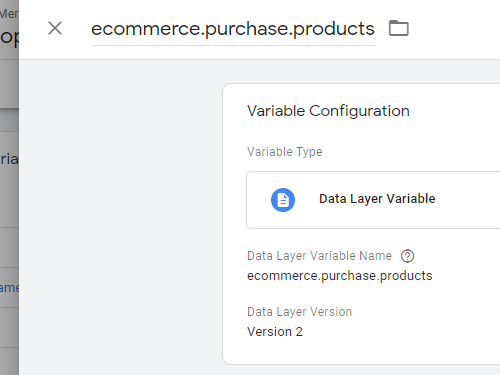
- **ecommerce.purchase.products** — we need this variable to “pull” an array of purchased products from the data layer. Name *ecommerce.purchase.products*
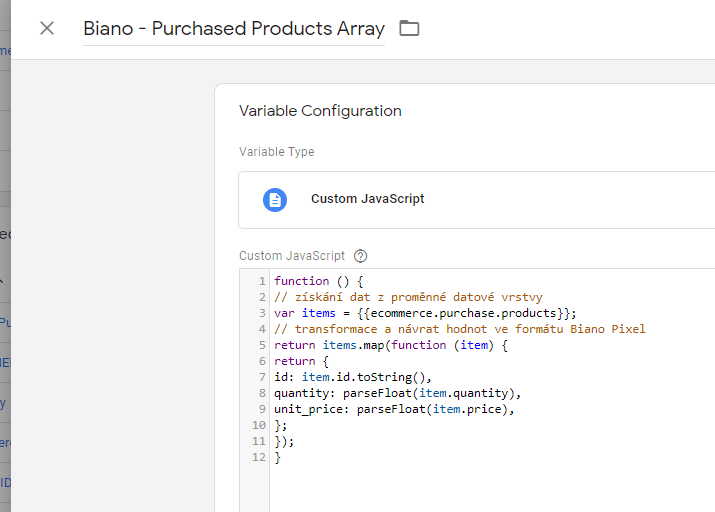
- ### d. Biano — Purchased Products Array
This variable **transforms** an array of purchased products into a Biano format.
We create a **variable with the type Custom JavaScript**. As content, we insert a script prepared by Biano. We just modify it a bit for the needs of our data layer. As the items variable, select the variable from the previous step **ecommerce.purchase.products**. For the **id** parameter, write instead of .productCode> .id. Other parameters remain the same.
You can download the modified script below.
```
function () {
```// get data from a data layer variable```
var items = {{ecommerce.purchase.products}};
```// transform and return values in Biano Pixel format```
return items.map(function (item) {
return {
id: item.id.toString(),
quantity: parseFloat(item.quantity),
unit_price: parseFloat(item.price),
};
});
}
```
**Now we defined all the necessary variables for pixel implementation.**
**2.** We now define TRIGGERS for all Biano pixel events. That means **Page View, Product View, Add To Cart, and Purchase**. We launch the Page View on each page. So we use the built-in **All pages** launcher. We define other triggers according to the events of the data layer.
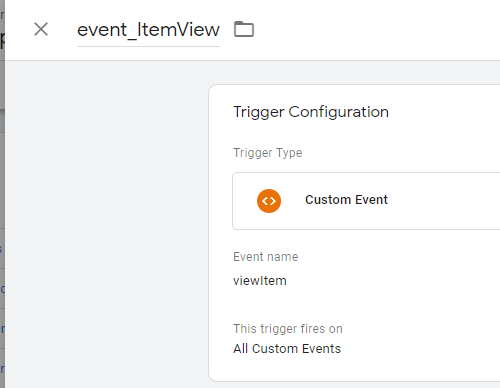
- ### a. Event — ItemView
Create a trigger with a name such as **event\_ItemView**, set the type to **Custom Event** and the name of the event **viewItem** (pay attention to event names and uppercase and lowercase letters). Again, the dataslayer will help us with that.
We **proceed** **similarly** for other triggers.
- ### b. Other triggers
- **event\_AddToCart** - name *addToCart*.
- **event\_Purchase** — name *purchase*.
We have defined all the necessary triggers, and now we can **create the tags themselves**.
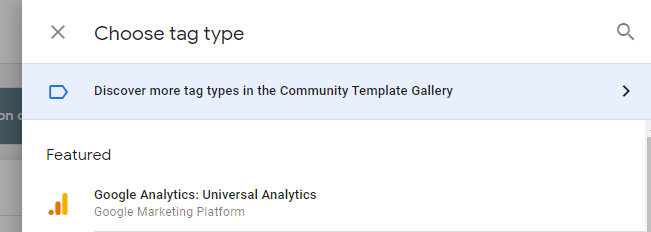
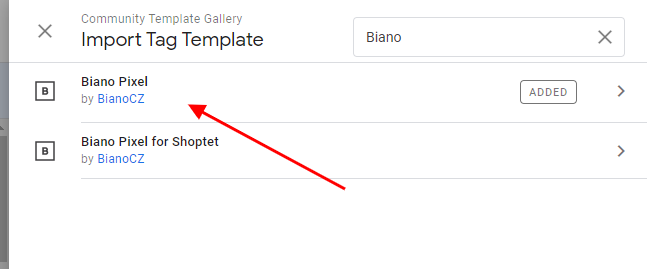
**3.** We will create four new tags (TAGS) for each Biano Pixel event. We choose **Biano Pixel** as the brand type. We must add this tag to our GTM from the **Template Community Gallery** and approve its use.
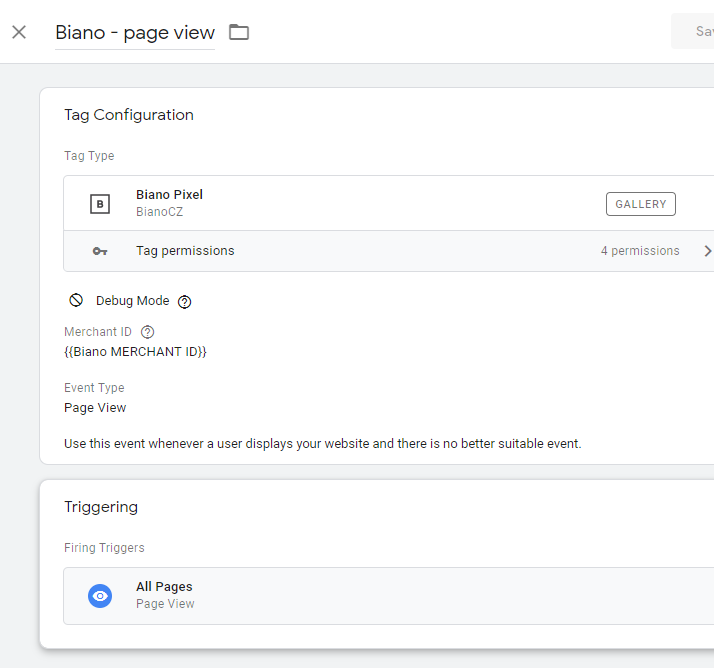
- ### a. Biano — Page View
For example, we call the first tag **Biano — page view**, we choose **Biano Pixel** as the type, we write the **{{Biano MERCHANT ID}}** variable created by us in the Merchant ID field, the type of the **Page View** event and as the **All Pages** trigger.
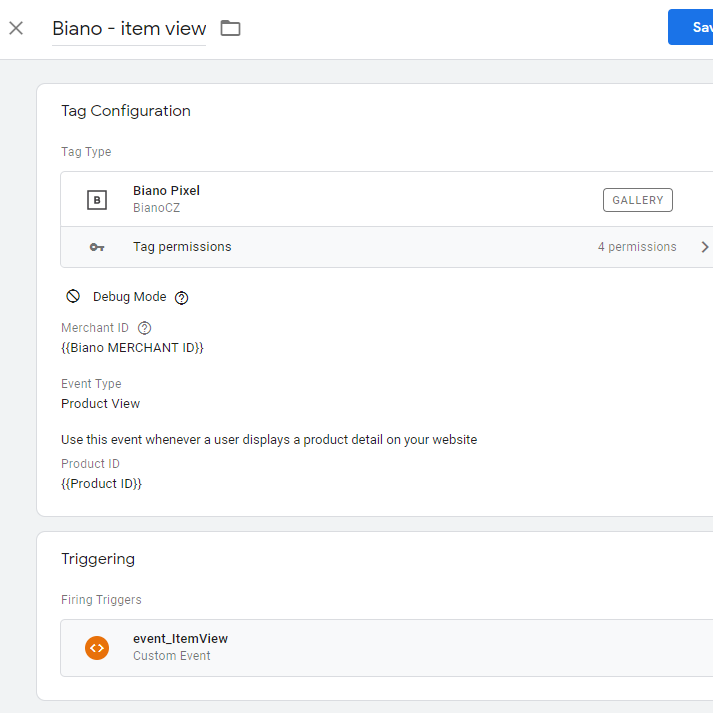
- ### b. Biano — Item View
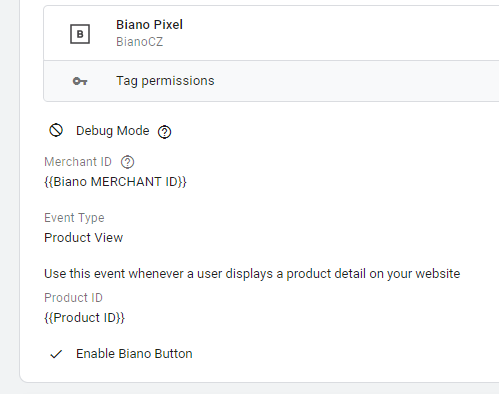
The next tag is going to send a Product View event. We set everything as before and enter our variable **{{Product ID}}** in the Product ID field. Select **event\_ItemView** as the trigger.
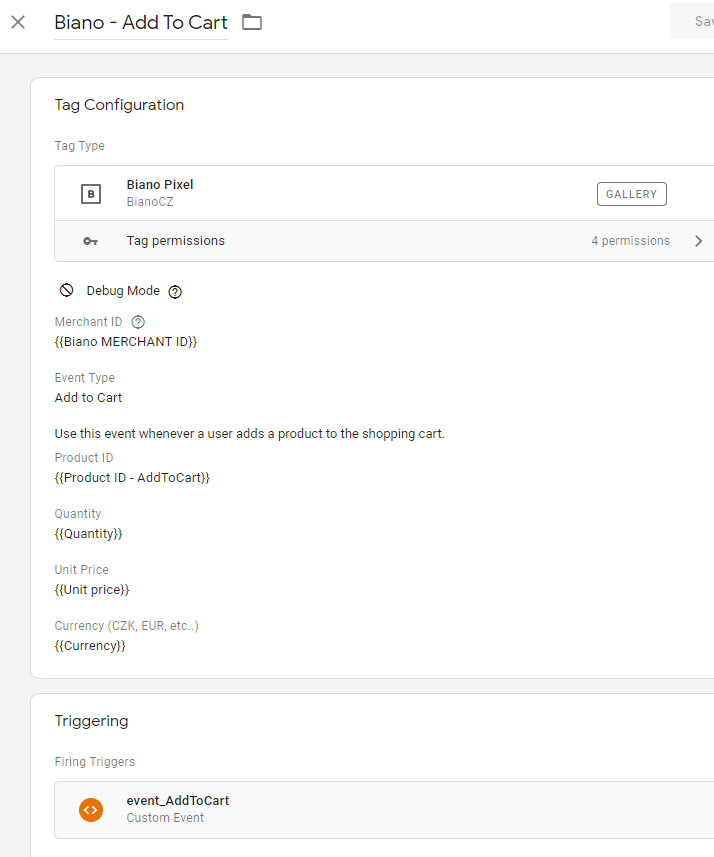
- ### c. Biano — Add To Cart
Another tag is going to be **Biano — Add To Cart**. We set the brand type and Merchant ID **as before**. Select the Add to Cart event type, enter the **{{Product ID — AddToCart}}** variable in the Product ID field, the **{{Quantity}}** variable in the Quantity field, the **{{Unit price}}** variable in the Unit Price field and **{{Currency}** in the Currency field. Select the trigger **event\_AddToCart**.
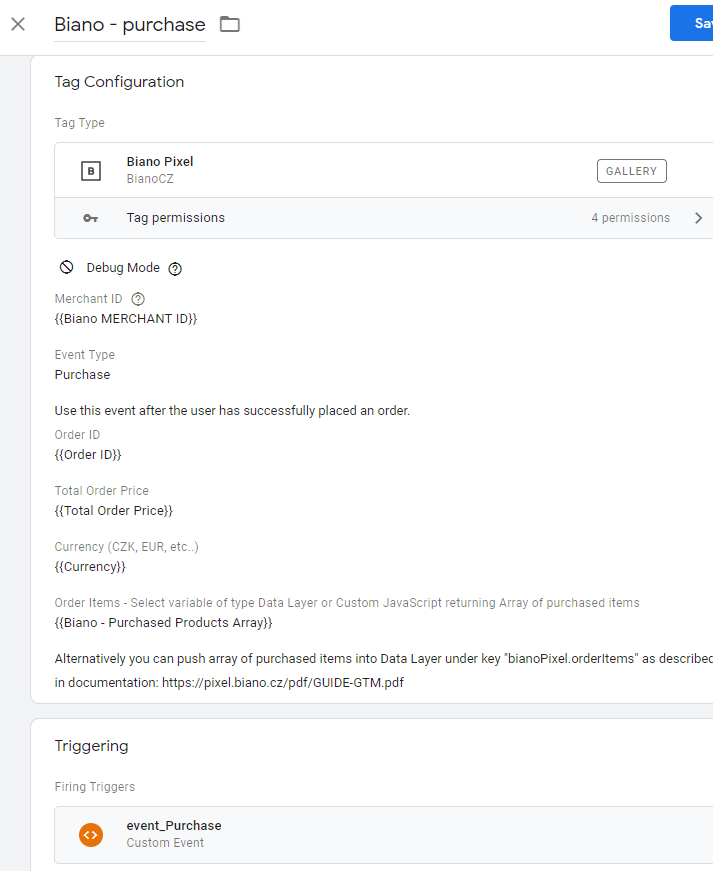
- ### d. Biano — Purchase
The last tag is going to be **Biano — purchase** sending information about customer purchases. We will set the brand type and Merchant ID **as before**. Set the event type to Purchase. In the other fields we write the pre-prepared variables **{{Order ID}}, {{TotalOrder Price}}, {{Currency}} and {{Biano — Purchased Products Array}}**. Select **event\_Purchase** as the trigger.
**4.** Now we can use the **preview of changes in GTM** to check whether all variables are filled correctly and all tags are triggered. We try to run all events, i. e. visit the site, visit the product card, add to the cart, and purchase. If everything is correct, the events should also appear in the Biano administration itself.
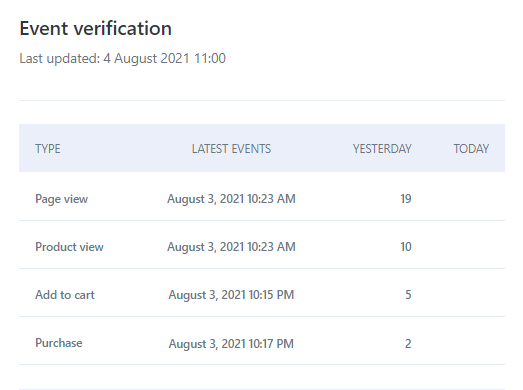
**5.** Once we have everything checked, we can **publish** the container, and we are **done**.
## **Procedure for Biano Button:**
We implement the button entirely using Google Tag Manager. It’s not the best way, but it’s enough for us to deploy and test the service. At the same time, this tutorial requires at least a basic knowledge of **JavaScript, HTML, and CSS**.
We recommend that you also study the **instructions** for implementing the Biano Button from Biano itself.
- ### 1. Variable (parameters) definition
For the Button to work properly, it is necessary to define several variables (parameters). We can use the **Product ID** from the previous manual, but we still need to create the **Product name** and **Product cover IMG**.
- **a. Product ID** — we have already defined it from the pixel implementation.
- **b. Product name** - we create a **Data Layer Variable** and name **ecommerce.detail.products.0.name**.
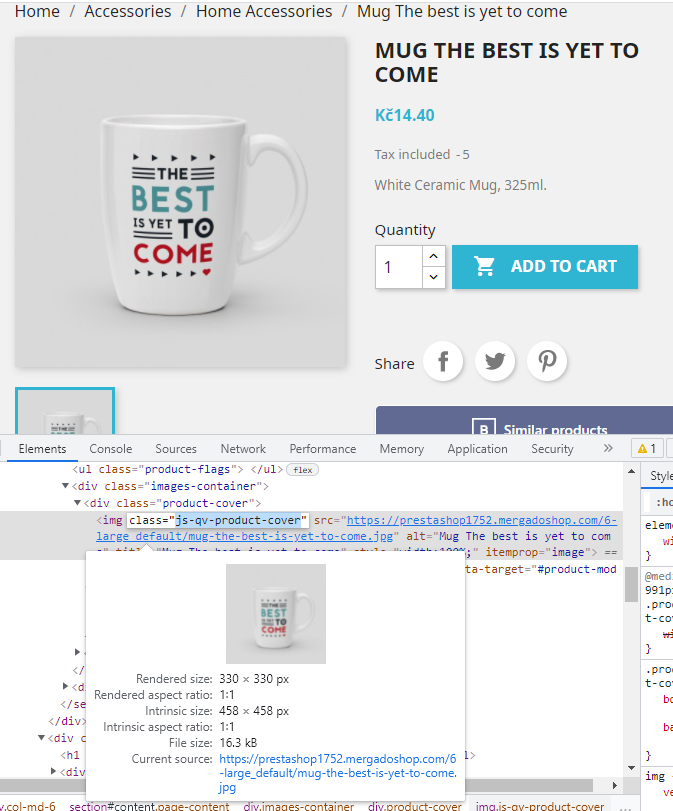
- **c. Product cover IMG** — this variable can be a bit more complicated because the URL of the product image is not going to be provided by the data layer. We need to find the link directly in the page code using the **CSS selector** or **id element** and define it as a variable.
We open the developer tool again and find the element containing our image. It is best if the element has a unique id, but a class will suffice. In our case it is the element **img** and **class = “js-qv-product-cover”**. If you do not know what a CSS selector, id, and class is, we recommend that you study the required minimum first.
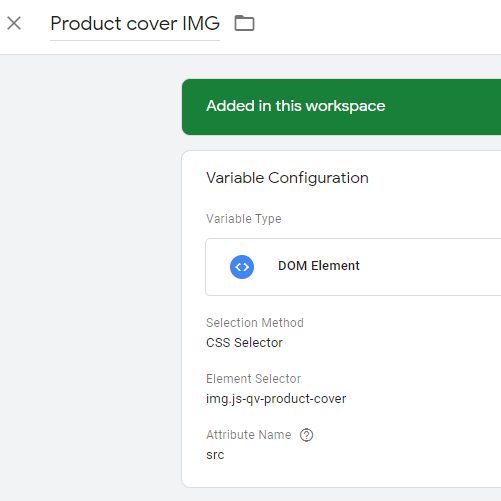
Then we create a new variable of the type **DOM element**. As the Selection Method, we choose **CSS Selector**. We copy the name of the class in the value Element Selector in our case **img.js-qv-product-cover** and Attribute Name we enter **src**, which is an attribute in which the link to the image is written.
- ### 2. Insert a Biano link into a page
We have already created all the necessary triggers from the Pixel implementation instructions, so we proceed directly to the **tag creation** (TAG), which inserts the **HTML element <a>**, including all the necessary attributes, in the specified place. The Biano script then searches the page for this specific element and adds a **Similar Products** button instead.
We named the tag **HTML injection**. Select the **Custom HTML** tag type and insert a script into the body. It creates the necessary element with dynamic parameters. Then we place it on the page where we need it. To start the tag before the Biano Button tag, set the **Tag firing priority to 1**. Select **event\_ItemView** as the trigger.
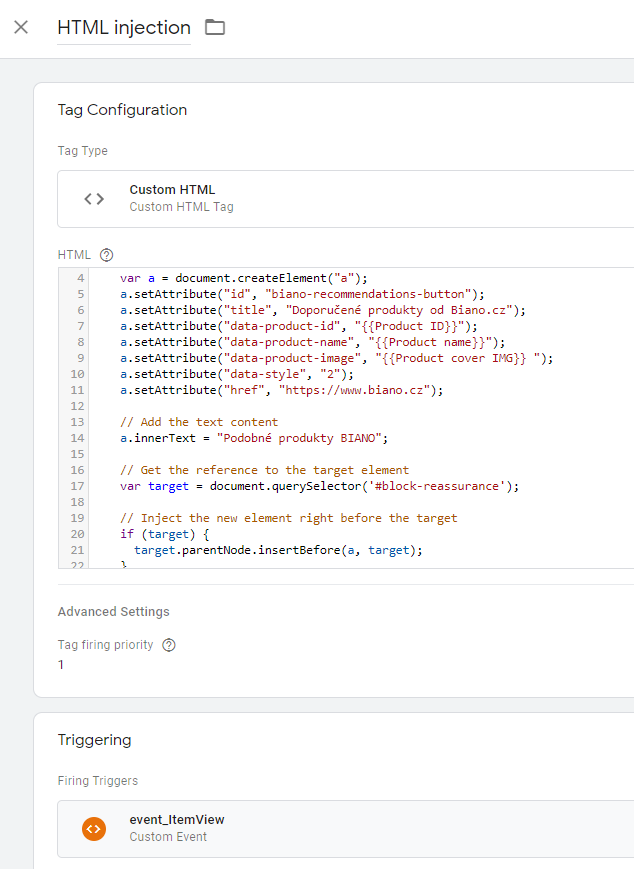
Let’s not go into the details of the script itself. We only explain how to add dynamic attributes and where the resulting element is inserted on the page. In the previous steps, we created variables, which we add as values for the attributes of our new element. **“data-product-id”, “{{Product ID}}”, “data-product-name”, “{{Product name}}” and “data-product-image”, “{{Product cover IMG}} “**. If you named the variables differently, of course, you have to edit the names.
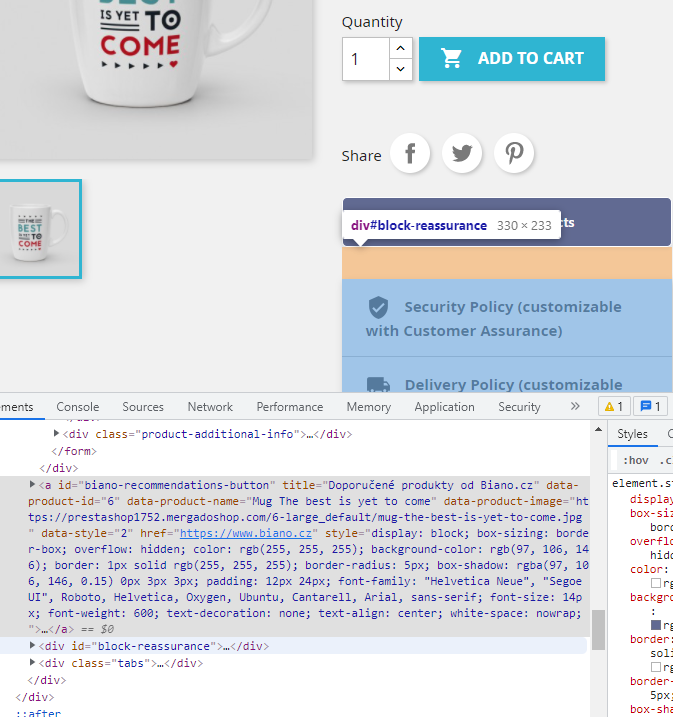
And now comes the last, most important part. We need to define **where our new element is going to be rendered** on the page. We go to the product tab and reopen the Developer Tools. We look for the element in front of which we want the Biano Button to be drawn. In our case, it was a block with information for the customer, which has **id = “block-reassurance”**. We write the name id in the appropriate place in the script as # block-reassurance.
**Download our script below**, but keep in mind that you may need to edit it. Especially the **Selector element** before which you want to insert a Button.
```
```
- ### 3. Biano Button activation
Finally, we modify the original **Biano tag — item view**. Open the tag settings and check the **Enable Biano Button** checkbox.
- ### 4. Function check
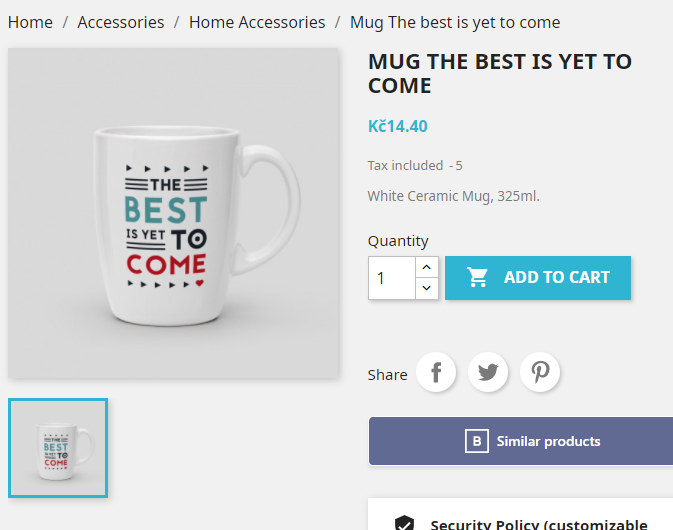
As with the Biano Pixel, we check the changes by **previewing the changes in GTM**. If everything is correct, the Biano Button — Similar Products should appear on the product page.
Attract more customers in the home and decor segment. Advertise on the Biano. The correct use of its smart services will bring you more **credibility** and the probability that the visitor **will buy from you**.
Do you run a store on another e‑commerce platform? The Mergado Pack module controls several of them and can implement well-known advertising tools, including **Glami Pixel**, or **Google Ads**.
[](https://pack.mergado.com/)
### **Read more:**
[ 
### What should a proper client context look like for performance specialists?
](https://www.mergado.com/blog/master-prompt-eshopy-b2c)
[ 
### How Feed Optimization Unlocked Meta Ads Performance without Increasing Ad Spend
](https://www.mergado.com/blog/feed-optimization-for-meta-ads)
[ 
### How to Sell Successfully on idealo
](https://www.mergado.com/blog/successful-sale-on-idealo)
[  ](https://www.mergado.cz/blog/petr-mindl)### [ Petr Mindl ](https://www.mergado.cz/blog/petr-mindl)
## What you *might be interested in next*
[ 
### Mergado Pack for WooCommerce will now help you collect reviews for Biano Star
](https://www.mergado.com/blog/mpack-woocommerce-biano-star)
[ 
### Mergado Pack v. 3 for PrestaShop simplifies many advertising operations
](https://www.mergado.com/blog/pack-prestashop-version-three)
[ 
### Install Mergado Pack for WooCommerce. You can do it in 2 minutes
](https://www.mergado.com/blog/mergado-pack-woocommerce-tutorial)
## Don’t miss *anything*
Sign up for our newsletter
By logging in, you agree that we will process your data by the [terms of personal data protection](https://www.mergado.com/cookies).
Thank you, you have successfully joined our subscriber's list.
function ml_webform_success_5807248() {
var r = ml_jQuery || jQuery
r('.ml-subscribe-form-5807248 .row-success').show(), r('.ml-subscribe-form-5807248 .row-form').hide()
}