


We prepared a step-by-step guide to help you get started in Mergado and learn how to manage your product campaigns on comparison shopping services. Everything you need to know to quickly become a Mergado professional. And here is the volume #1.

We prepared a step-by-step guide to help you get started in Mergado and learn how to manage your product campaigns on comparison shopping services. Everything you need to know to quickly become a Mergado professional. And here is the 1. volume.
How to register
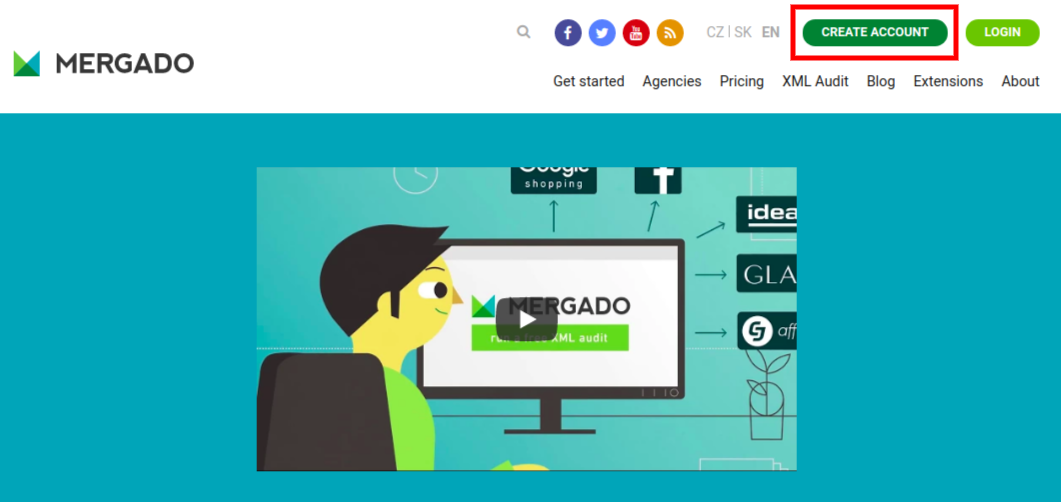
You can register right from the Mergado home page by clicking Create account (image 1) and filling out the registration form (image 2).
Make sure you fill out all the fields correctly. All the required information are important for Mergado to work properly and for you to receive invoices with correct billing details and in a correct mailbox.
Then choose a desired billing period (step 3). You can change this anytime in the future depending on your or your client’s needs.
Before submitting please don’t forget to read and agree with our Terms of use (step 4).
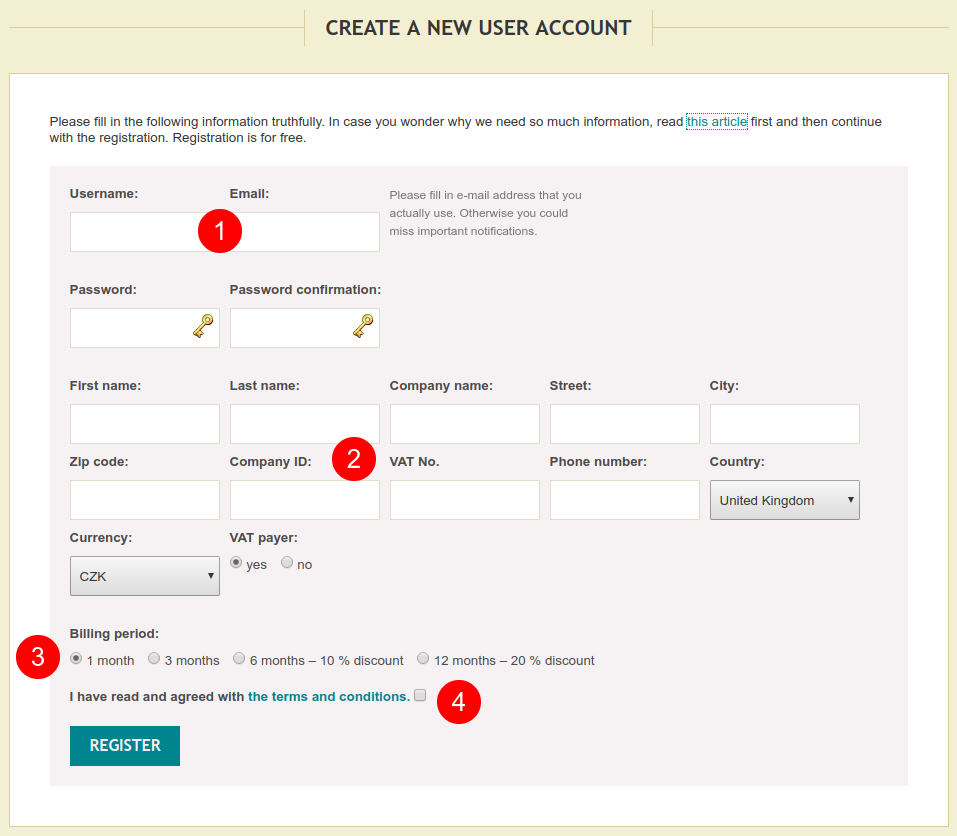
After submitting you will receive a confirmation email to complete your registration.
When you login you can create your first export and start managing your product campaigns.
It is important to say that creating an account is free and can be canceled anytime. You pay only after creating one or more exports. This is also when the 30 day free trial starts. The actual tariff depends on the total number of items in all your exports combined (see pricing for more information).
How to create a first export
To be able to start optimizing your advertising first you need to create an export. Login to your account and click Create export on the top right (image 3).

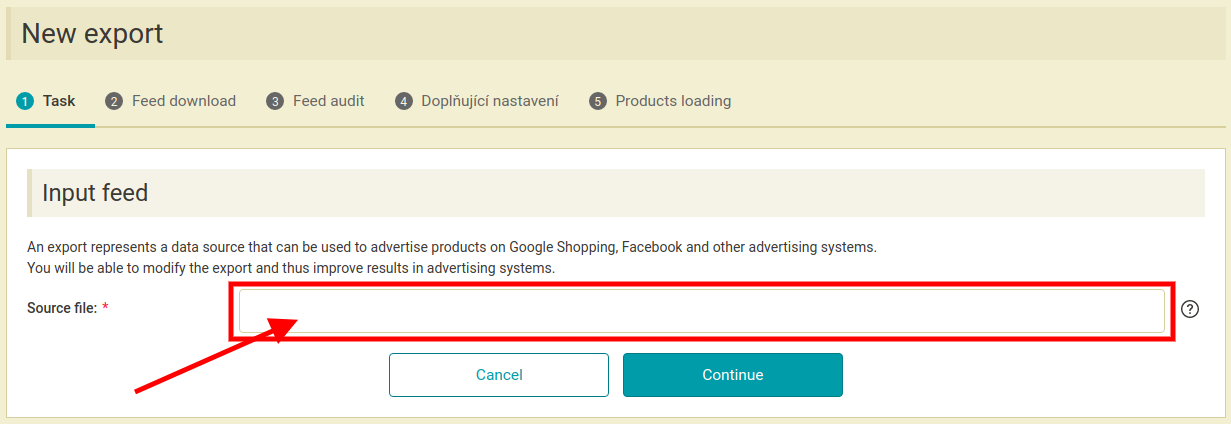
On the next page provide a URL address of your source xml feed (image 4). Mergado will regularly (every 4 – 8 hours) access this file to check for any updates in the feed (new products, price changes etc.). Click Continue and wait until Mergado processes the file (time depends on the number of items in the feed, usually few seconds).
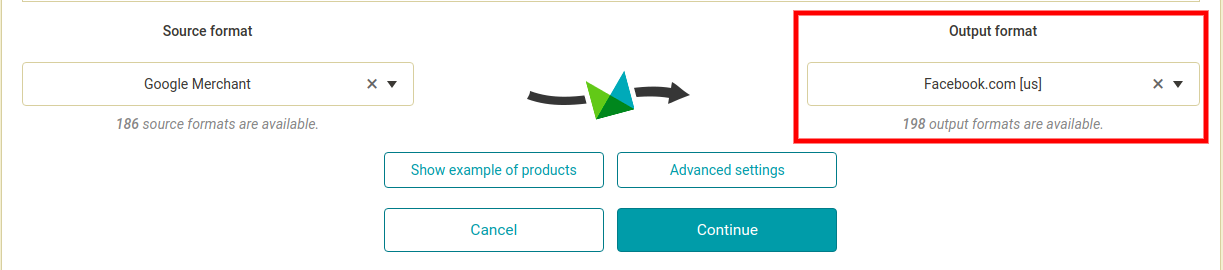
When finished click Continue again to get to additional settings (image 5). You can choose which export format you want to create (choose from the list on the right — output format). To finish click Continue.
Now you have created an export and you get to an export overview page. Here all your exports for different channels are listed. Note that from one source xml file you can create unlimited number of output exports. Just repeat the above procedure.
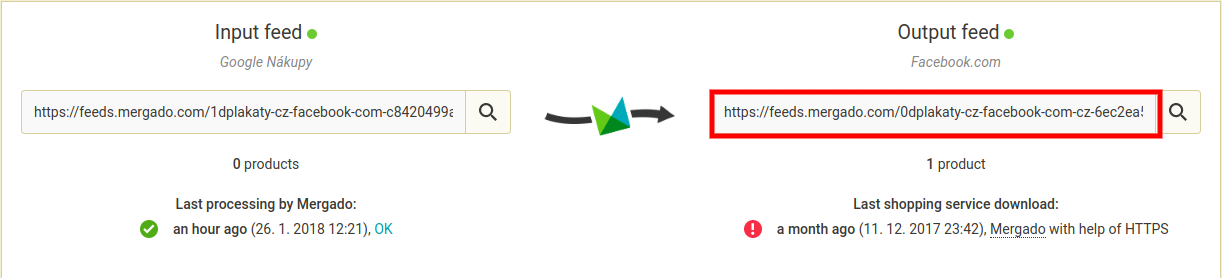
You can now proceed to editing the export feed by clicking the export name. Once you have finished editing and optimizing your product data, you want to copy and paste the URL address of the optimized output feed into a respective channel (e.g. facebook, google shopping, glami etc.). To find the URL address of the output XML, go to Summary page of export and scroll down to the bottom of the Summary page. There you can find both the source XML feed address as well as the output feed address (image 6). You can copy the link of the output feed and paste where needed.

Radim Zhoř
- He has several years of experience in e‑commerce.
- He works as a Business Development Specialist at Mergado, where he helps to market the Mergado product management tool.