


In this final episode of the “Get started with Mergado” series, learn how to make bulk edits of your XML feed with Mergado or how to activate apps in Mergado Store.
In this final episode of the “Get started with Mergado” series, learn how to make bulk edits of your XML feed with Mergado or how to activate apps in Mergado Store.

In Mergado, rules allow applying bulk changes to products. They can be applied either to all products in your feed, or to a saved query of products. This allows you to first filter those products that you wish to edit, then create a rule and apply it to that product query.
How to create a rule
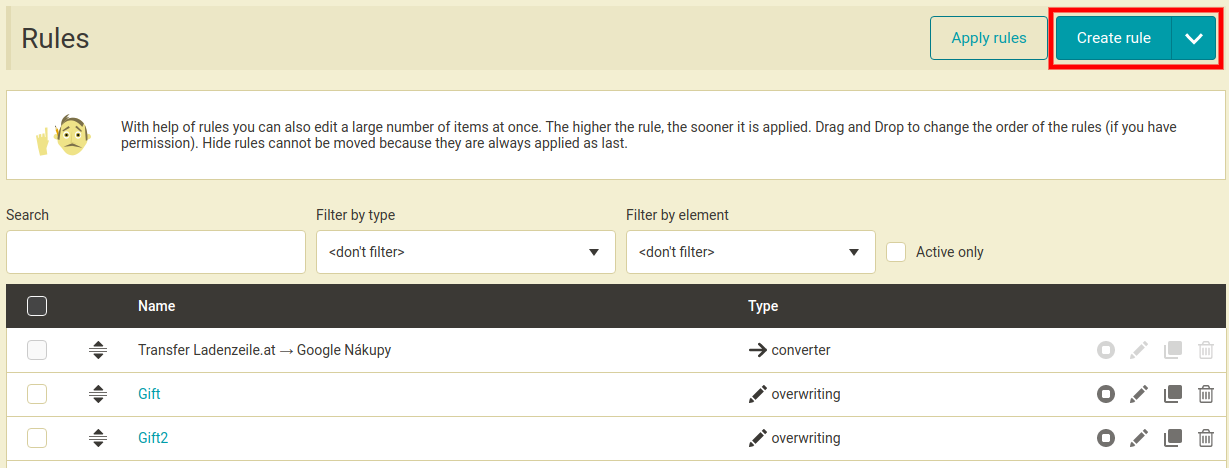
Rules can be created on the Rules page by clicking Create rule on the top right (image 15).
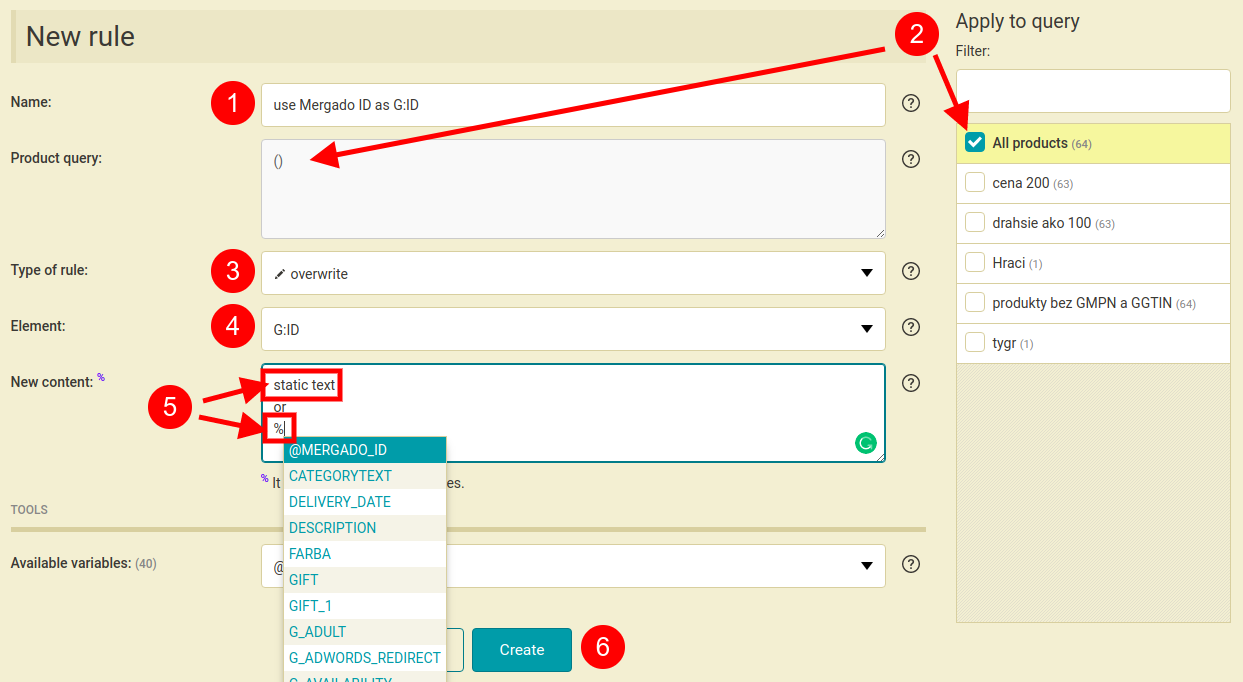
On the New rule page (image 16), first name your new rule (step 1), choose a query which you want the rule to be applied to (step 2), choose a desired rule type (step 3), choose which element (attribute) will be changed by the rule (step 4), and enter a new value for that element (step 5). The value can be either a static text (i.e. the given element in all products of the selected query will have the same value) or a variable value (e.g. a value from a different element). To do that, type the “%” sign and Mergado will offer you a list of available elements. To finish, click Create (step 6)
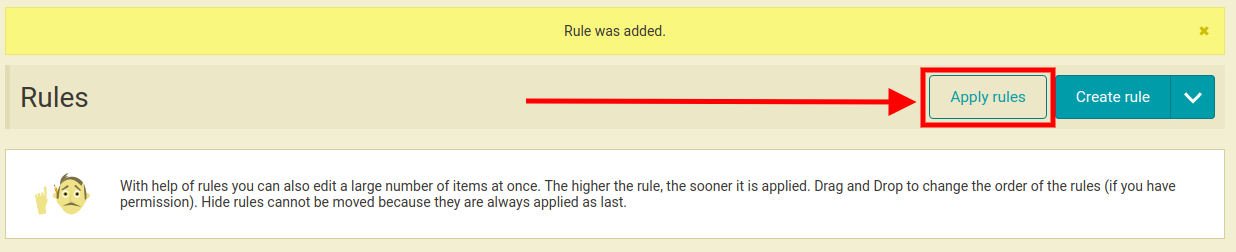
Important! To confirm and implement the changes, you need to click Apply rules (image 17).
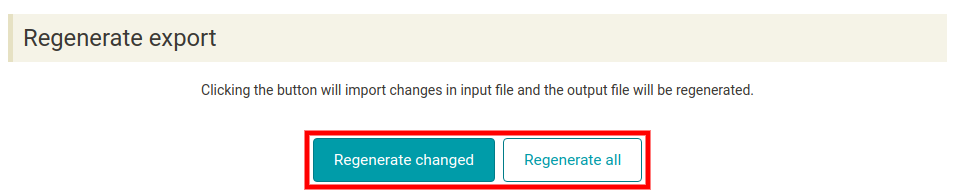
So now you have your changes implemented in the output feed. They will reflect in your product campaign after an automatic synchronization with a respective comparison shopping service. However, you are able to force an immediate synchronization manually. Just go to export Settings and click Regenerate export (image 18).
Working with Mergado apps
Mergado apps expand the possibilities and reach of Mergado itself. With their help, you can easily manage bidding or edit product images in your campaigns. All apps can be found in Mergado store. A link to Mergado Store can be found in the main menu when you log in to your Mergado account (image 19).

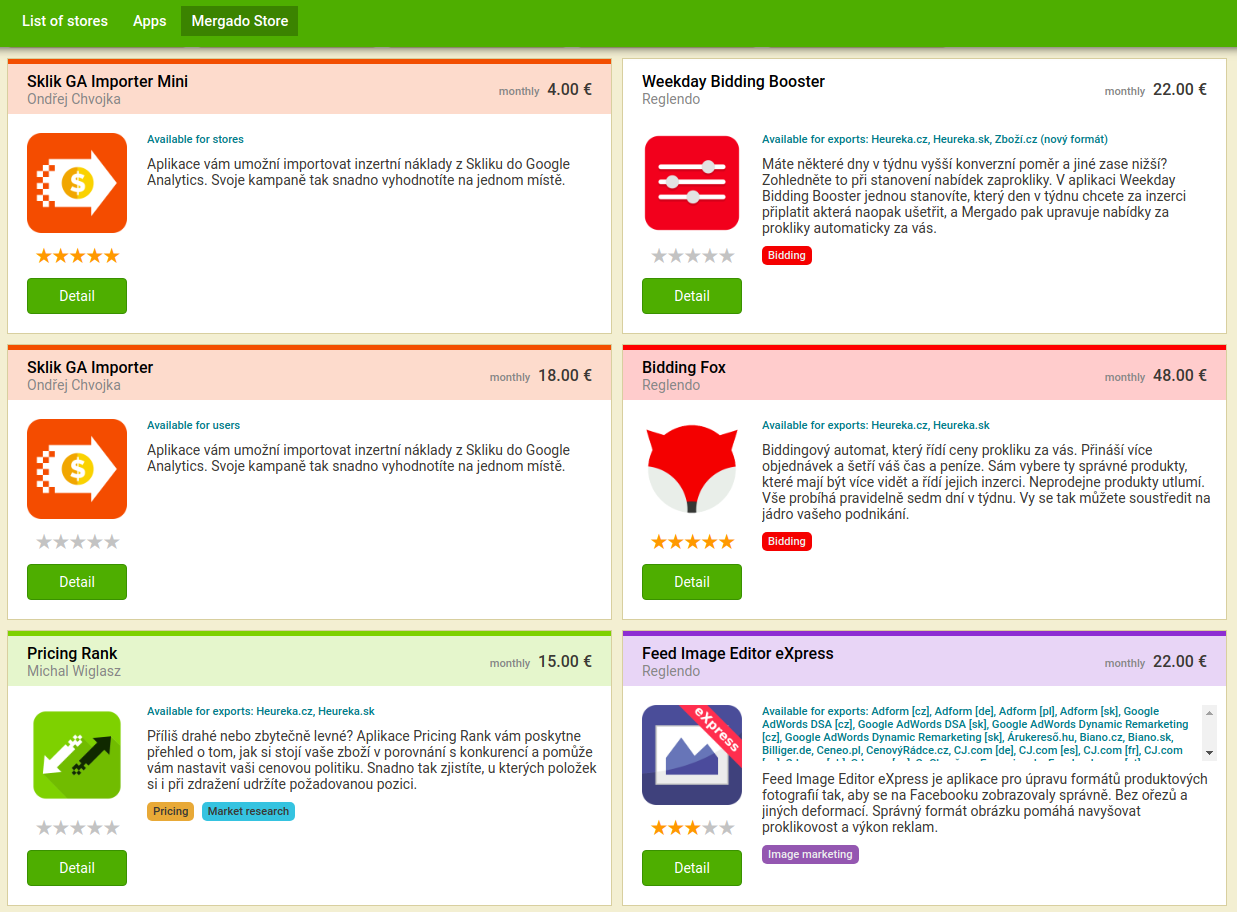
The link navigates you to Mergado Store page with a list of available apps and their basic information (image 20).
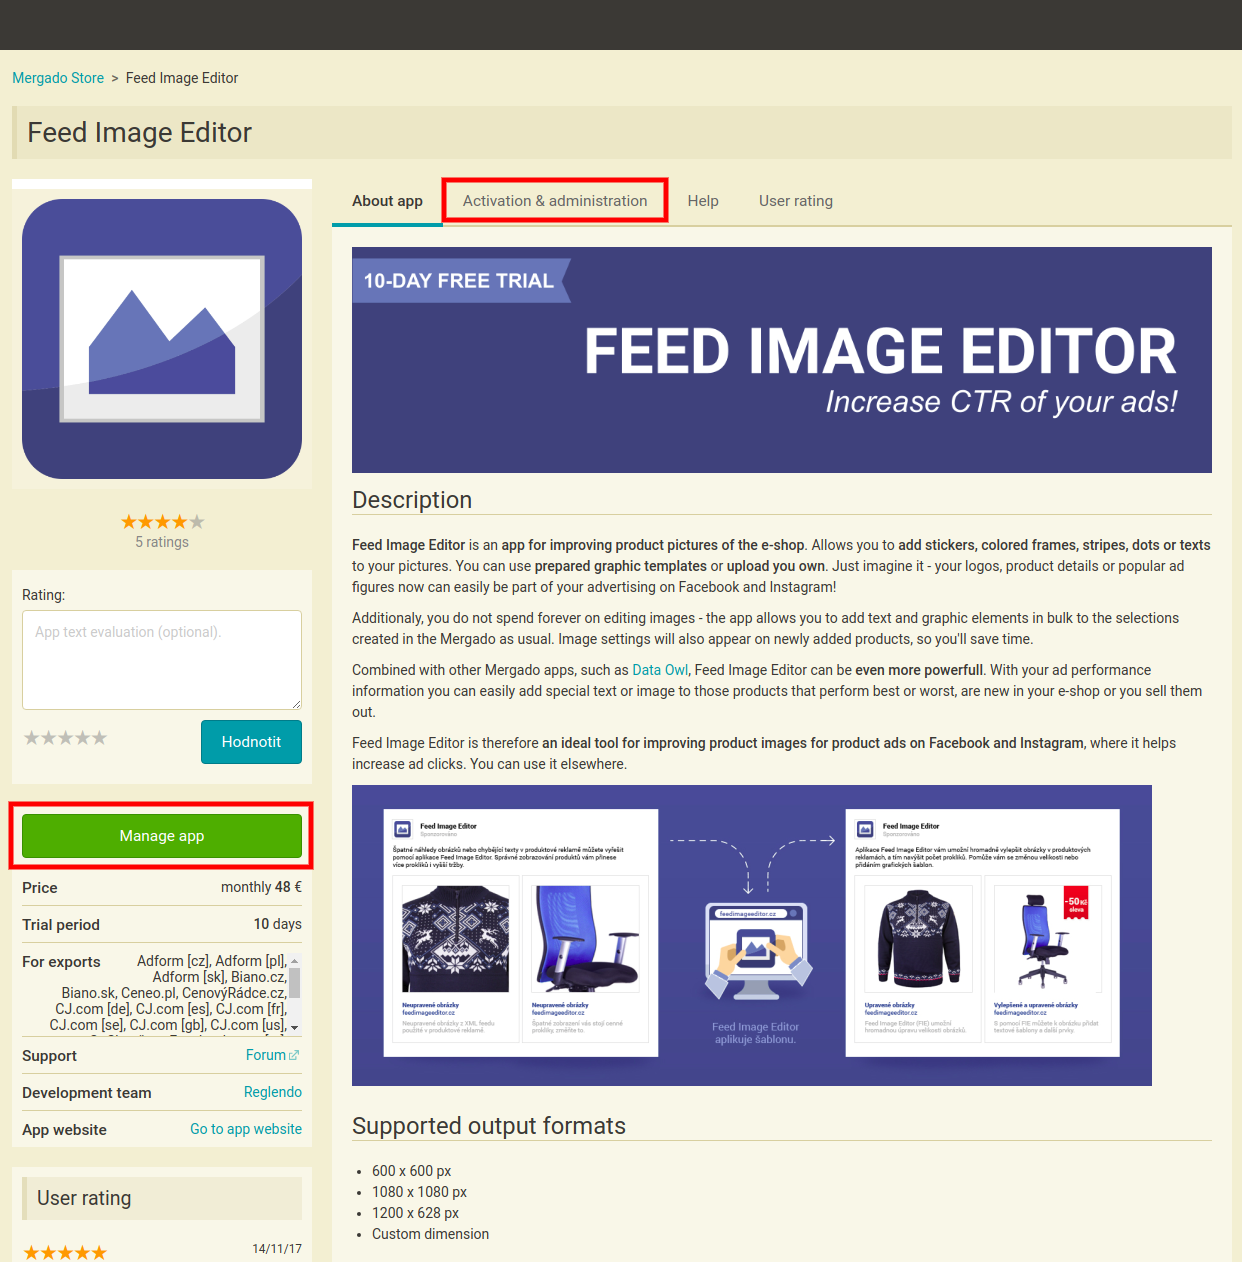
You can click on any app to see a more detailed description (image 21). Here you can learn what the app can do, it’s price and trial period etc. To activate it, use the green “Manage app” button, or the “Activation & administration” link in the app menu.
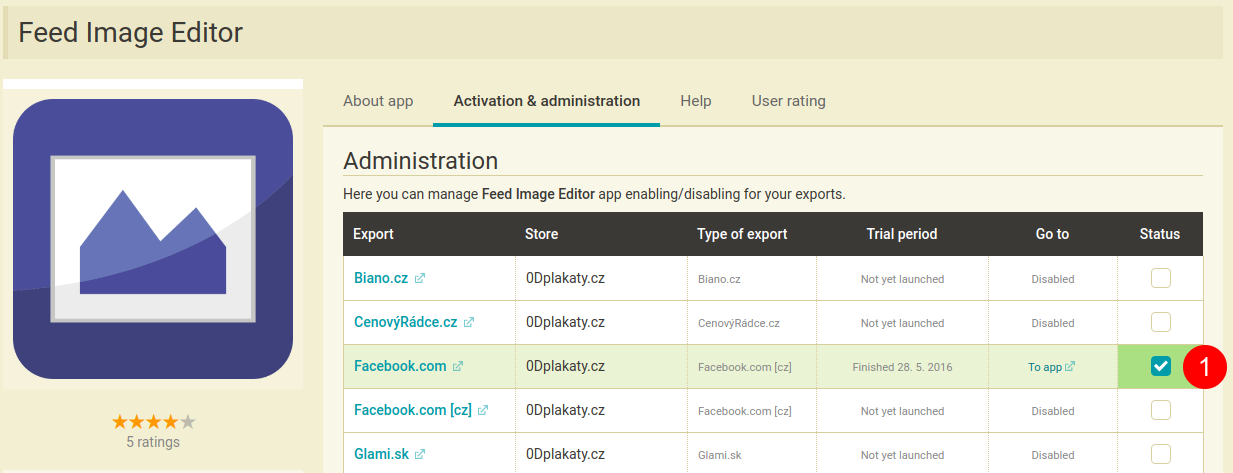
On the app administration page, you can choose for which export you want to activate the app. To activate, mark the checkbox on the right and click Save changes below (image 22).
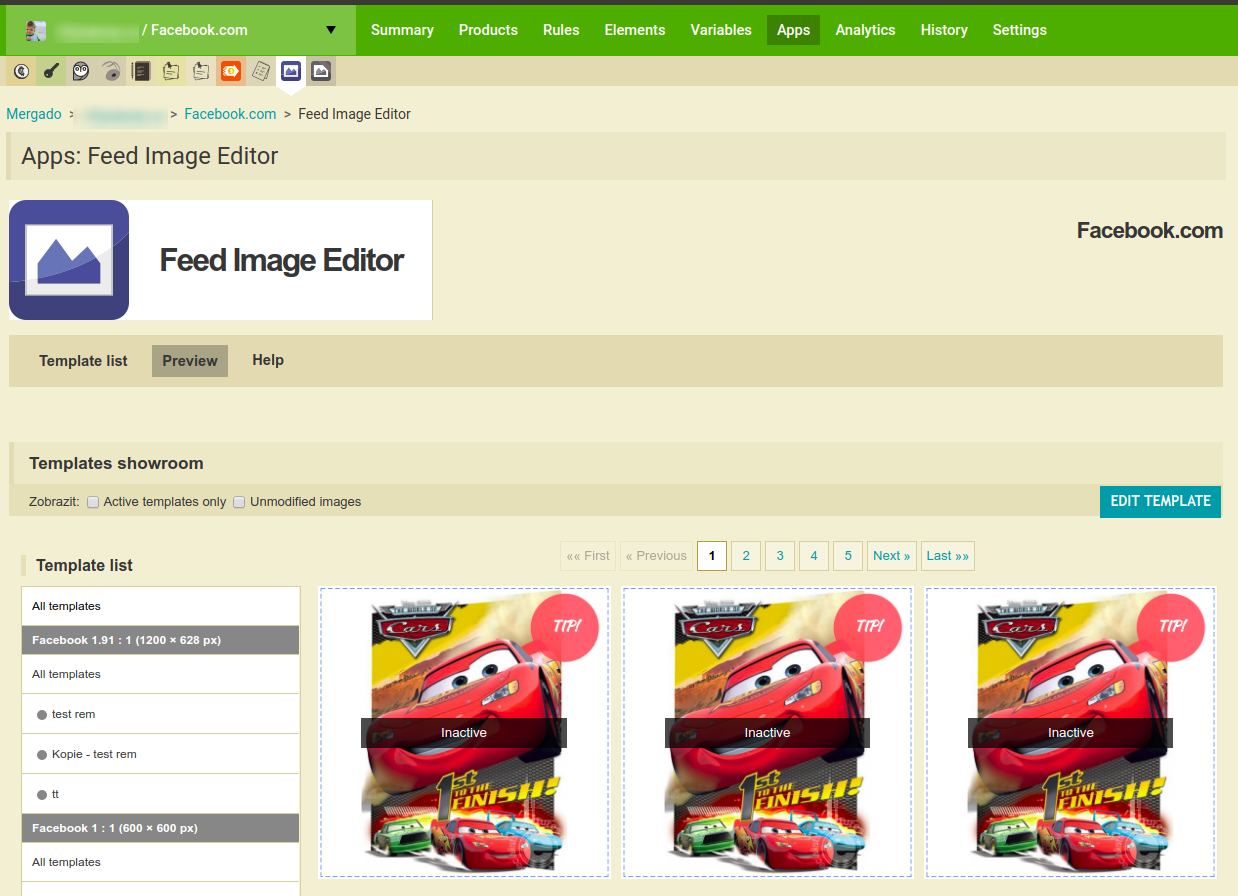
Now to start working with the app, go to your export Summary page. Here you can see the activated app icon below the main menu as well as mini info-box in the active apps section (image 23).
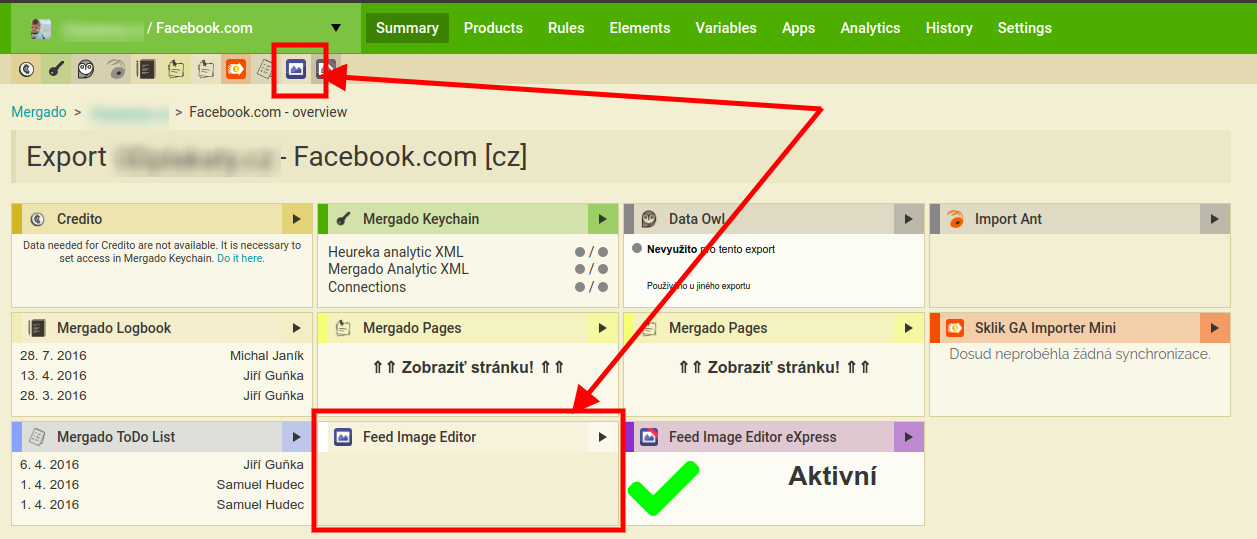
Clicking any of the above links will navigate you to the actual app page, where you can start working with the app (image 24).
If you need help with anything feel free to contact us at mergado@mergado.com.

Radim Zhoř
- He has several years of experience in e‑commerce.
- He works as a Business Development Specialist at Mergado, where he helps to market the Mergado product management tool.