1. Introduction
1.1 What we did
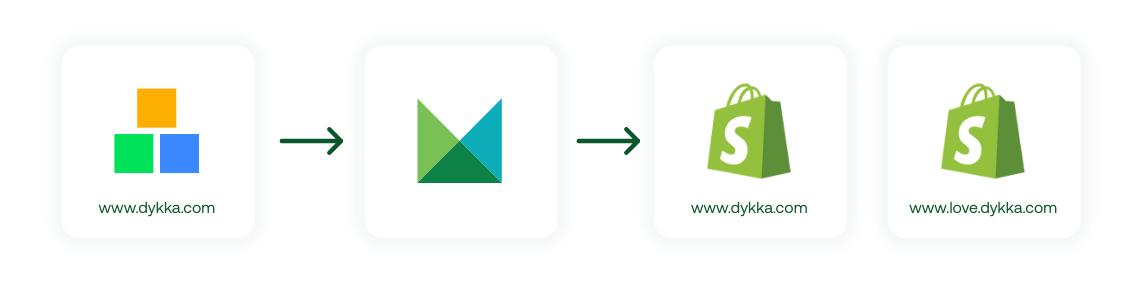
For our client dykka.com, we carried out a complete migration from the Shoptet platform to Shopify – in fact, into two separate versions: dykka.com and love.dykka.com (18+).
The main reason for splitting the online store was the advertising possibilities for different product types. While adult toys cannot be promoted via Google Ads, lingerie can. That’s why we decided to create a separate store for products that can be actively advertised.
Shoptet also has limitations when it comes to entering foreign markets easily. Shopify, as a global e‑commerce platform, solves this problem – it allows flexible expansion and offers a wider range of localization and payment options.
For a successful migration, we used Mergado, a data editor that allowed us to bulk optimize and transform product data for smooth import into Shopify. We also took advantage of several Mergado extensions, which we’ll describe in more detail in later sections of this case study.
1.2 What we achieved
We managed to complete the project in a relatively short timeframe, even though this was “uncharted territory” for our team. A key success was migrating almost all the content the client had on the site – from products and categories to reviews.
2. Before migration
2.1 Tools we used
For the migration, we combined several tools that allowed us to efficiently prepare, adjust, and upload all the necessary data.
Tools used:
- Mergado – for editing and exporting product feeds
- Mergado extension: Shopify Importer – importing data into Shopify via API and partial data adjustments
- Mergado extension: Scraping Camel – scraping the original website and retrieving data that could not be exported in a standard way
- Shopify – the target e‑commerce platform
- Shopify custom app: Mergado – connecting Mergado with Shopify
- Shopify app: Judge.me – importing product and shop reviews
- Shoptet – the source platform (original store)
- Google Sheets – for quick data edits and adding missing values
- Online image editing tools – e.g., for changing image resolutions
How we activated the tools:
- Mergado extensions (Shopify Importer, Scraping Camel) – activated easily via store.mergado.com
- Shopify app: Judge.me – activated in the Apps section in Shopify admin
Shopify custom app: Mergado – instructions are available on the Mergado forum
For correct functionality, the app needs these permissions:
3. Migration process
3.1 Products
3.1.1 What we need
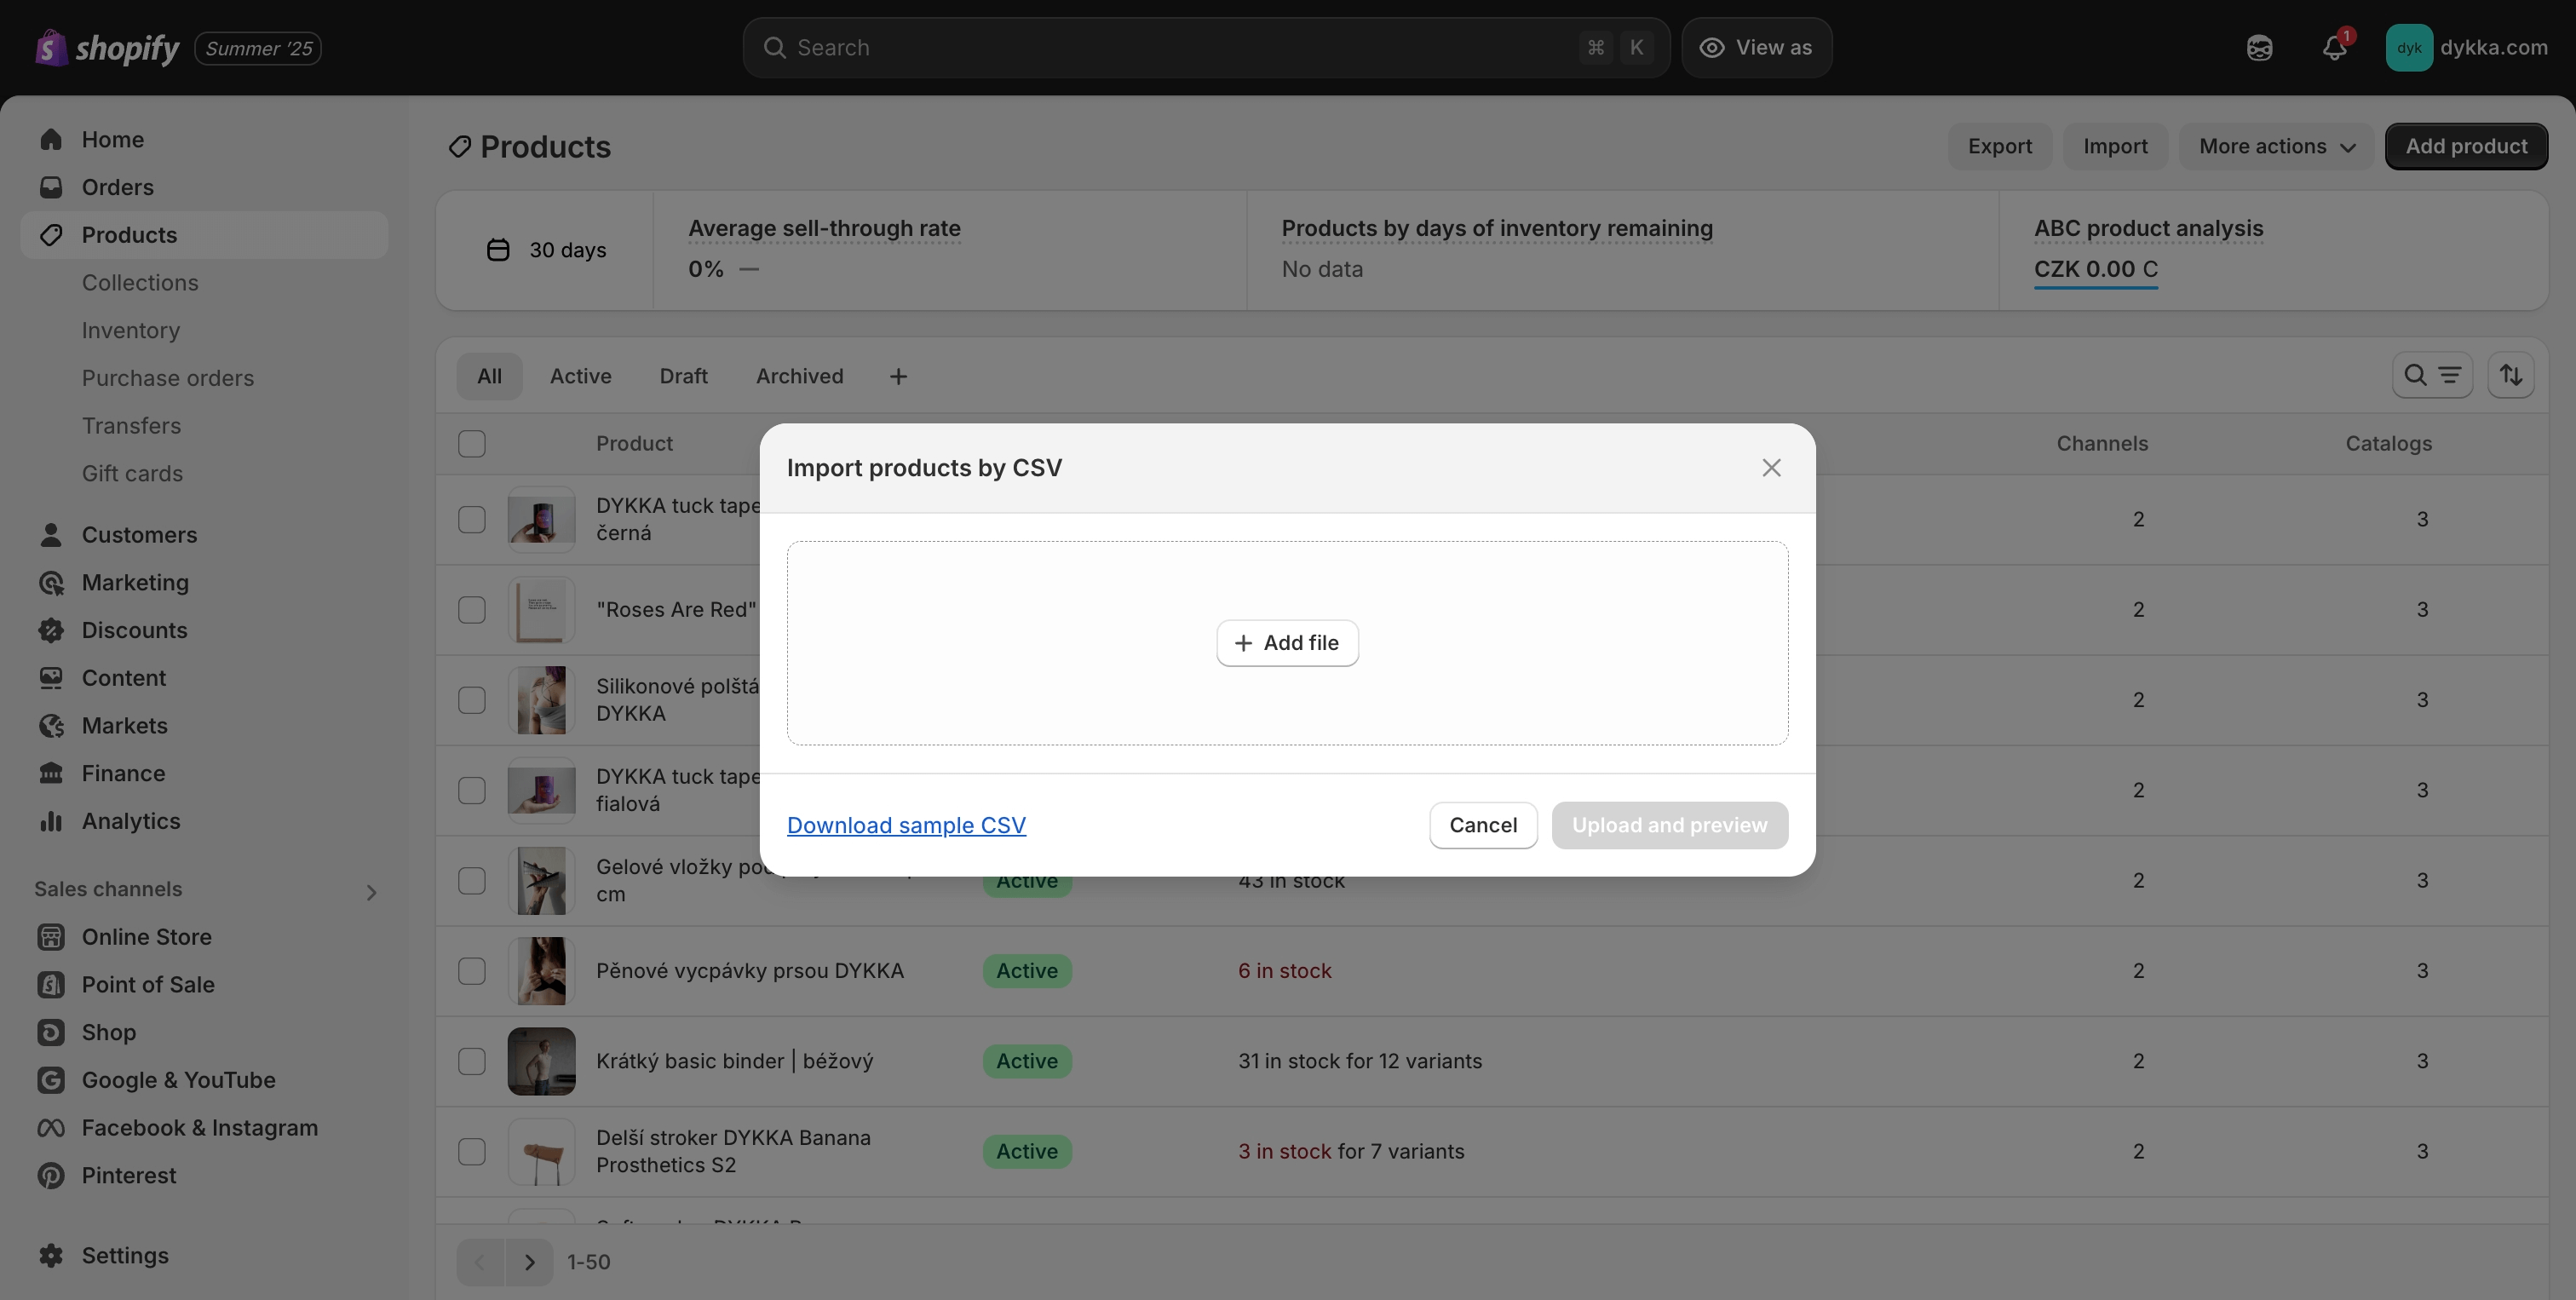
Shoptet allows exporting product data in XML format via a feed URL, while Shopify requires importing products from a CSV file in Shopify CSV format. To convert from Shoptet Complete XML to Shopify CSV, we used Mergado, which can transform and prepare data for import.
For this process, you need:
- Mergado account – to process the data (converter)
- Access to Shoptet admin – to export data
- Access to Shopify admin – to import data
- Custom Shopify app: Mergado – to connect Mergado with Shopify
3.1.2 Step-by-step
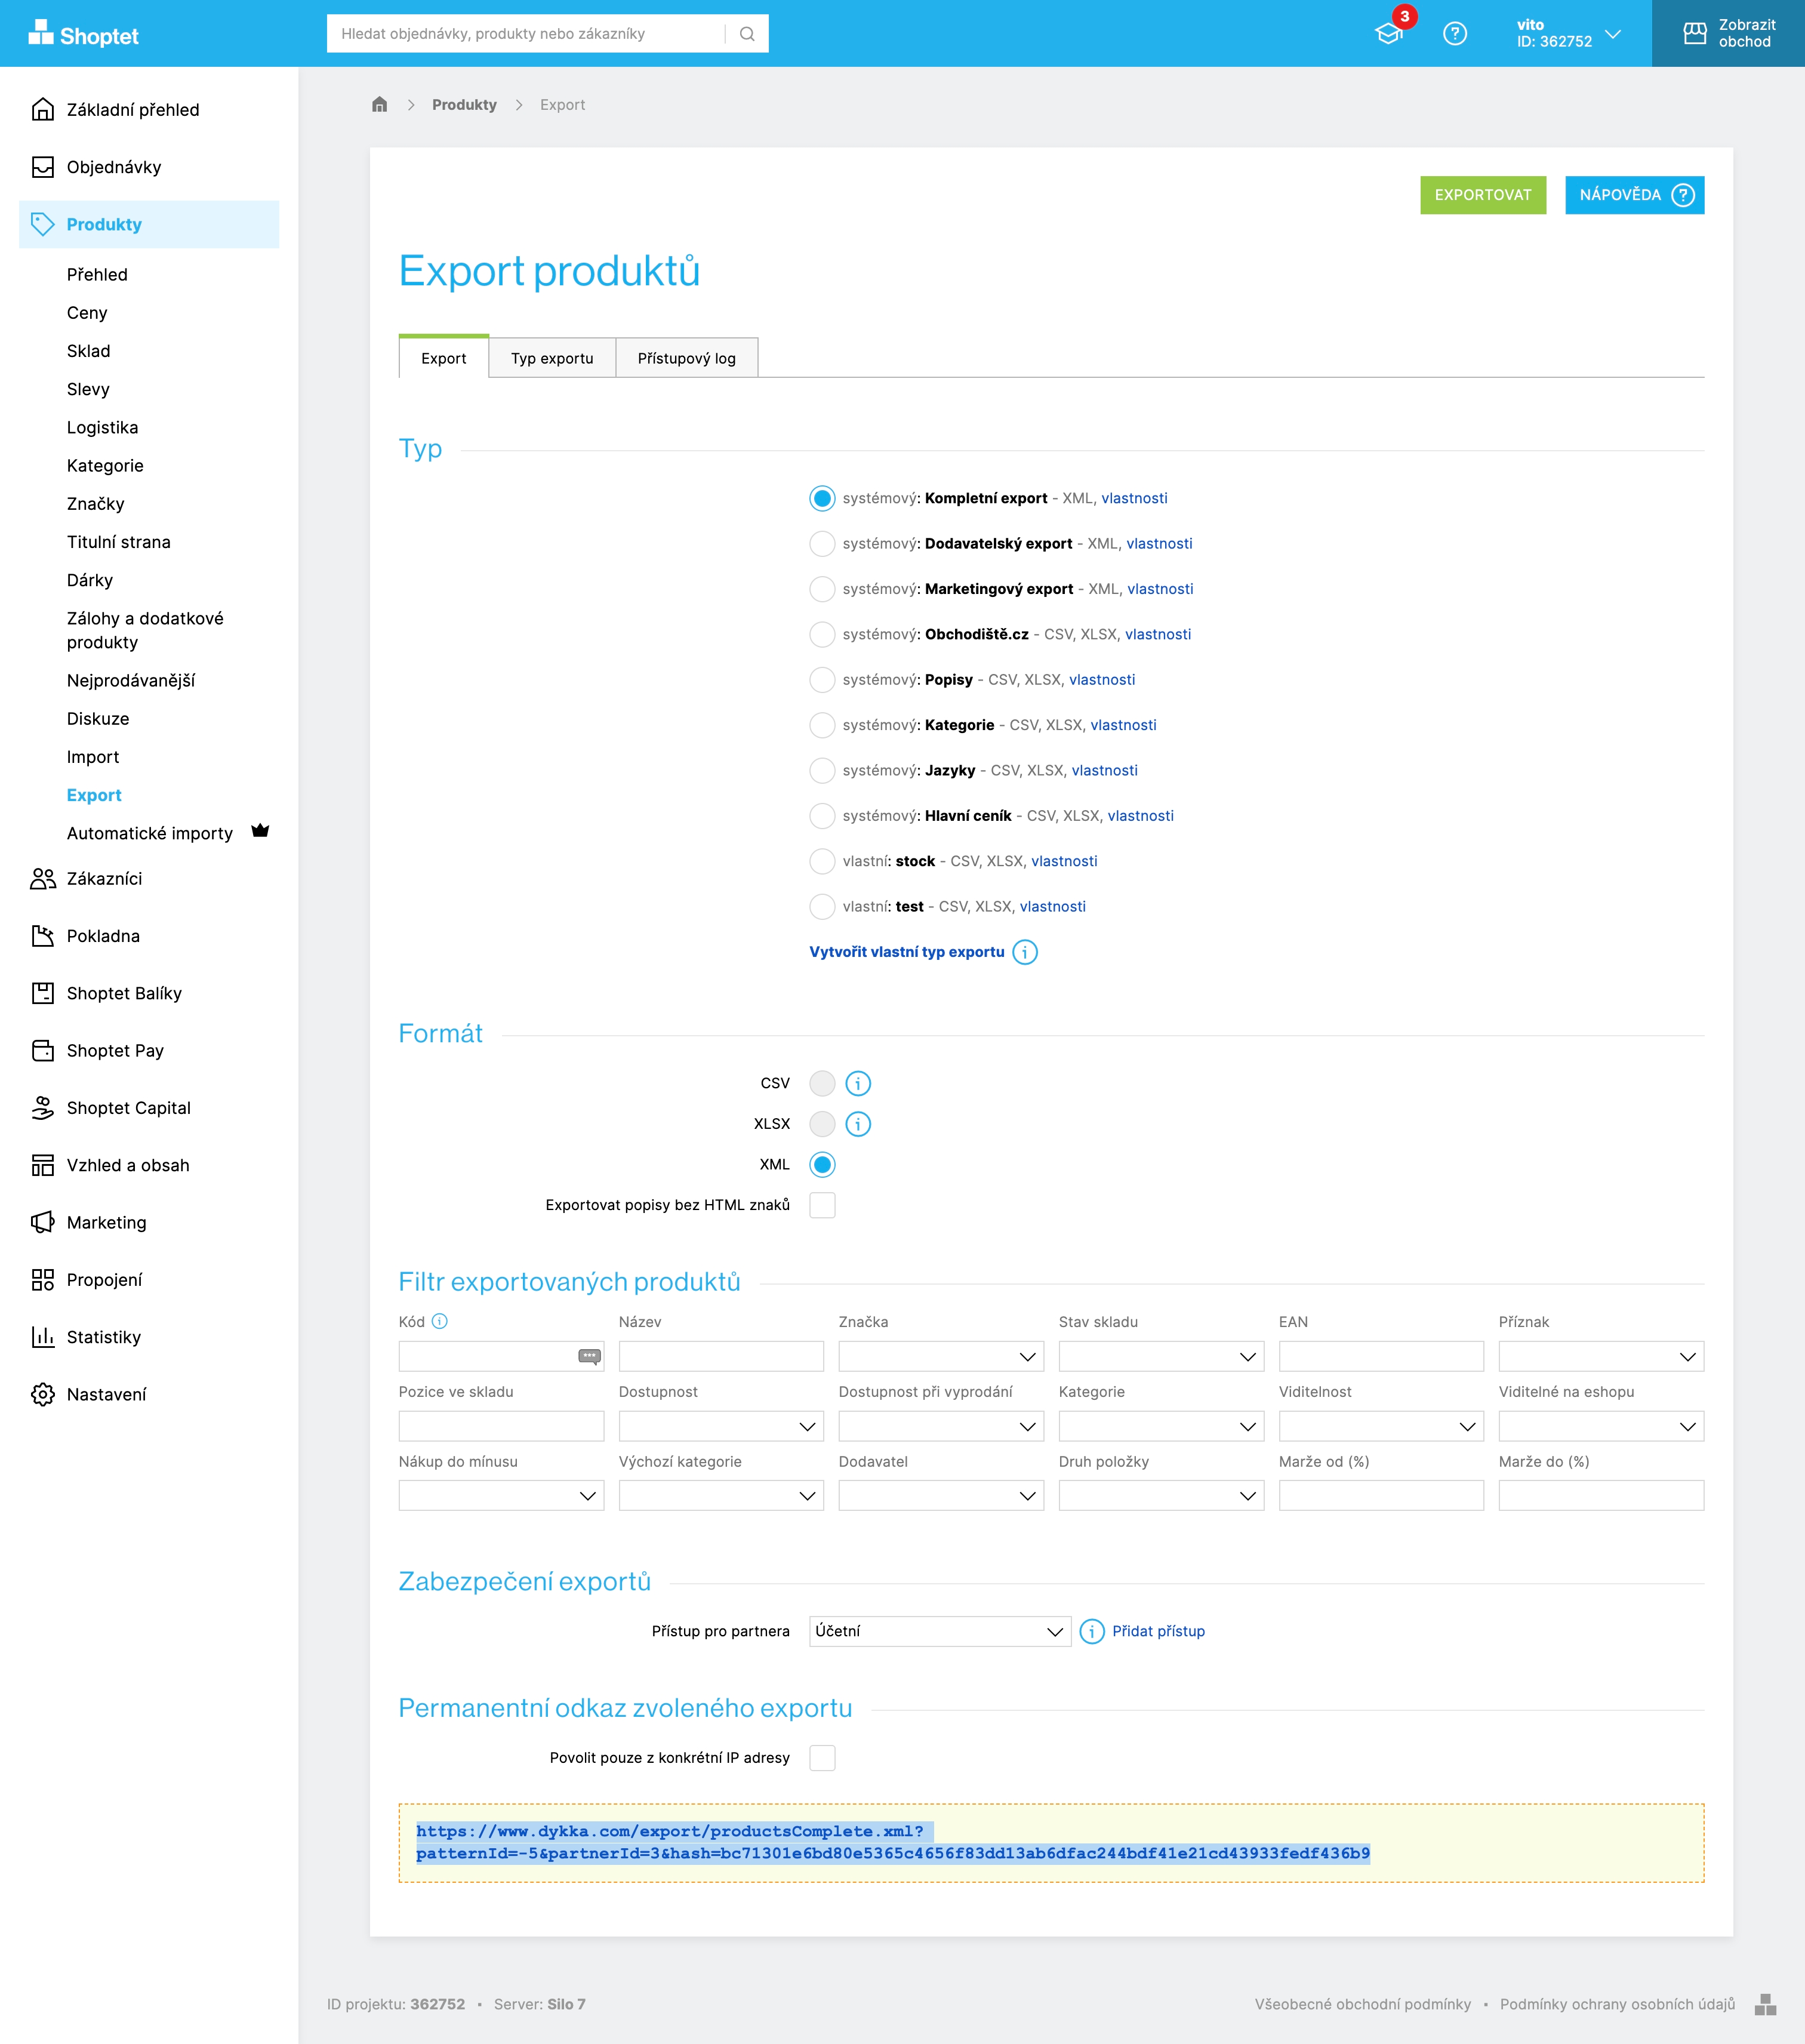
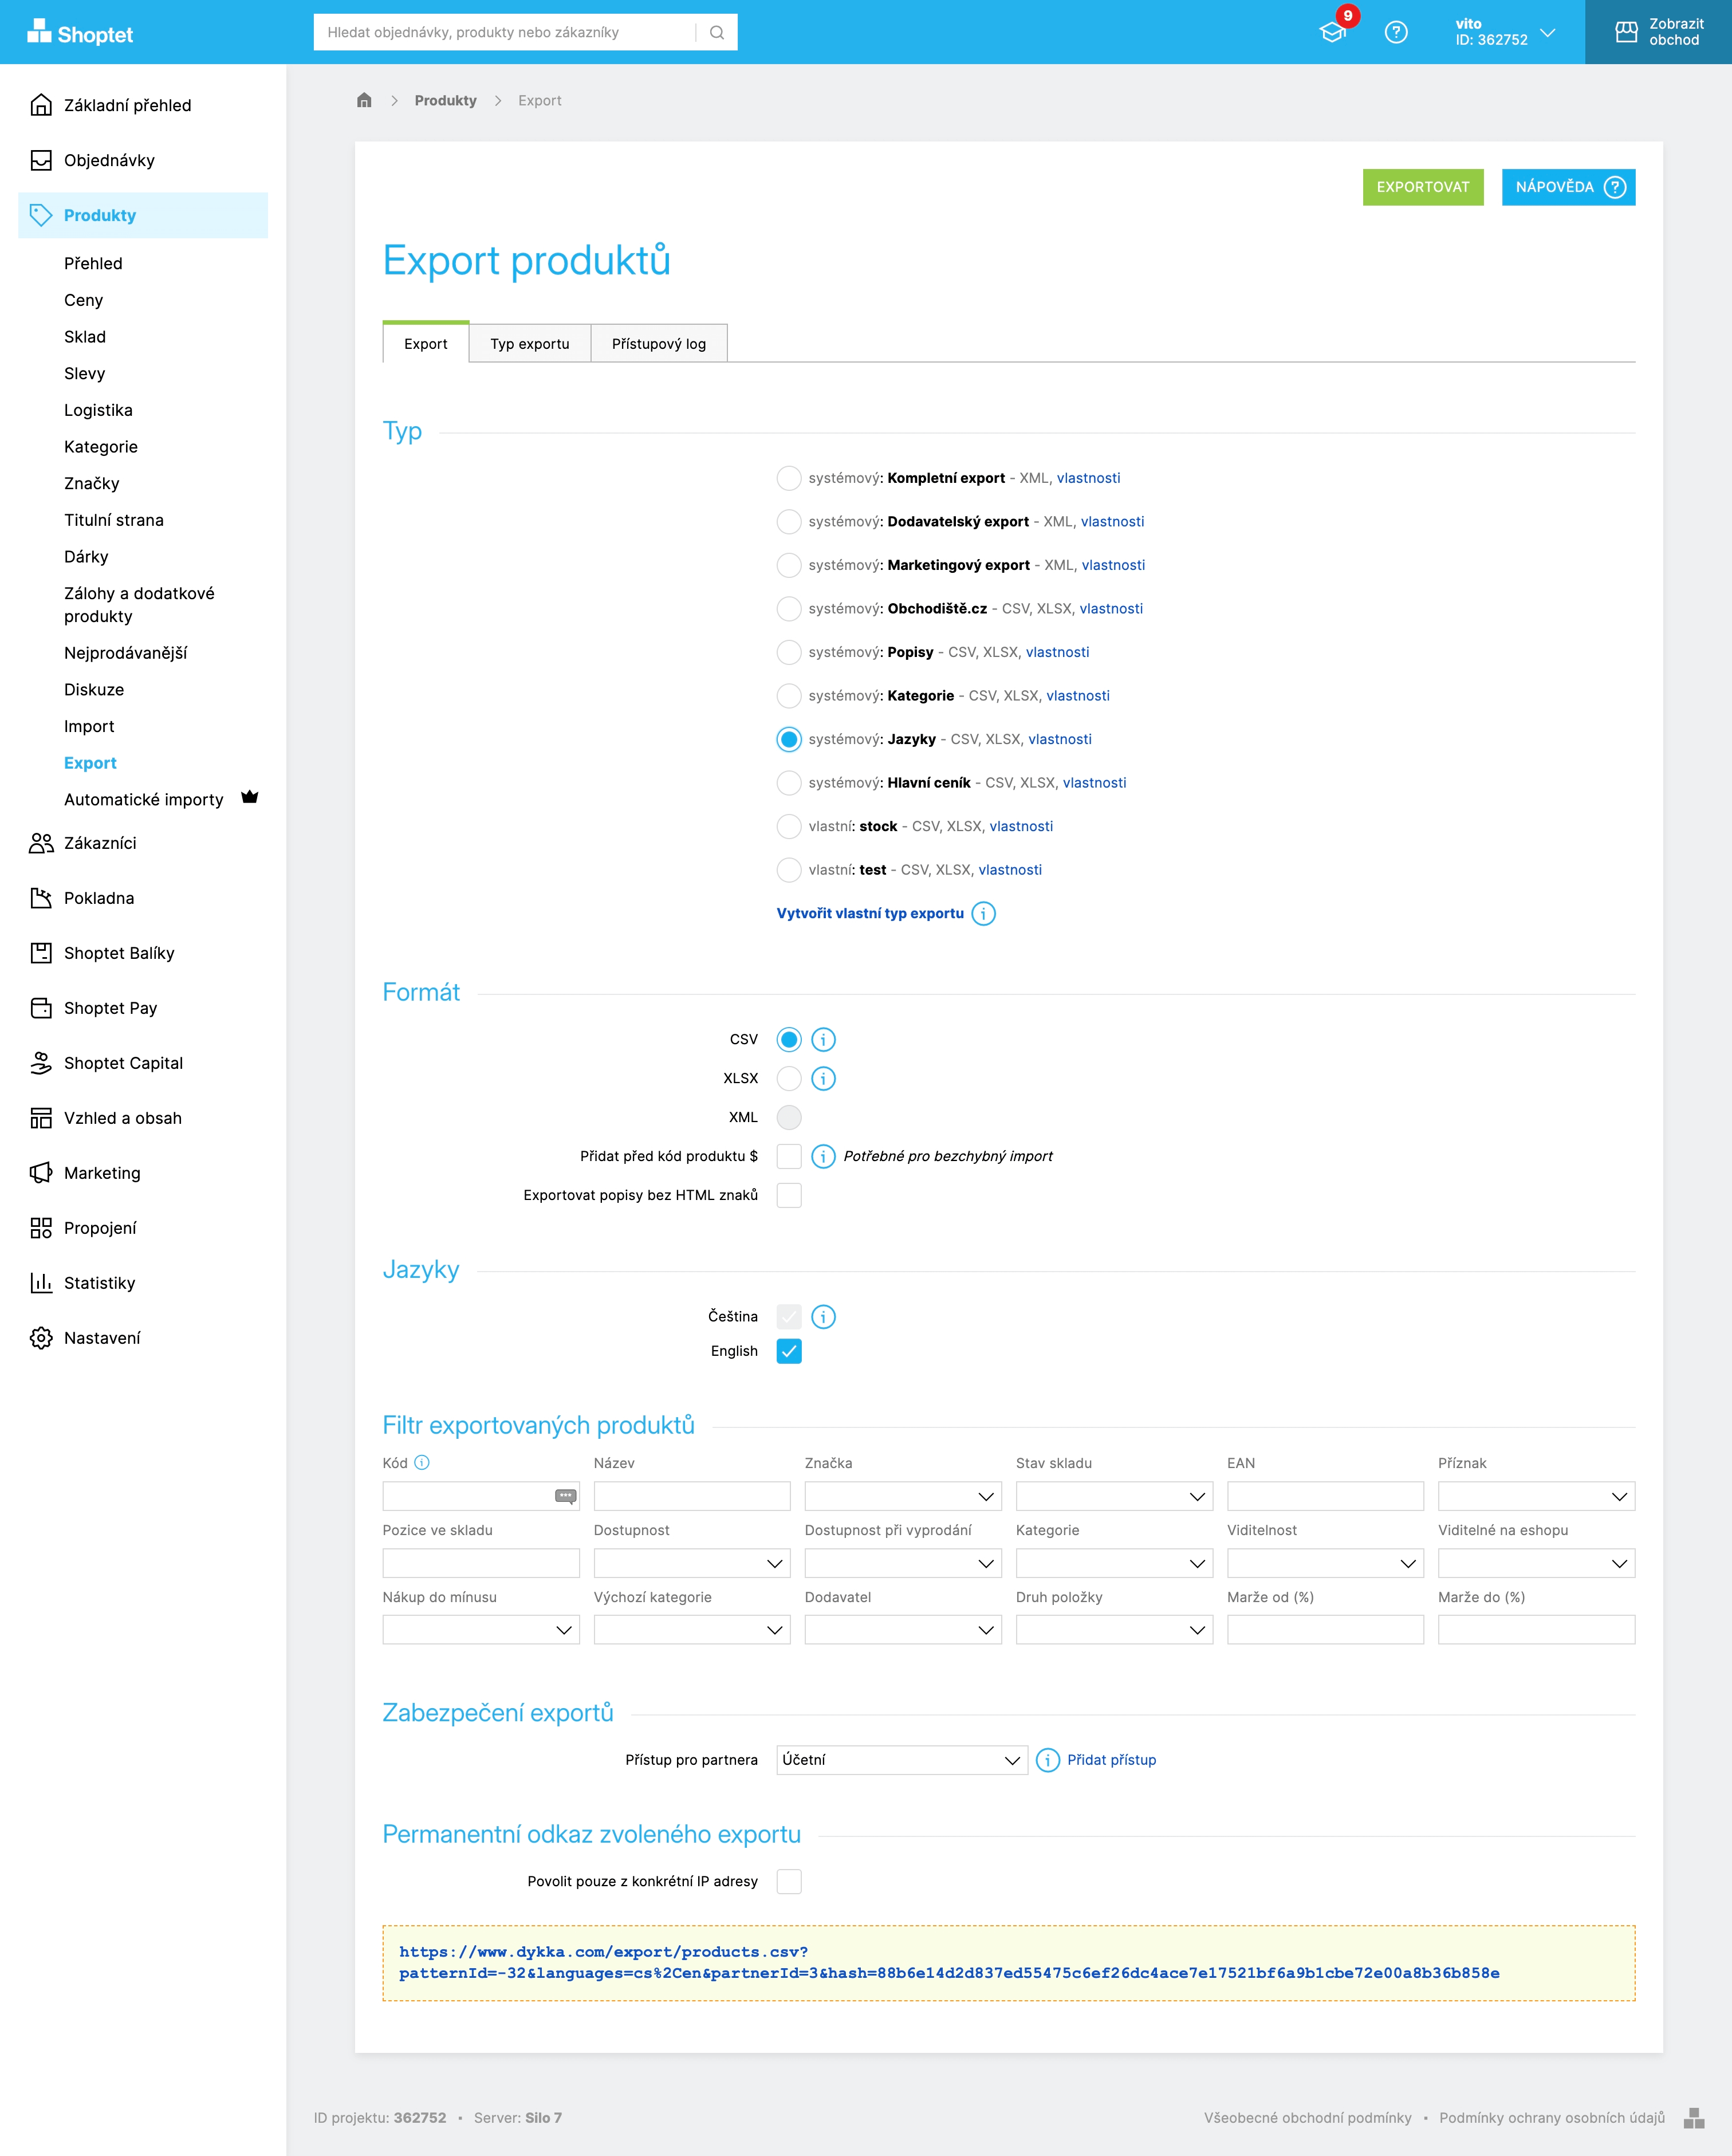
Shoptet
- In Shoptet admin, go to Products → Export.
- Select the system format Complete XML Export.
- Copy the feed URL (bottom of the page).
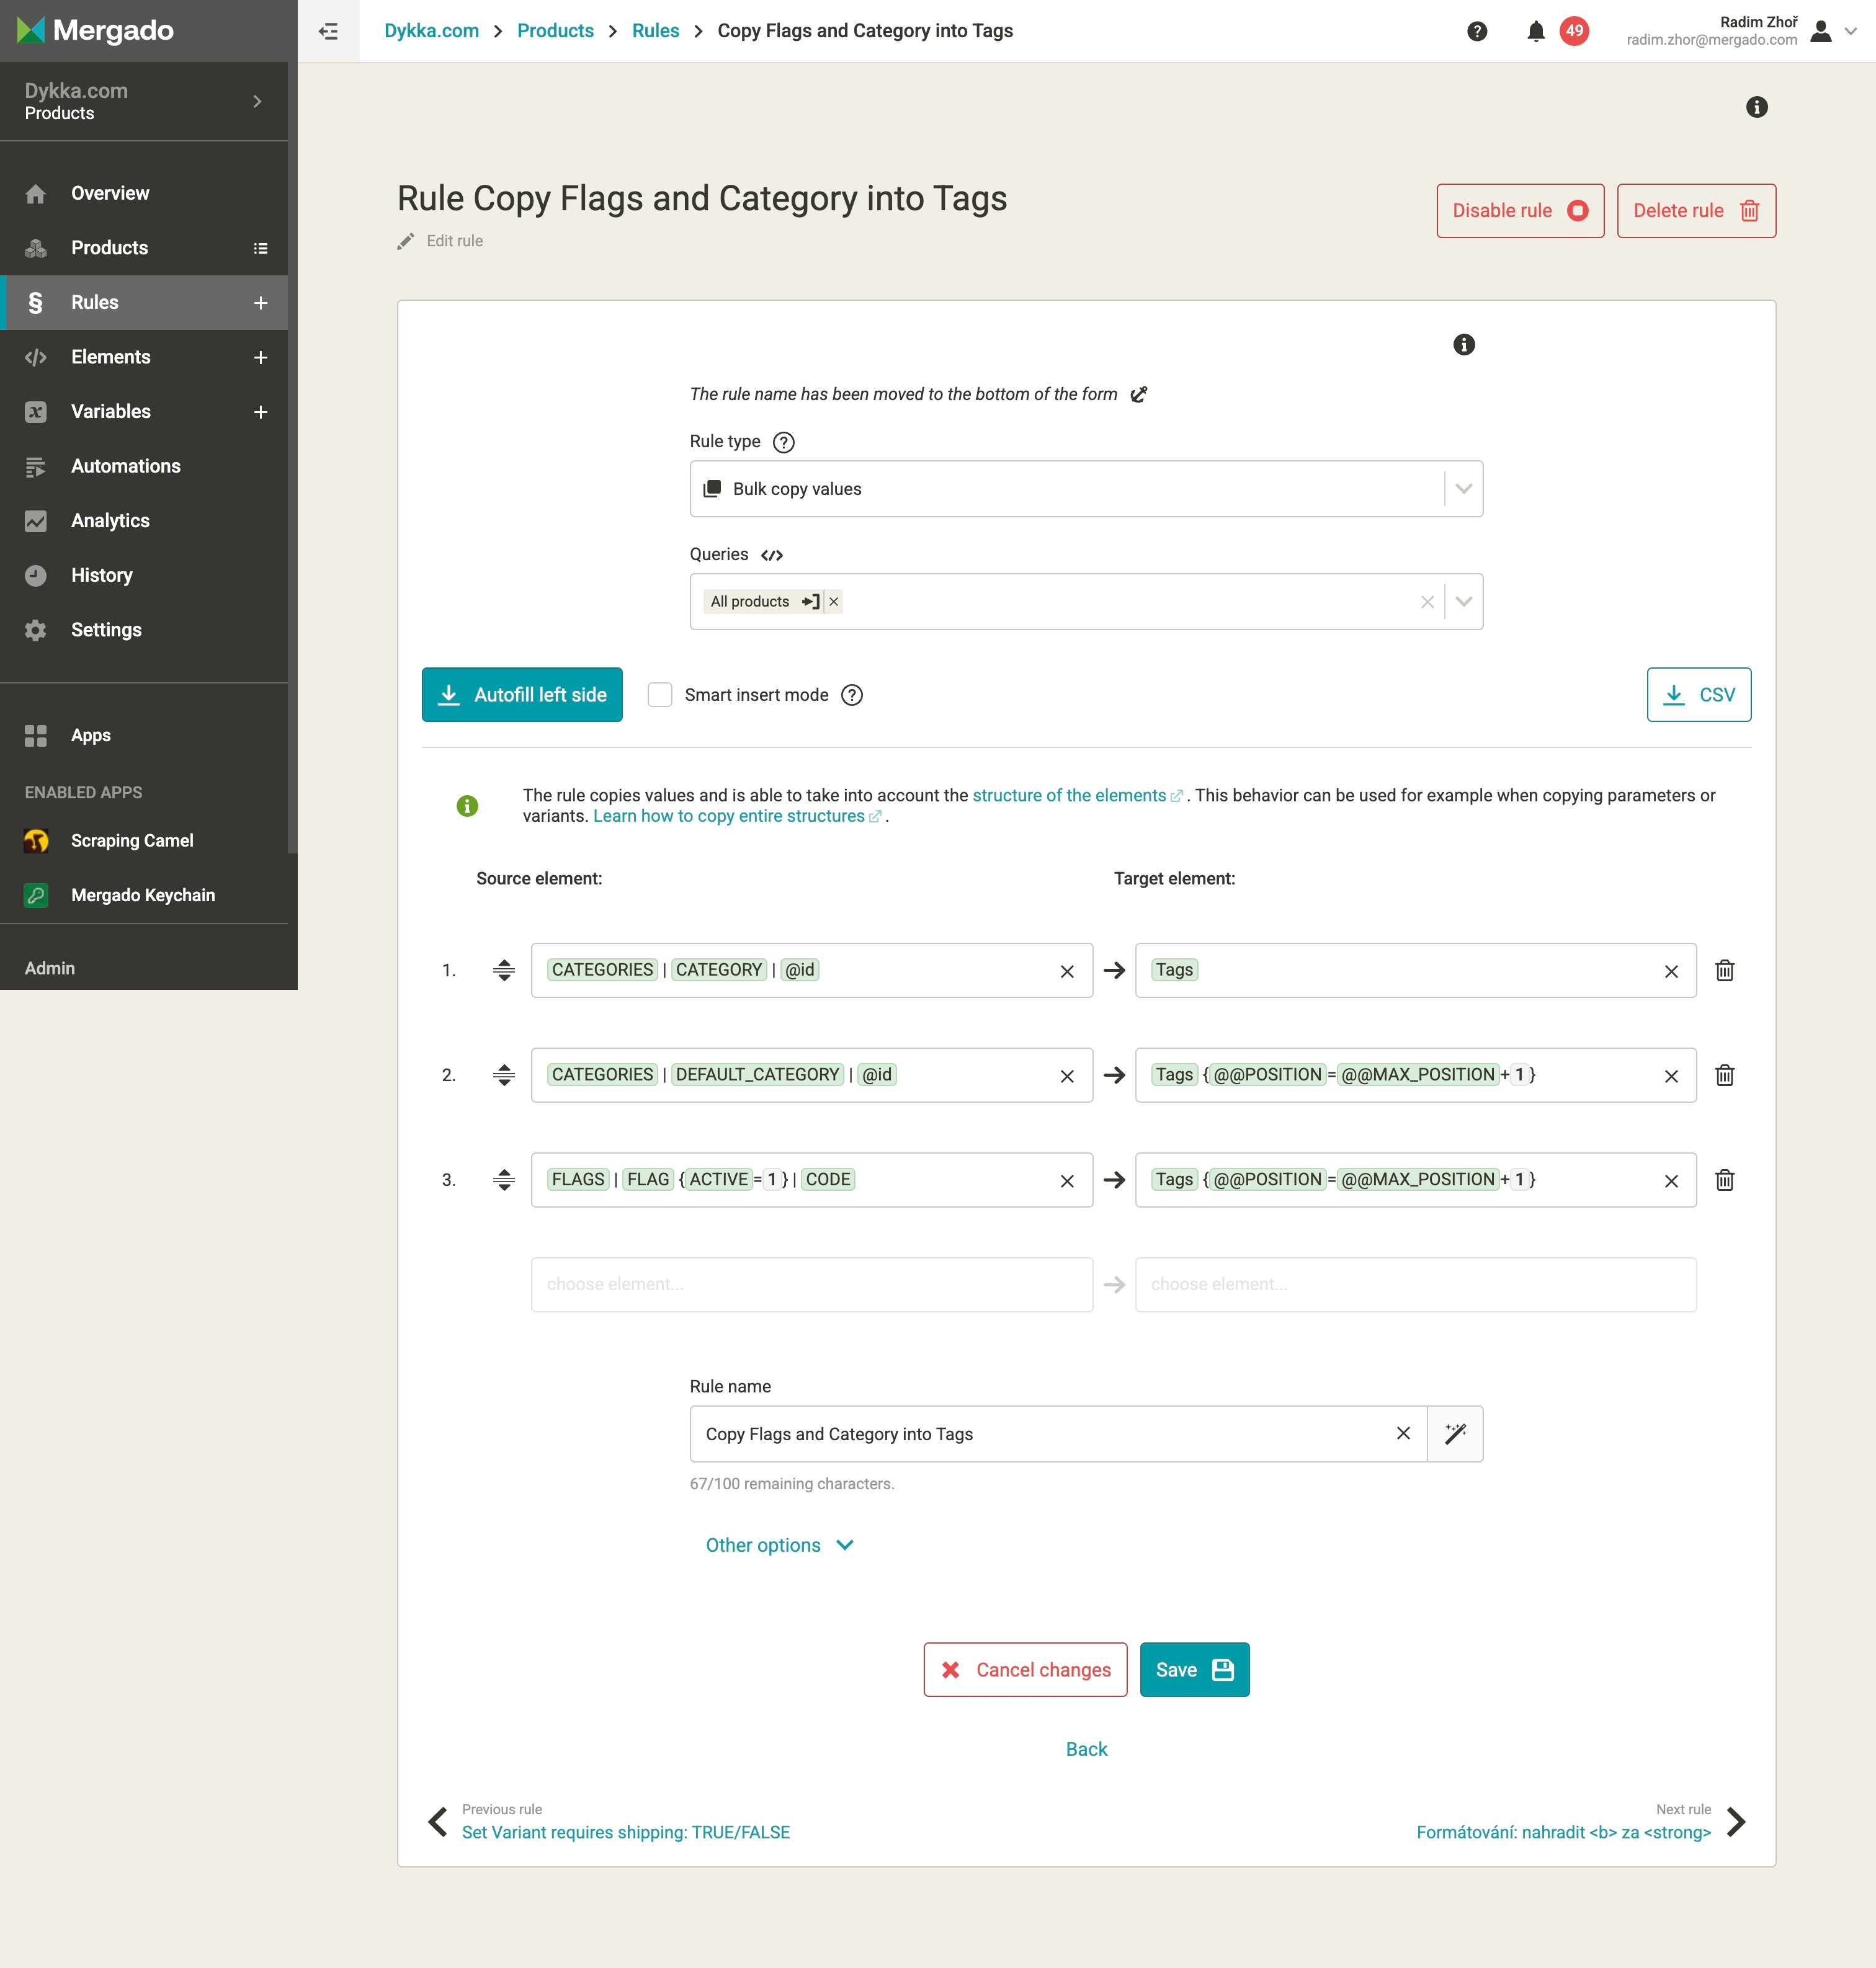
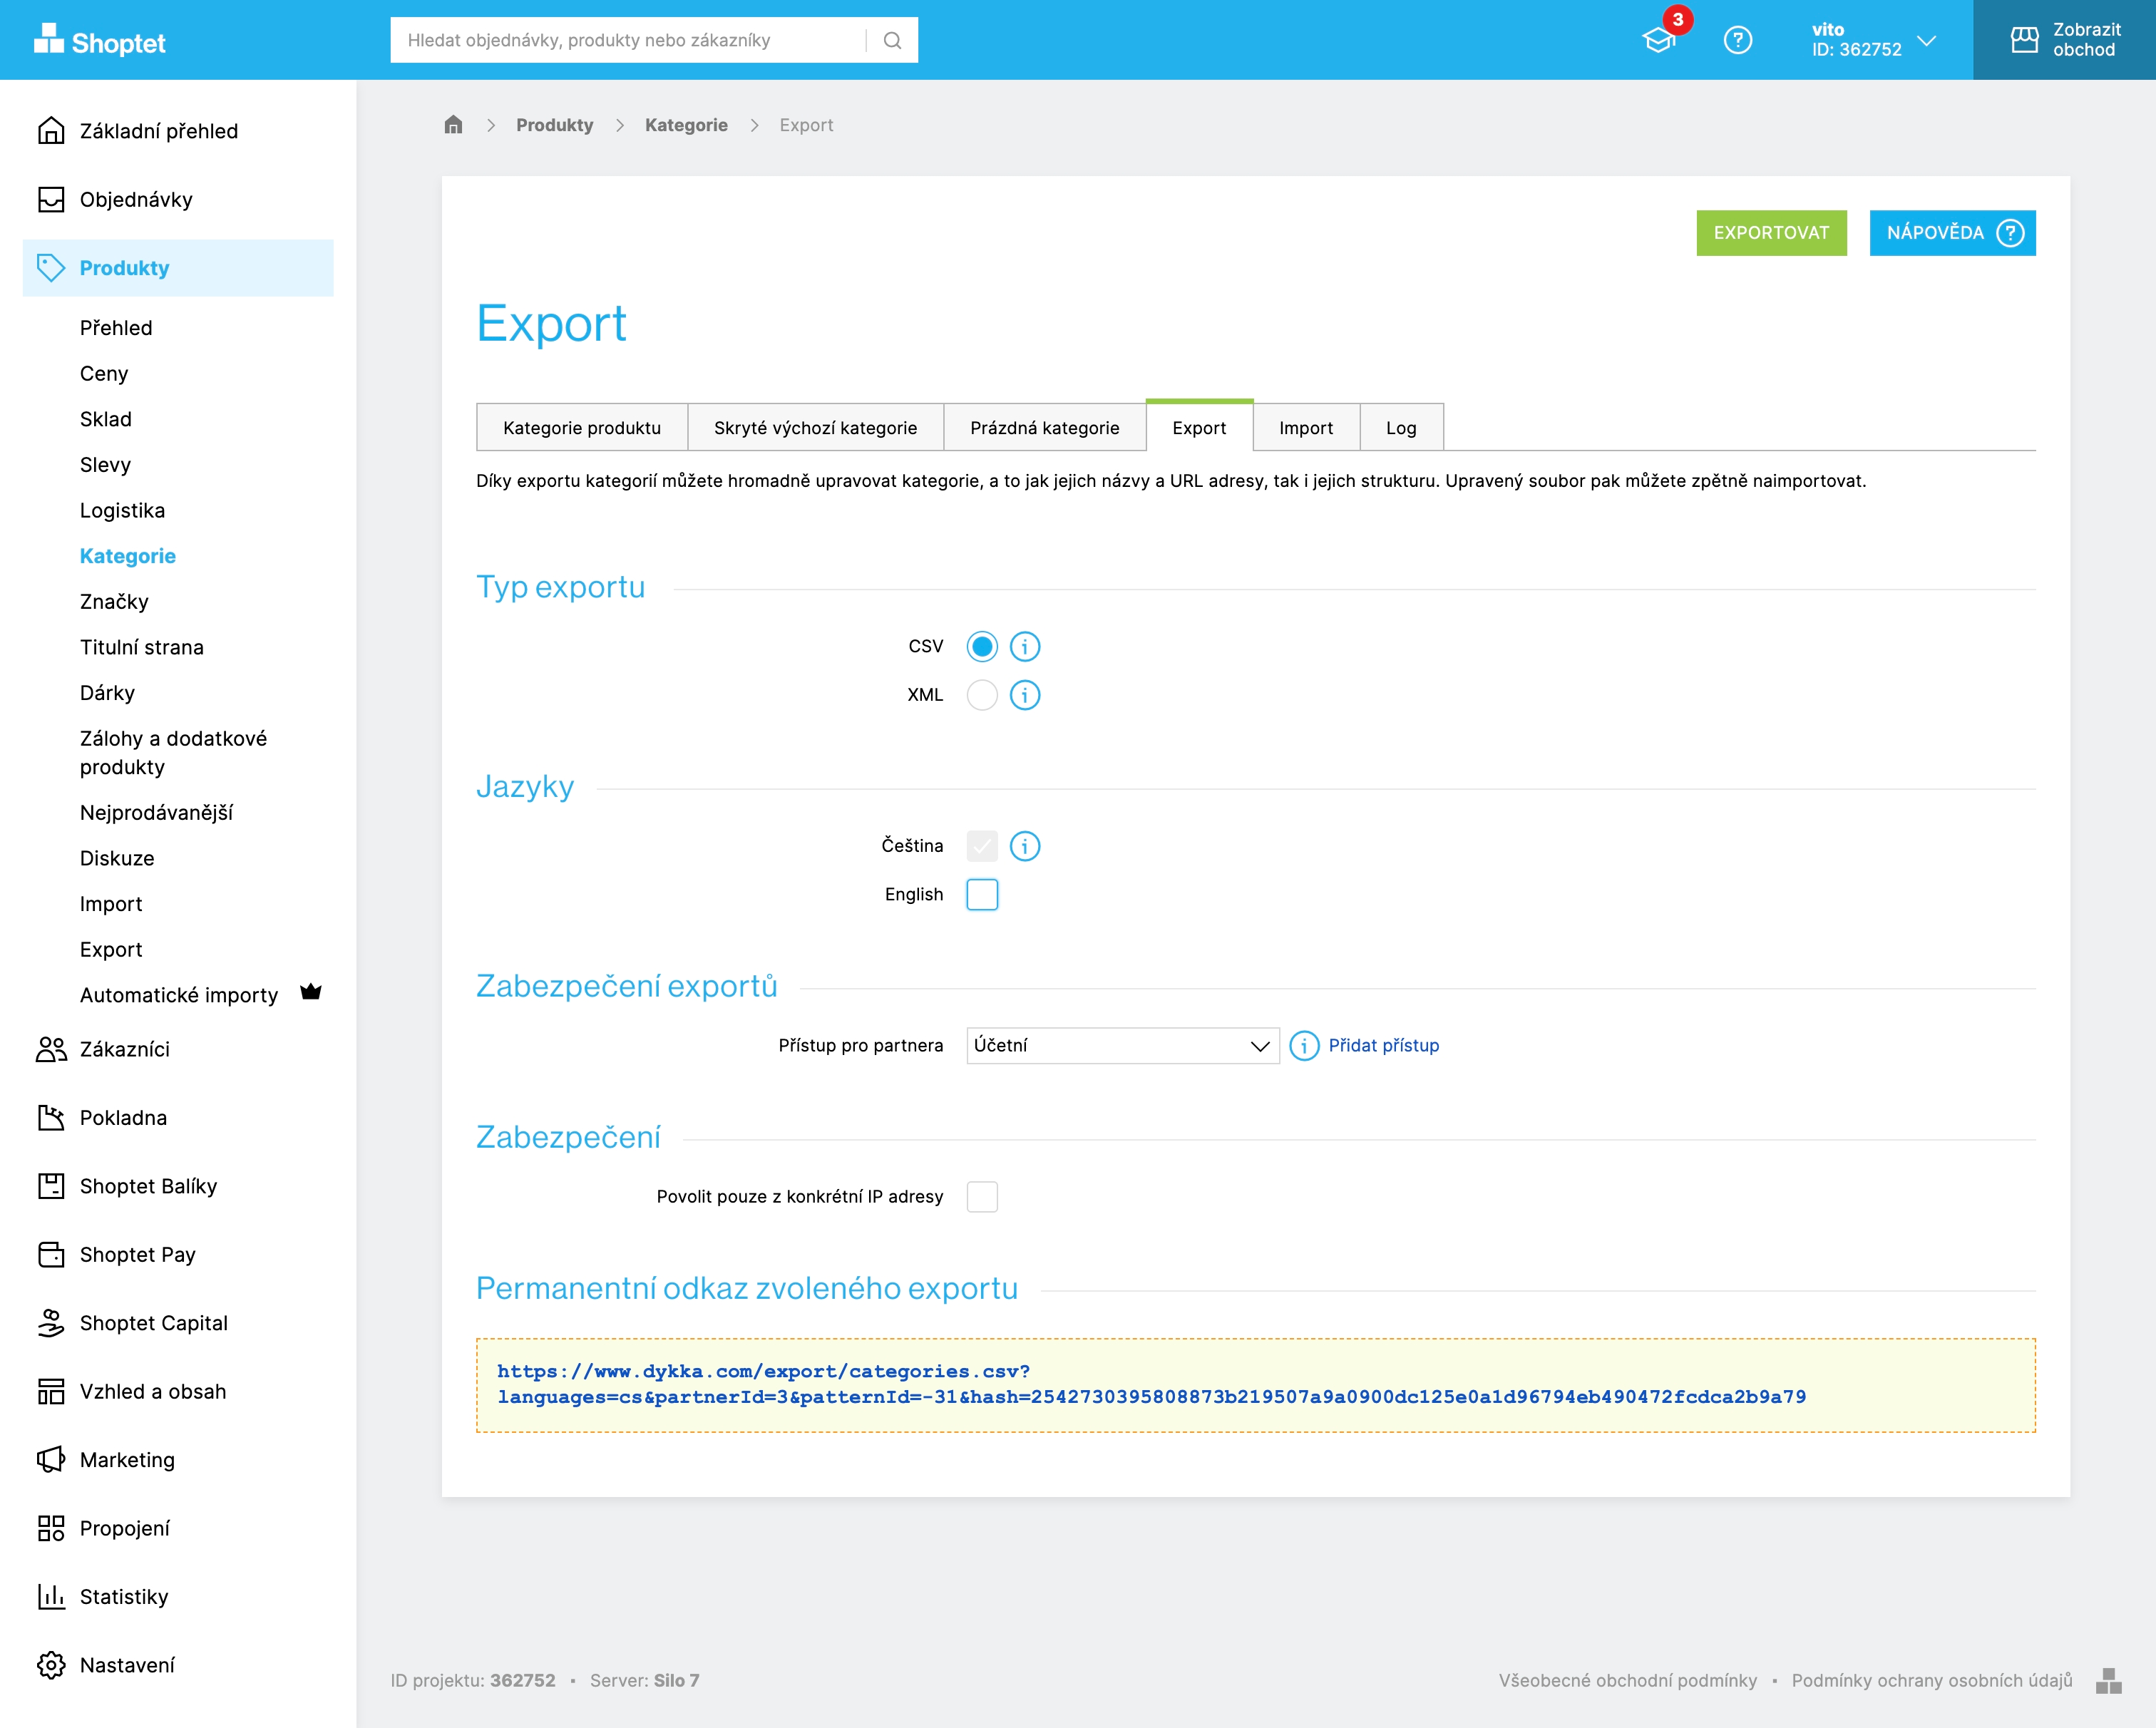
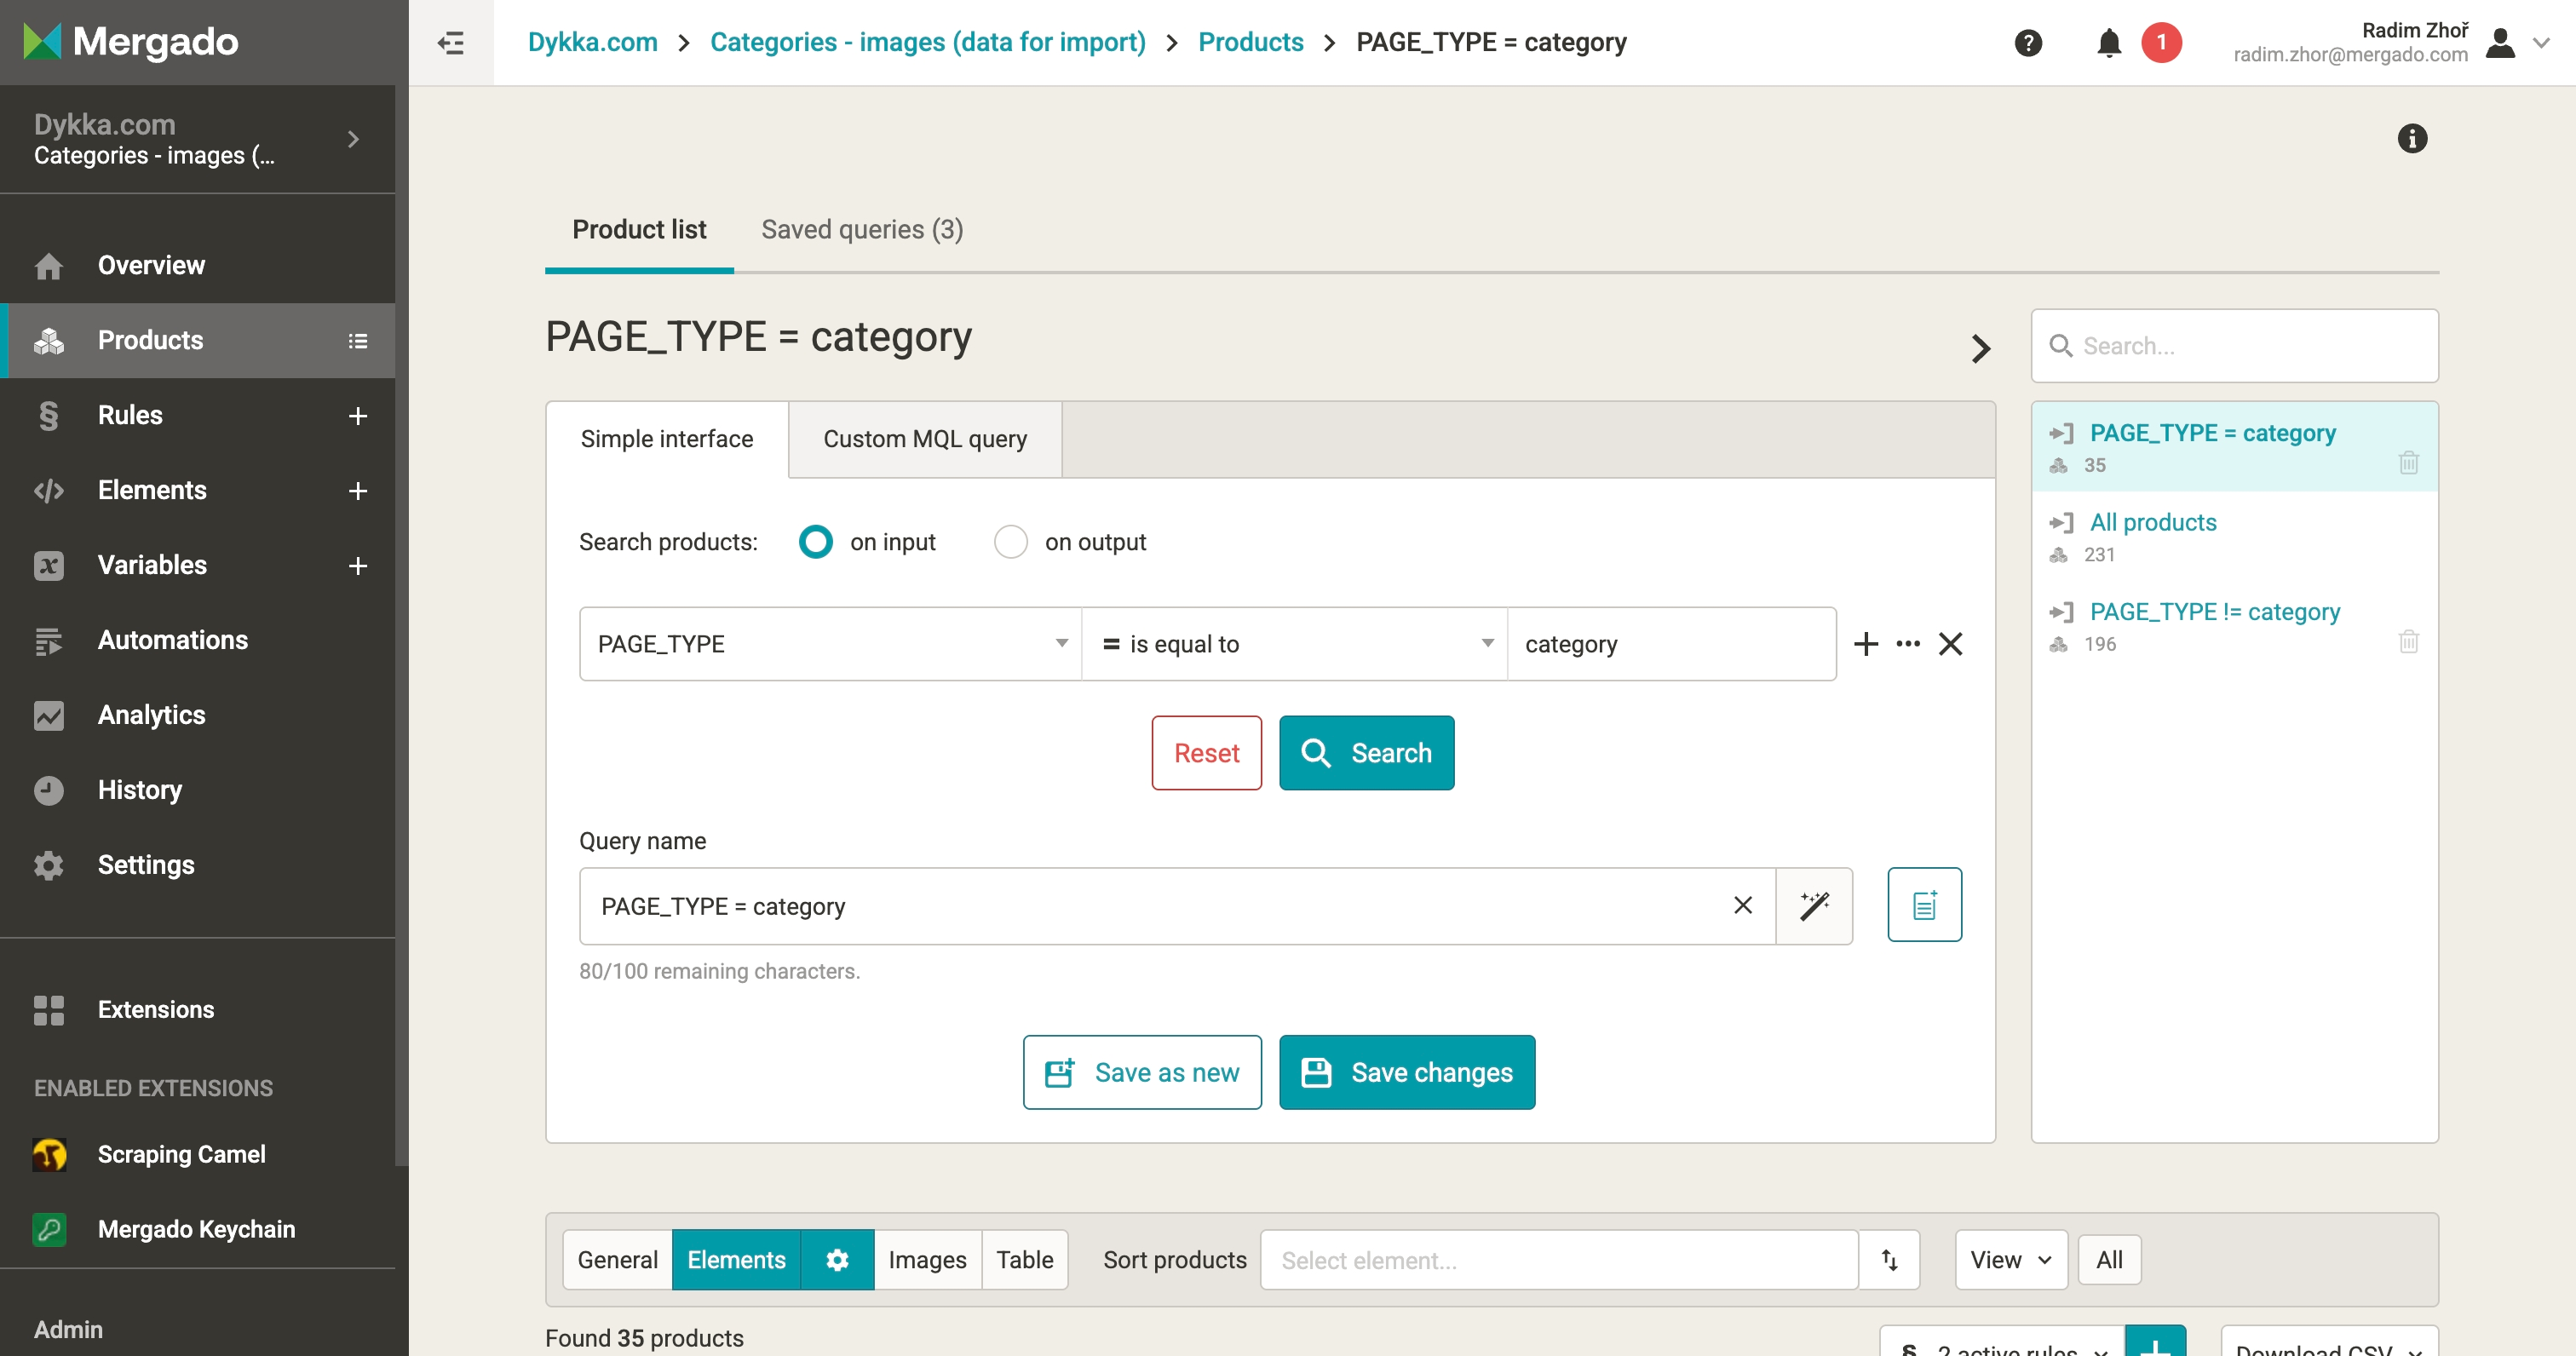
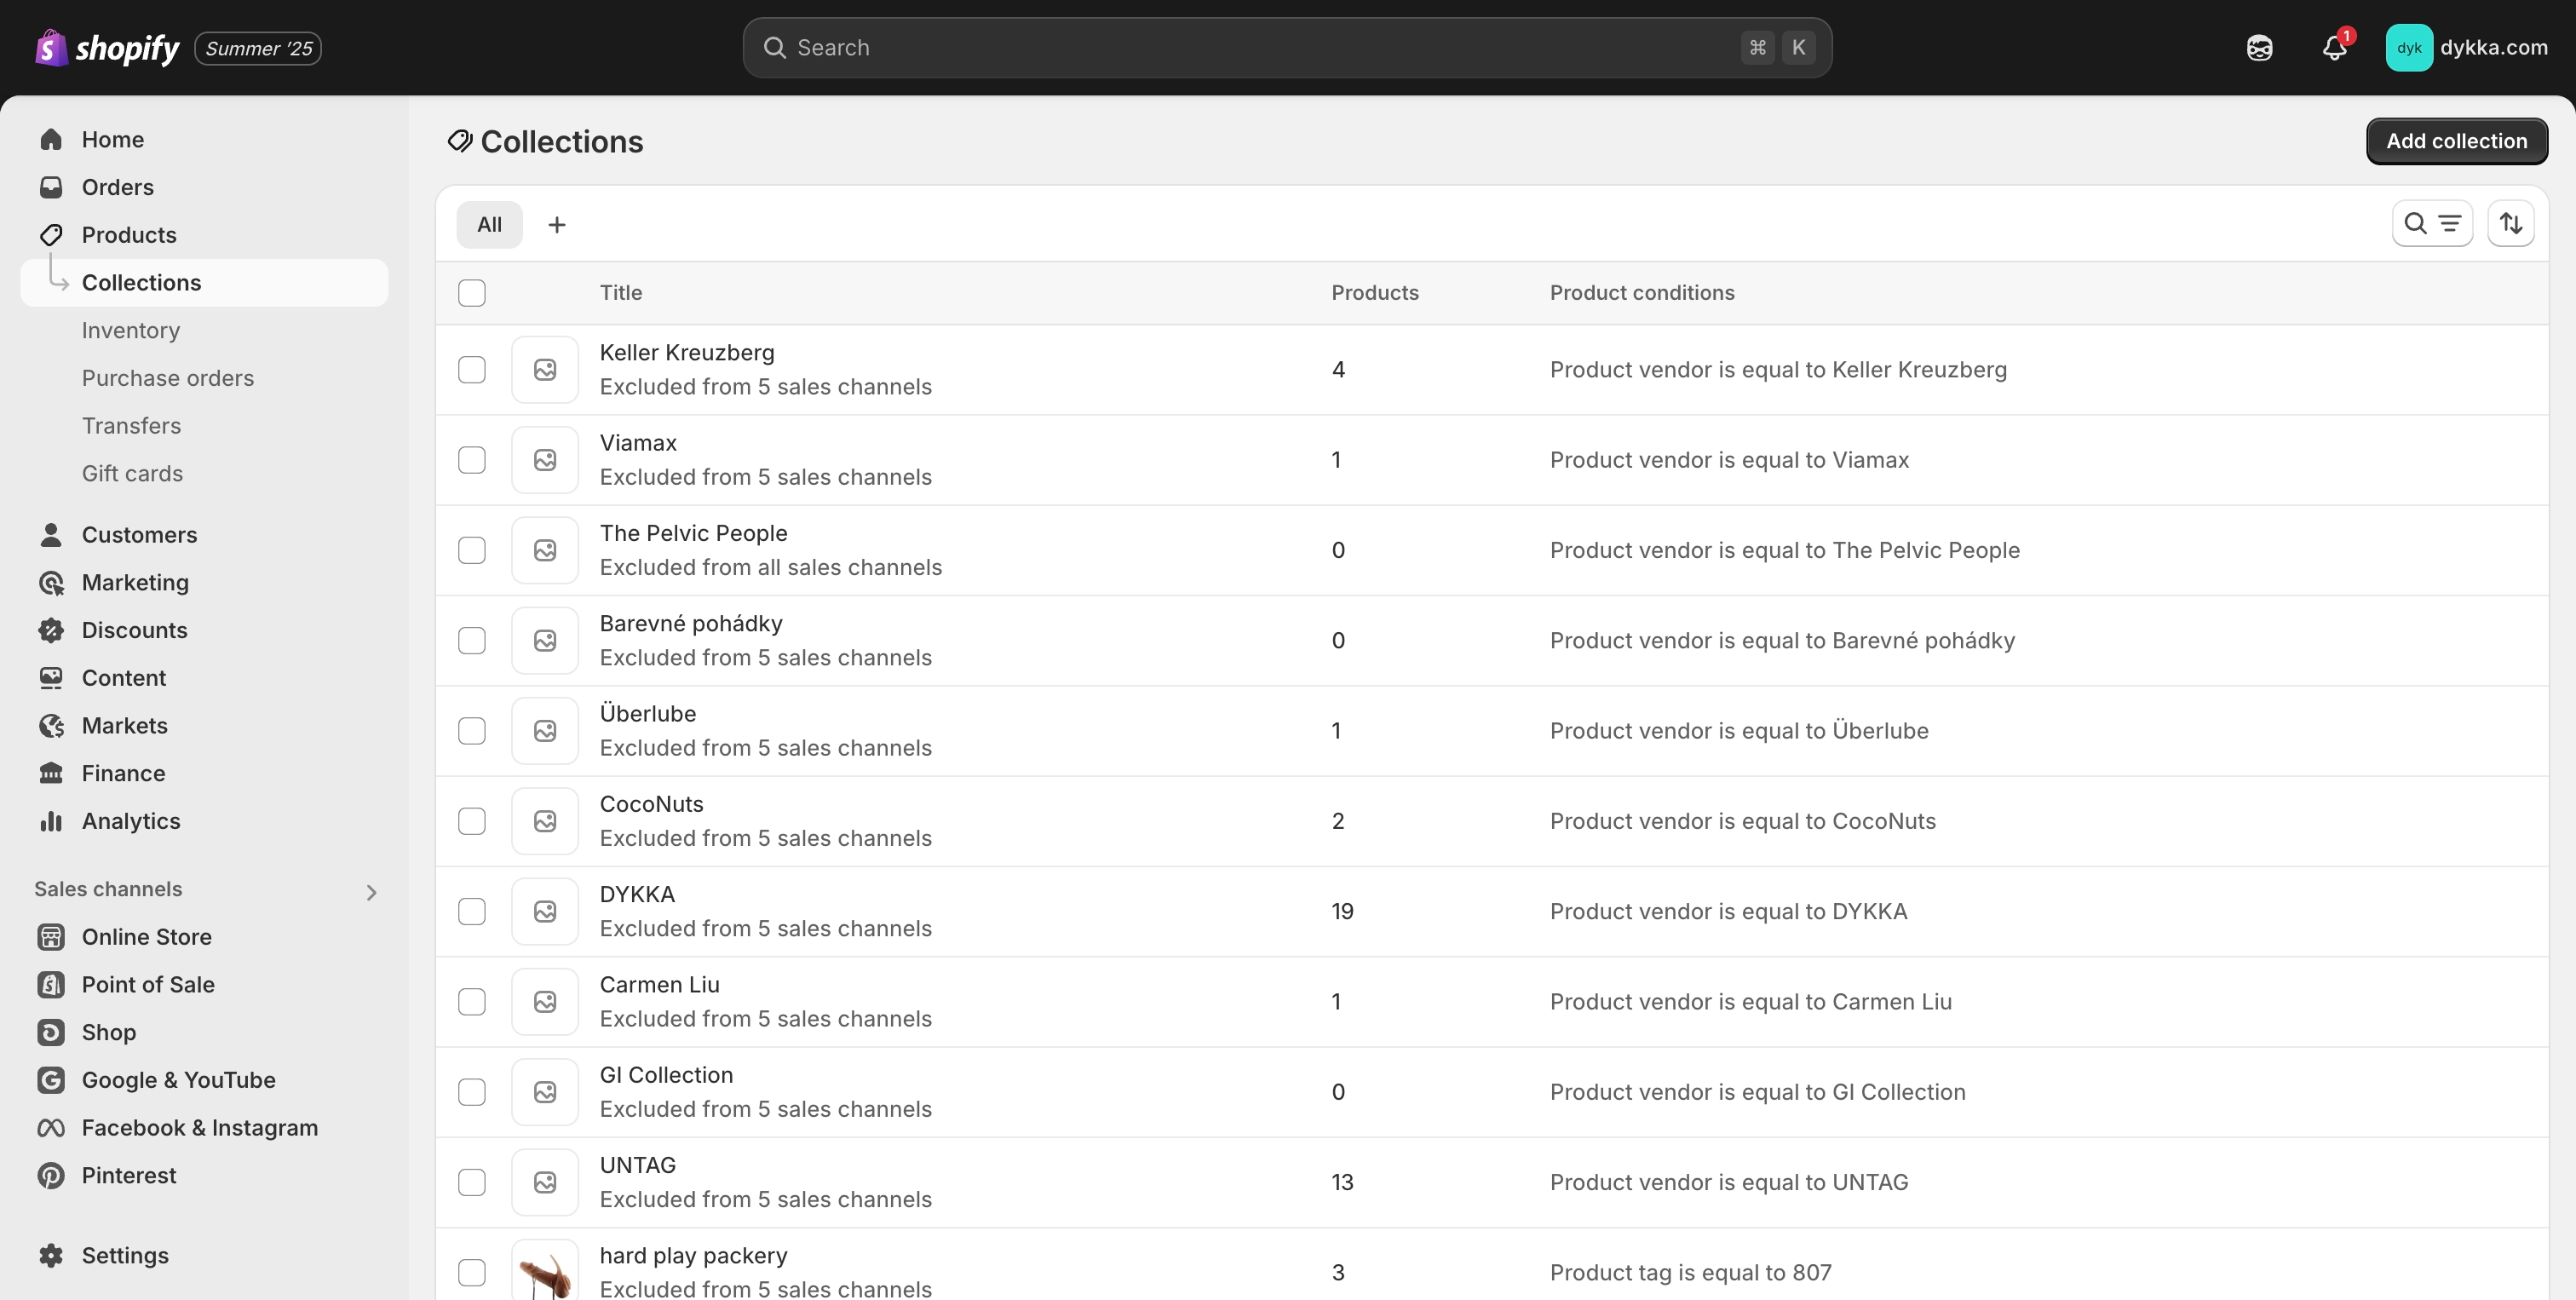
3.2 Categories
3.2.1 What we need
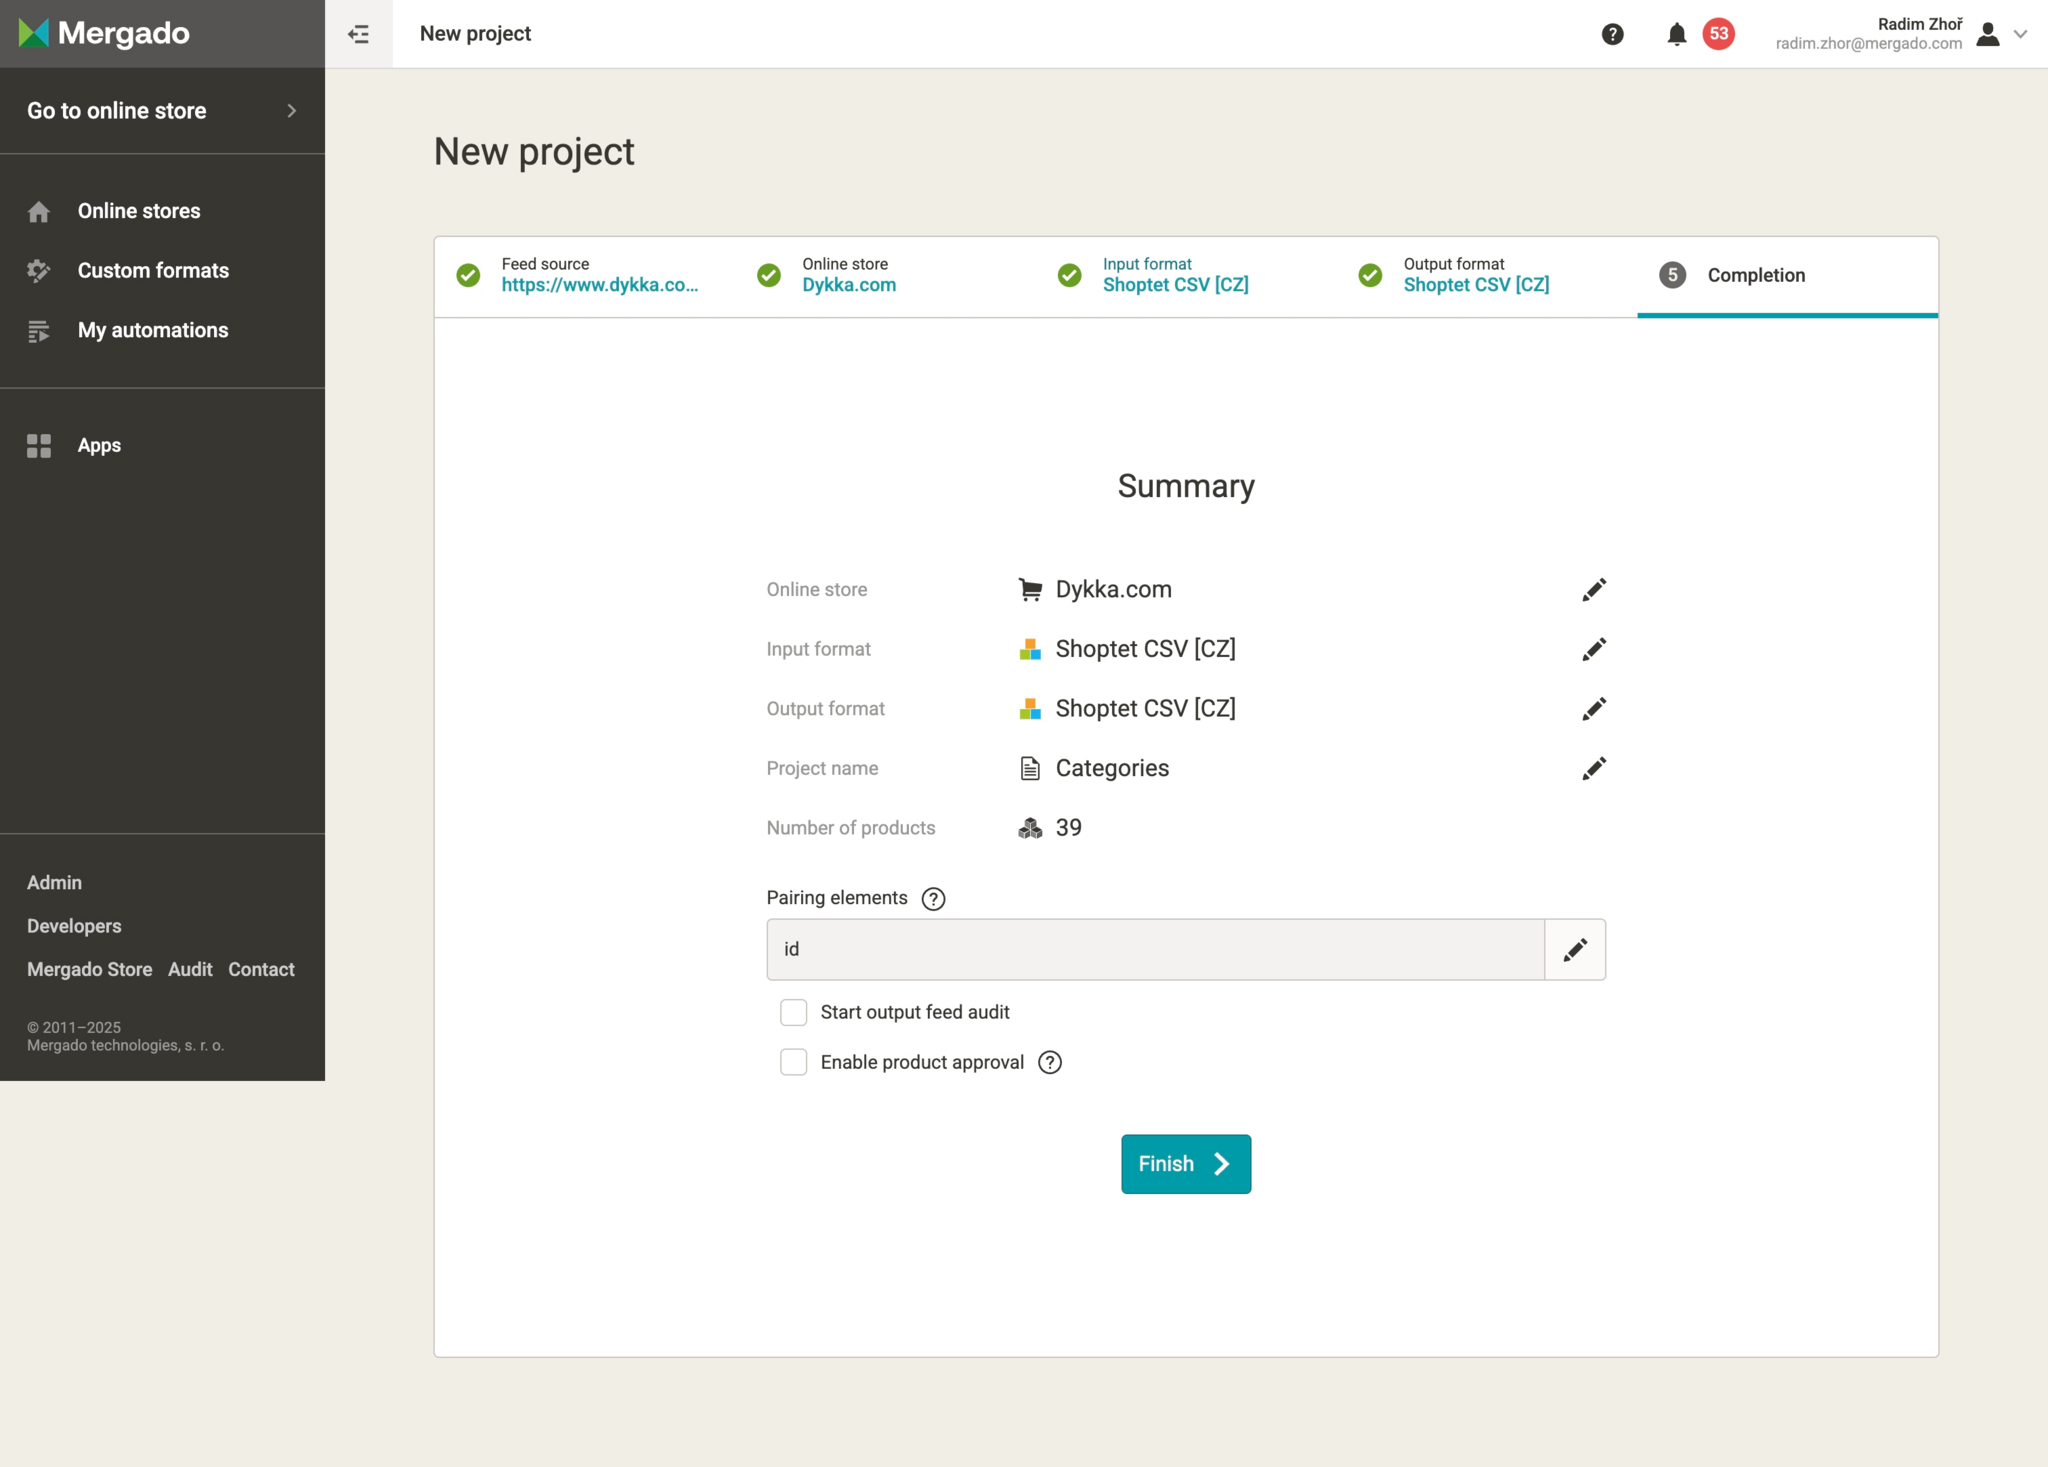
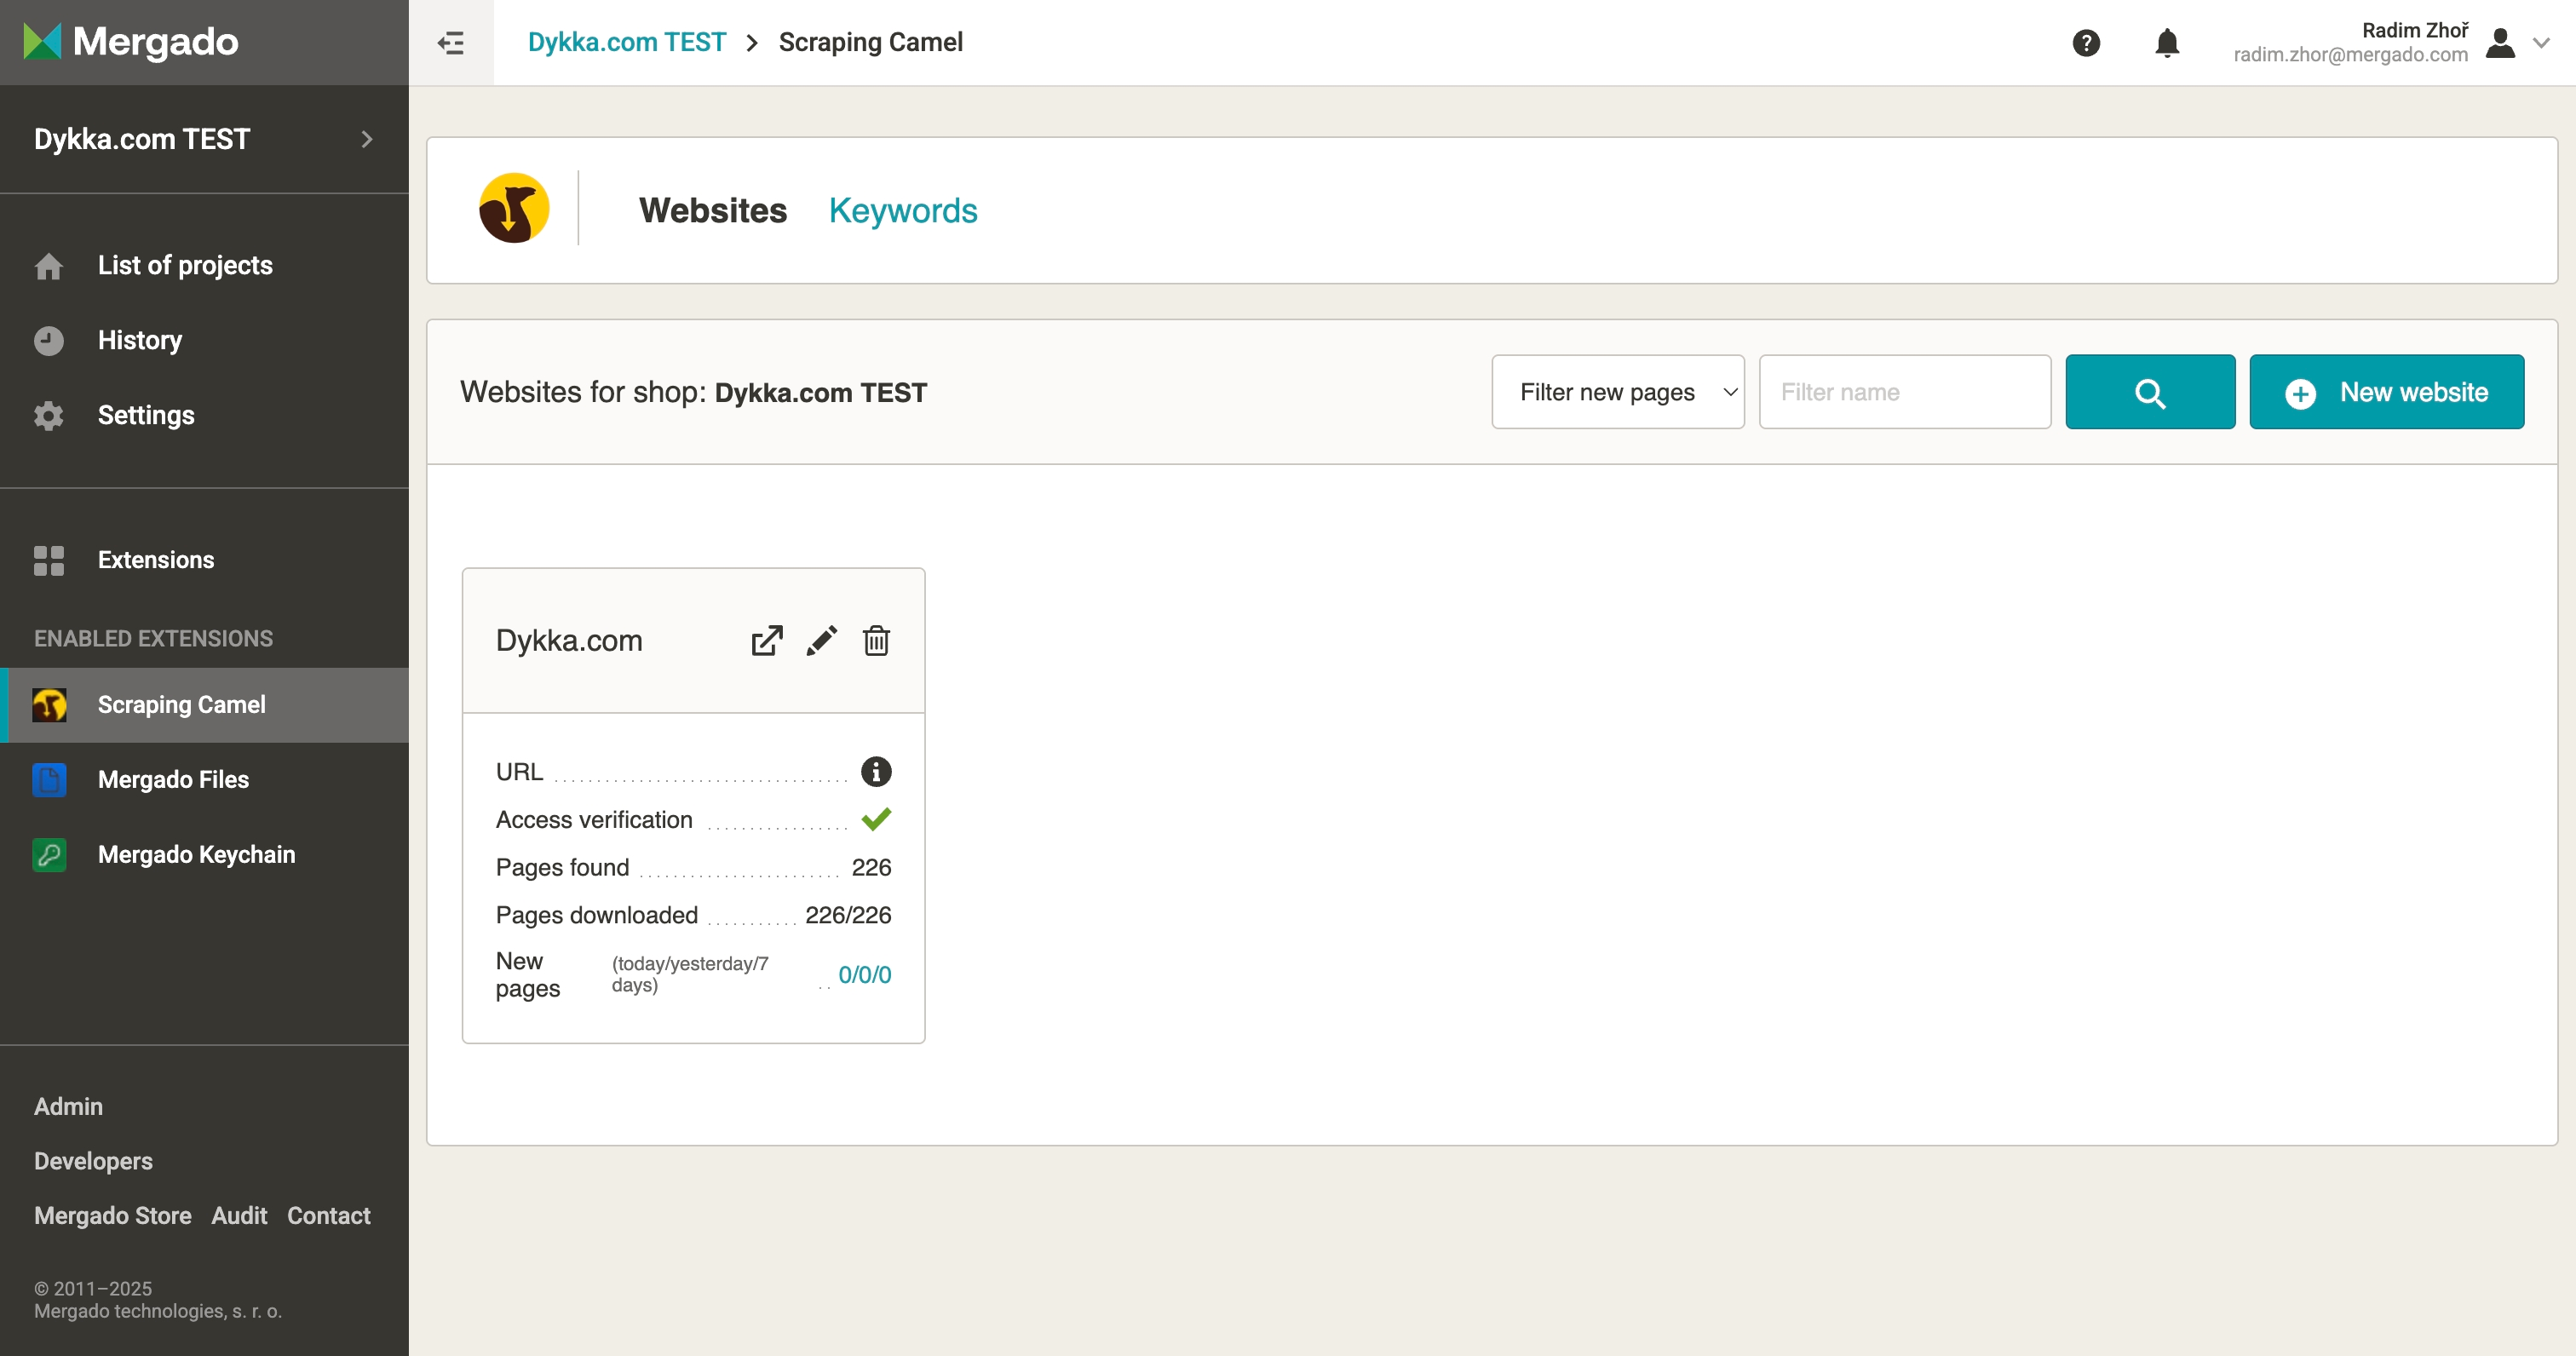
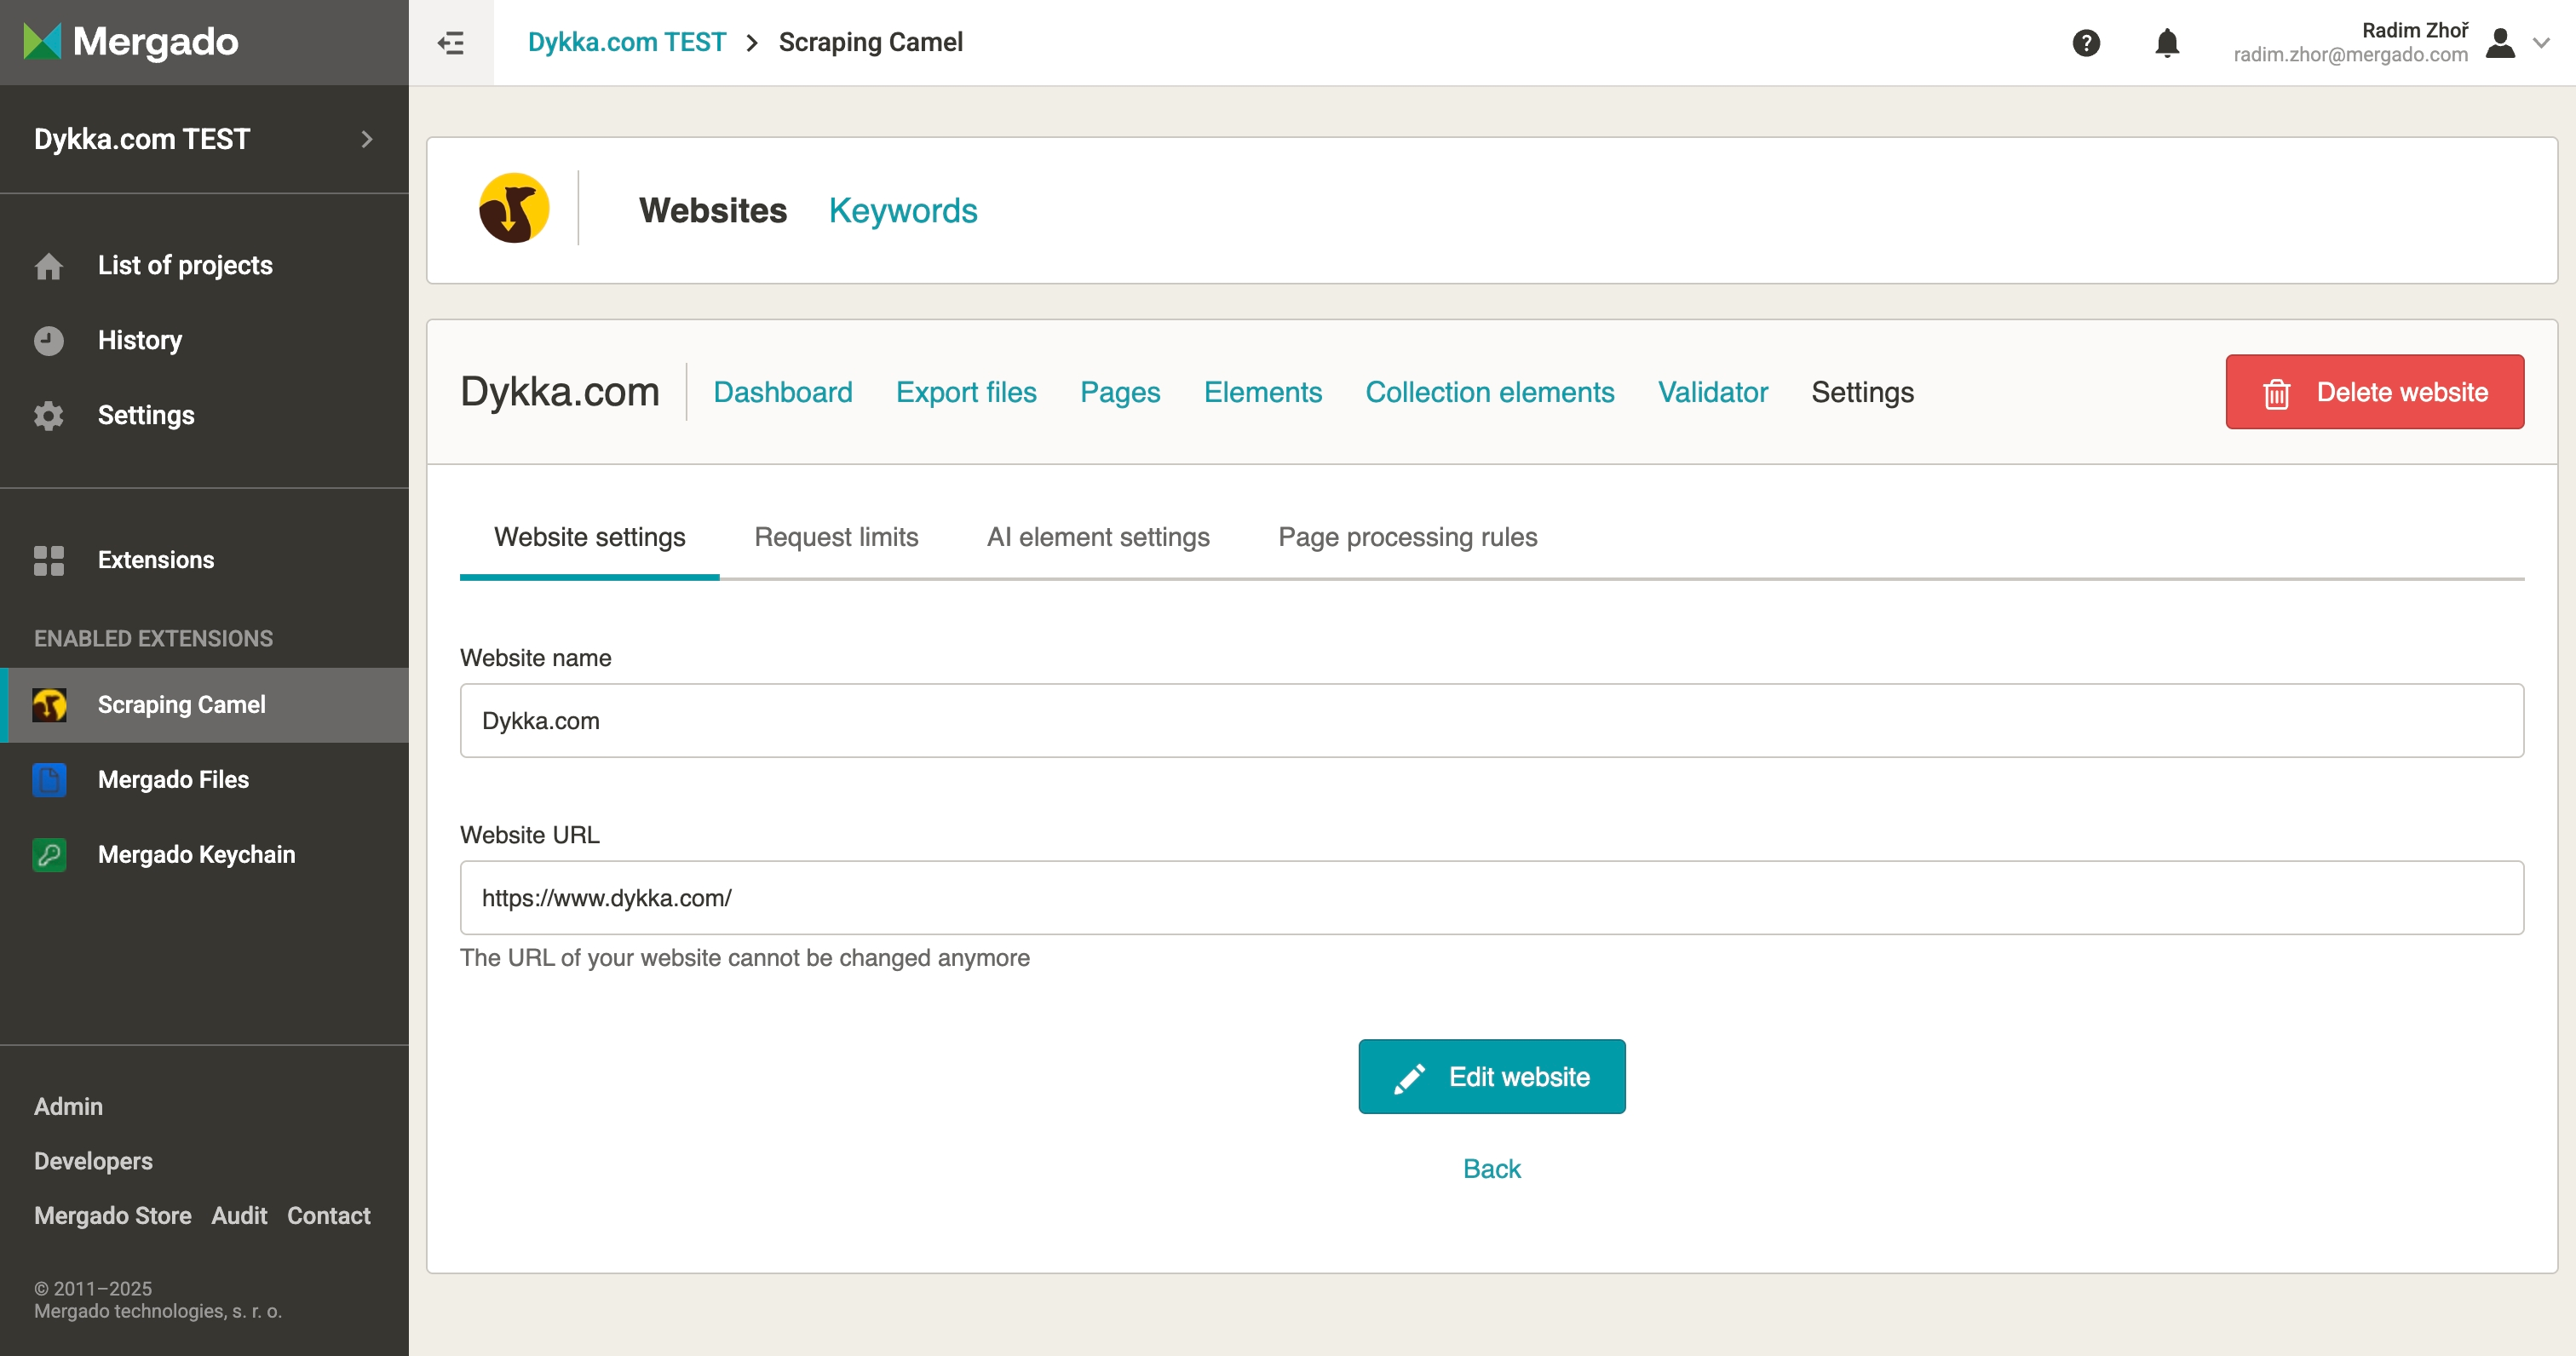
Shoptet allows exporting categories in CSV format via a feed URL. Shopify, however, only accepts category imports via API. The Shoptet CSV also doesn’t contain category image URLs, so these had to be added before importing into Shopify.
We solved this using Mergado Editor and its extensions. Missing image URLs were retrieved with Scraping Camel and added to the CSV in Mergado. The adjusted CSV was then uploaded directly to Shopify via Shopify Importer (API).
You need:
- Mergado account – for preparing data and activating Scraping Camel & Shopify Importer
- Mergado extension: Scraping Camel – to get category image URLs
- Access to Shoptet admin – for exporting categories
- Access to Shopify admin – for data import
- Shopify custom app – to connect Mergado with Shopify
- Mergado extension: Shopify Importer – to upload categories into Shopify via API
3.2.2 Step-by-step
Shoptet
- In Shoptet admin, go to Products → Categories → Export (CSV) and select language CZ.
- Copy the feed URL.
- After the upload, you can download a CSV with the original and new category ID and handle for verification, which you can use when importing translations.
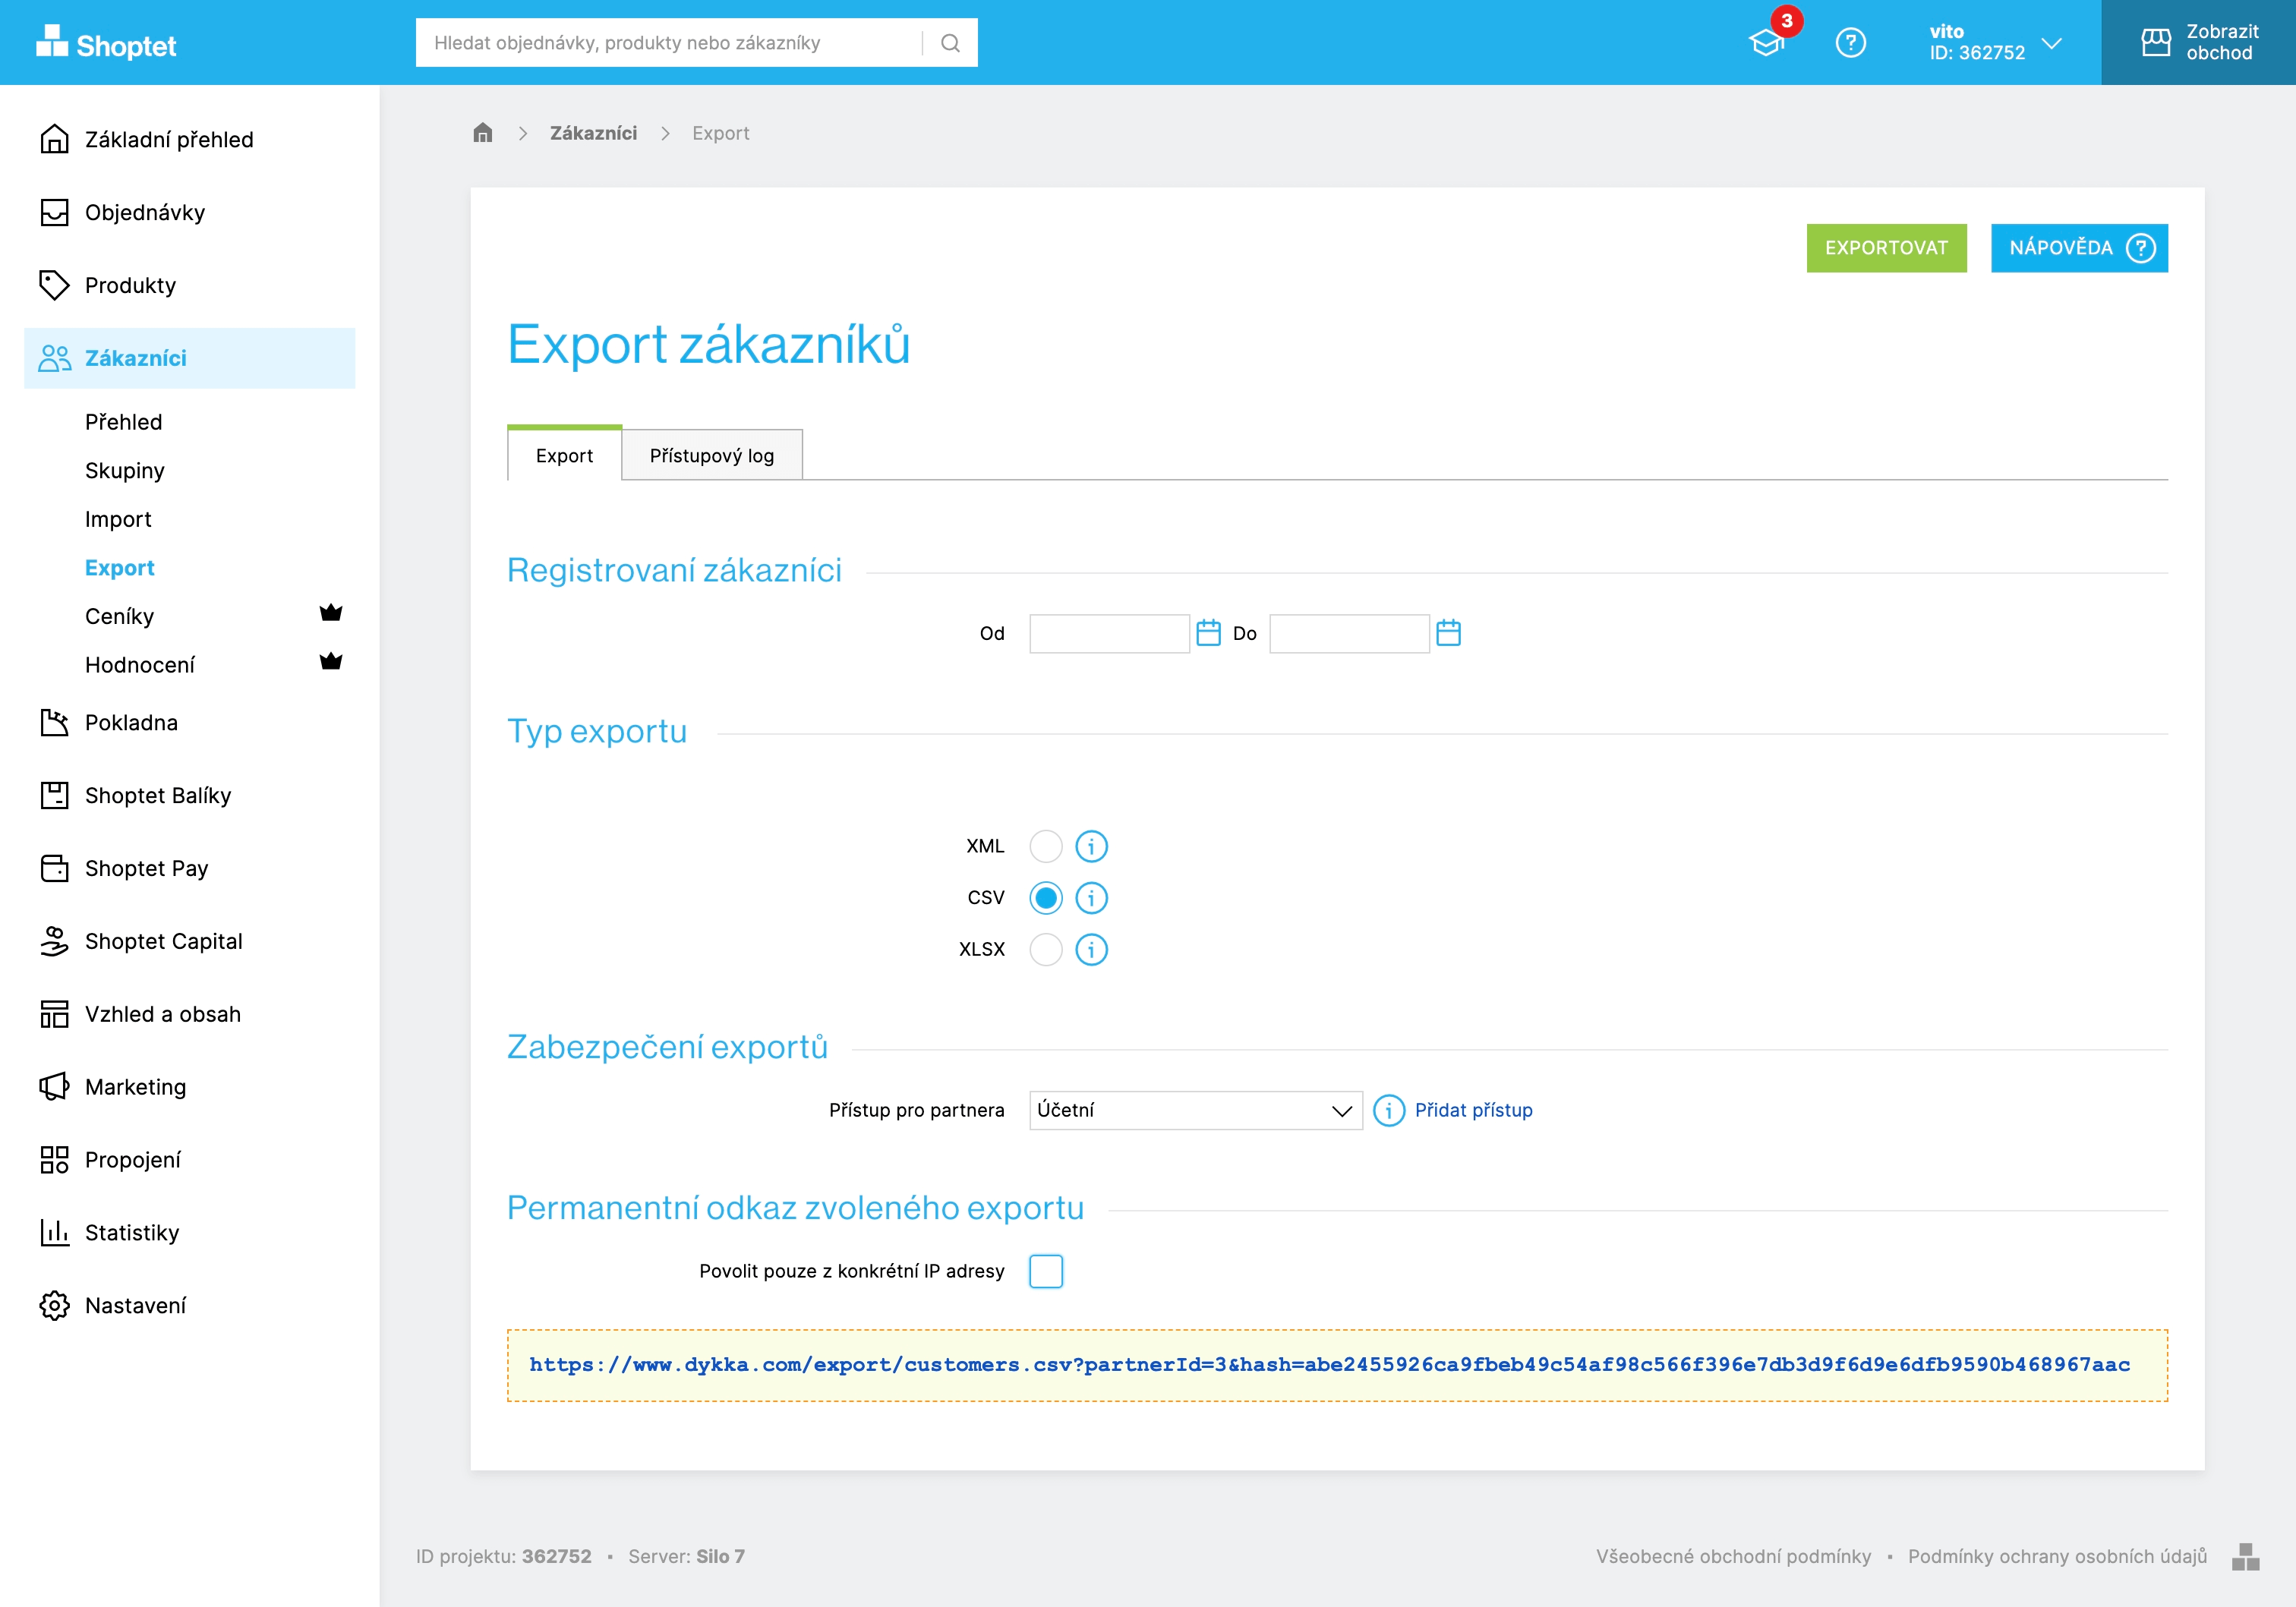
3.3 Customers
3.3.1 What we need
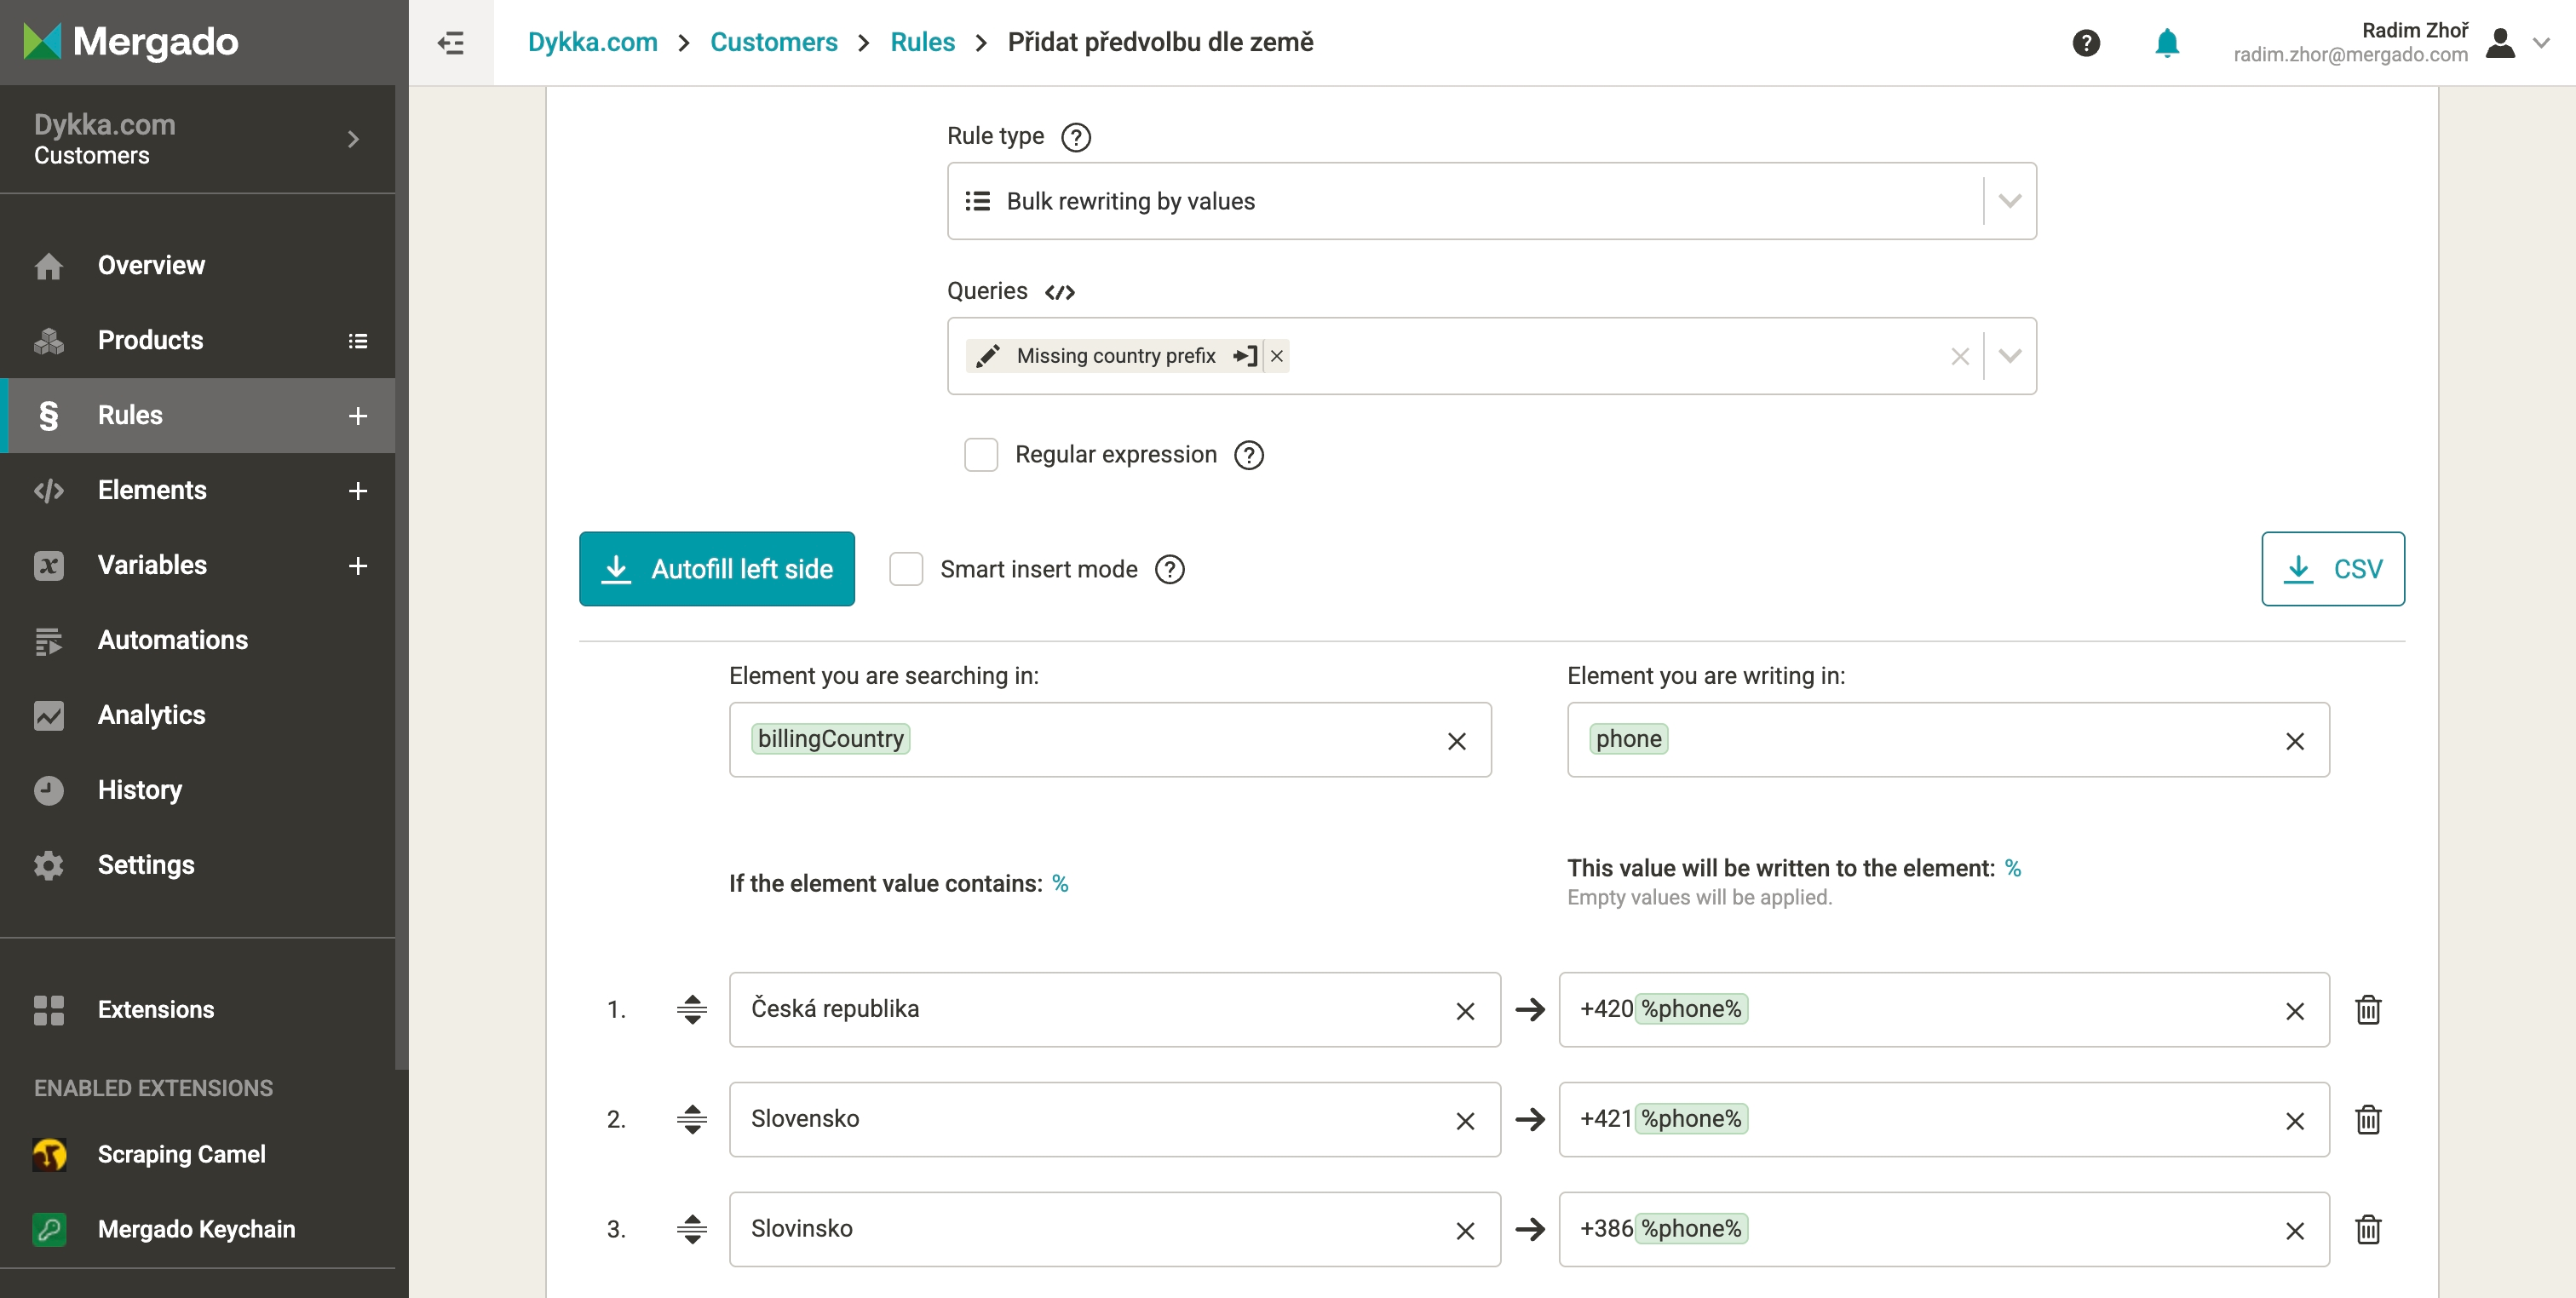
Shoptet allows exporting customers in CSV format. This CSV must be adjusted before importing into Shopify, and errors (e.g., country codes) must be corrected.
We made the necessary edits in Mergado Editor and then uploaded the CSV into Shopify via API using Shopify Importer. While Shopify also allows manual CSV import, the API solution is faster and more flexible.
You need:
- Mergado account – to prepare data and activate Shopify Importer
- Access to Shoptet admin – for customer export
- Access to Shopify admin – for customer import
- Shopify custom app – to connect Mergado with Shopify
Mergado extension: Shopify Importer – to upload data into Shopify via API
3.3.2 Step-by-step
Shoptet
- In Shoptet admin, go to Customers → Export (CSV).
- Copy the feed URL.
3.4 Product reviews
3.4.1 What we need
Shoptet does not allow exporting customer reviews in a standardized format, and Shopify cannot import them via API. To solve this, we exported reviews from Shoptet into CSV using our own script in the Judge.me format. Then, through the Judge.me Shopify app, we imported them into Shopify. The required adjustments (such as adding product handles) were done in Mergado Editor.
You need:
- Mergado account – for preparing data
- Custom script – to download reviews in CSV
- Access to Shoptet admin – for review export
- Access to Shopify admin – for data import
- Google Sheets – for merging CSV files
- Shopify app: Judge.me – for importing reviews (judgeme.com)
3.4.2 Step-by-step
Shoptet
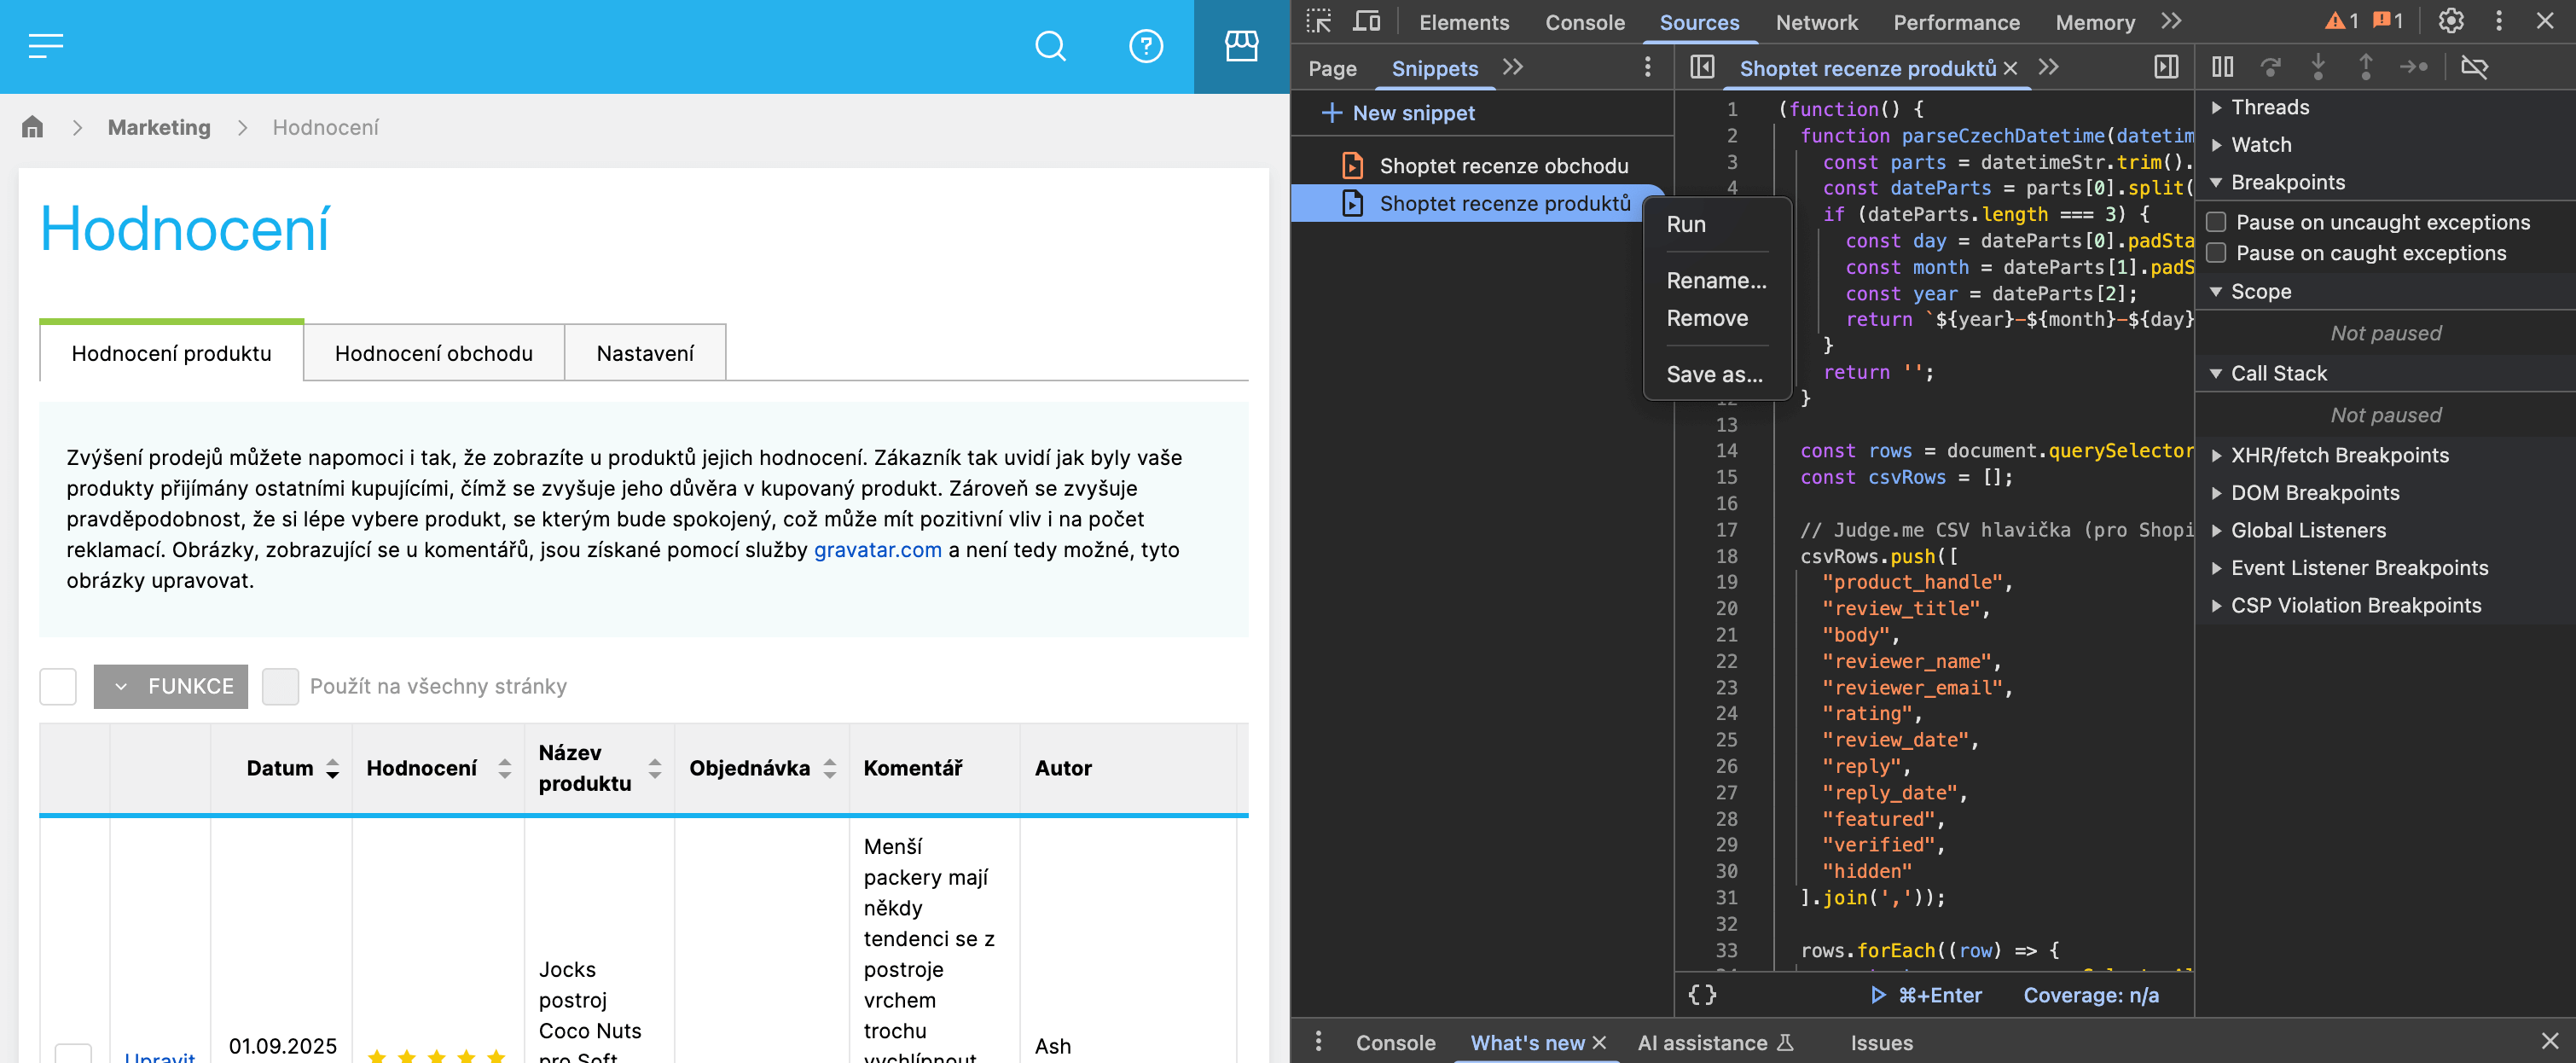
- In Shoptet admin, go to Marketing → Reviews → Product reviews.
- Open the page inspector (right click → Inspect).
- In the Sources tab, create a new snippet and paste this script. It will:
- Generate a CSV in Judge.me format
- Automatically start download
- Run the script on every page with reviews (max 50 reviews per page).
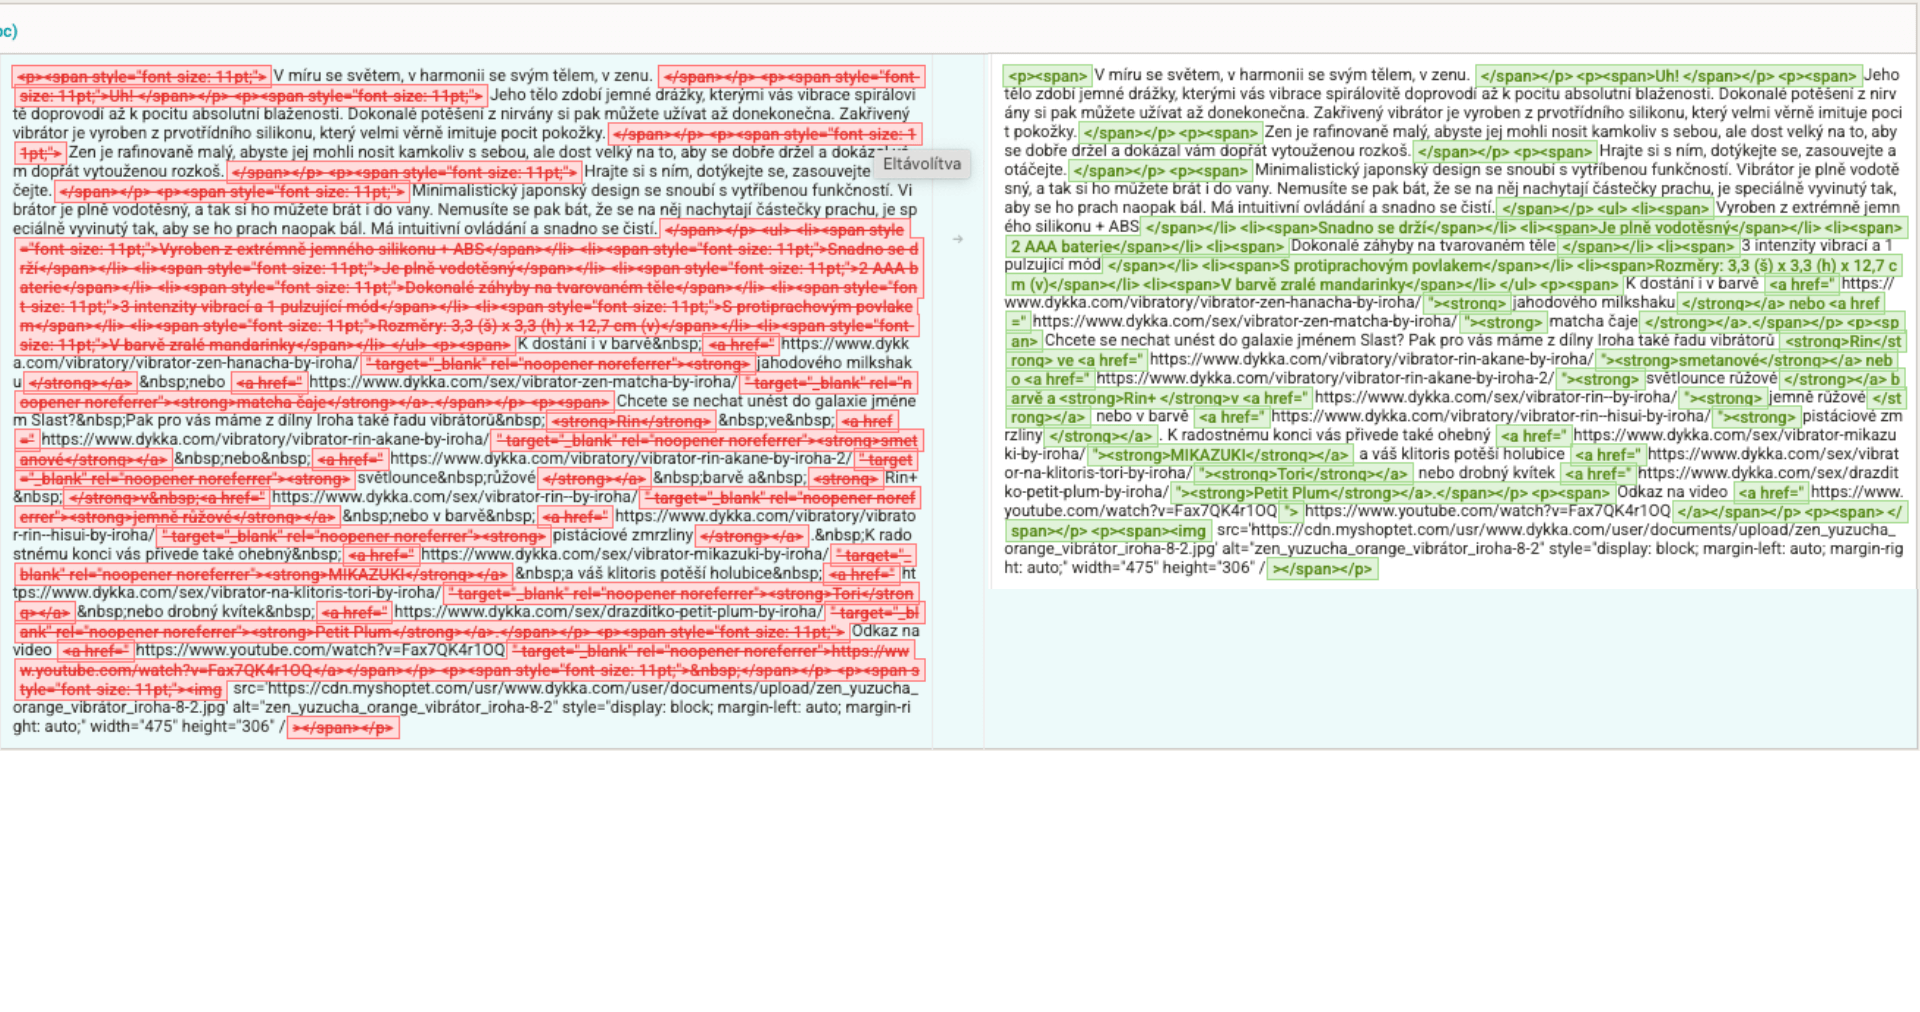
- Merge downloaded files in Google Sheets. Add a column ID and number rows 1…n. This ID is only needed for import into Mergado, not for Shopify itself.
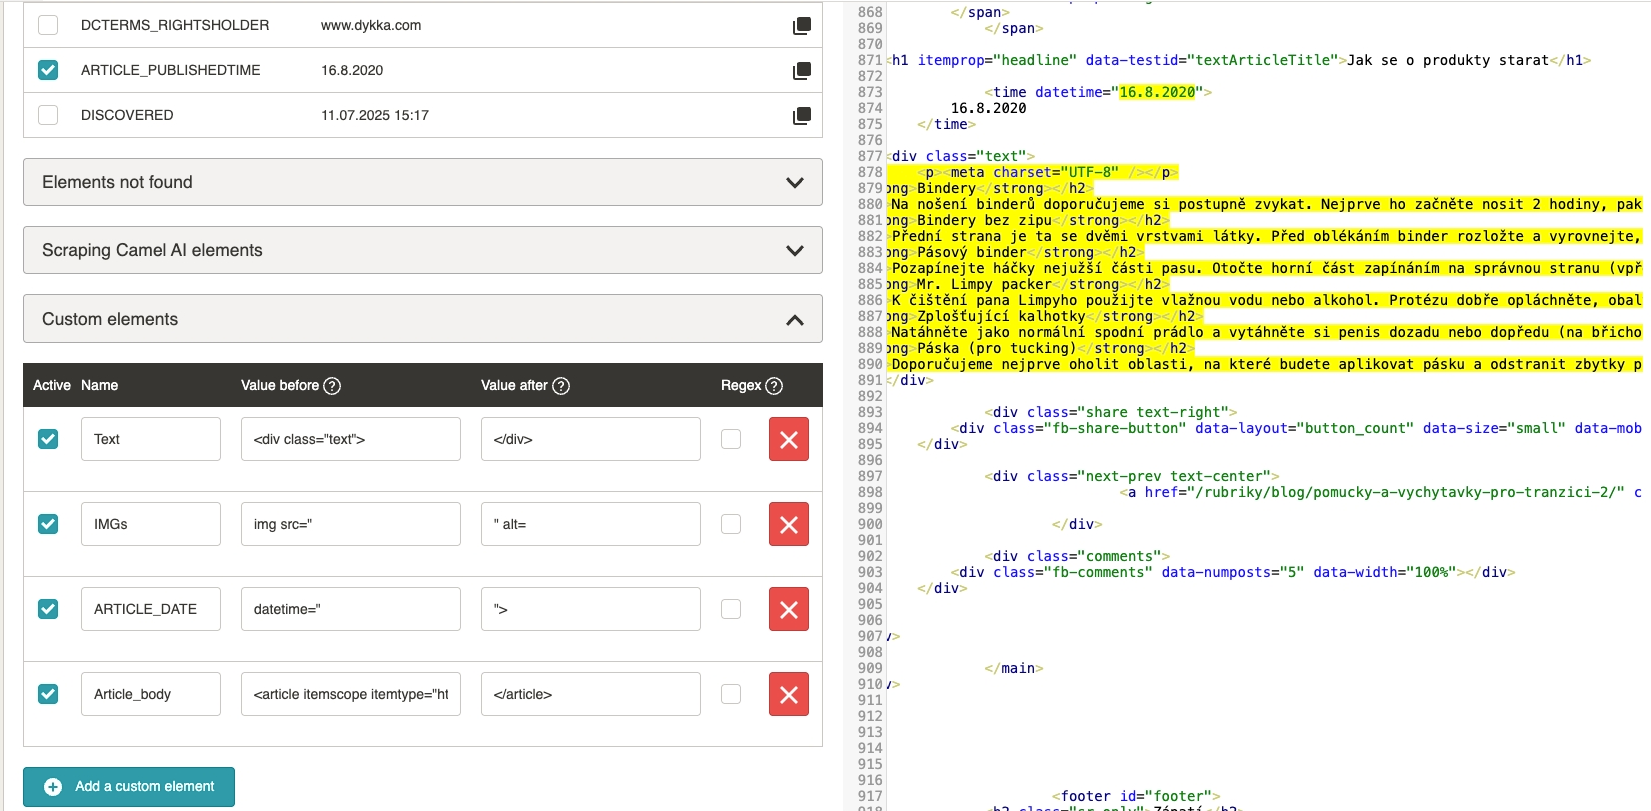
Mergado
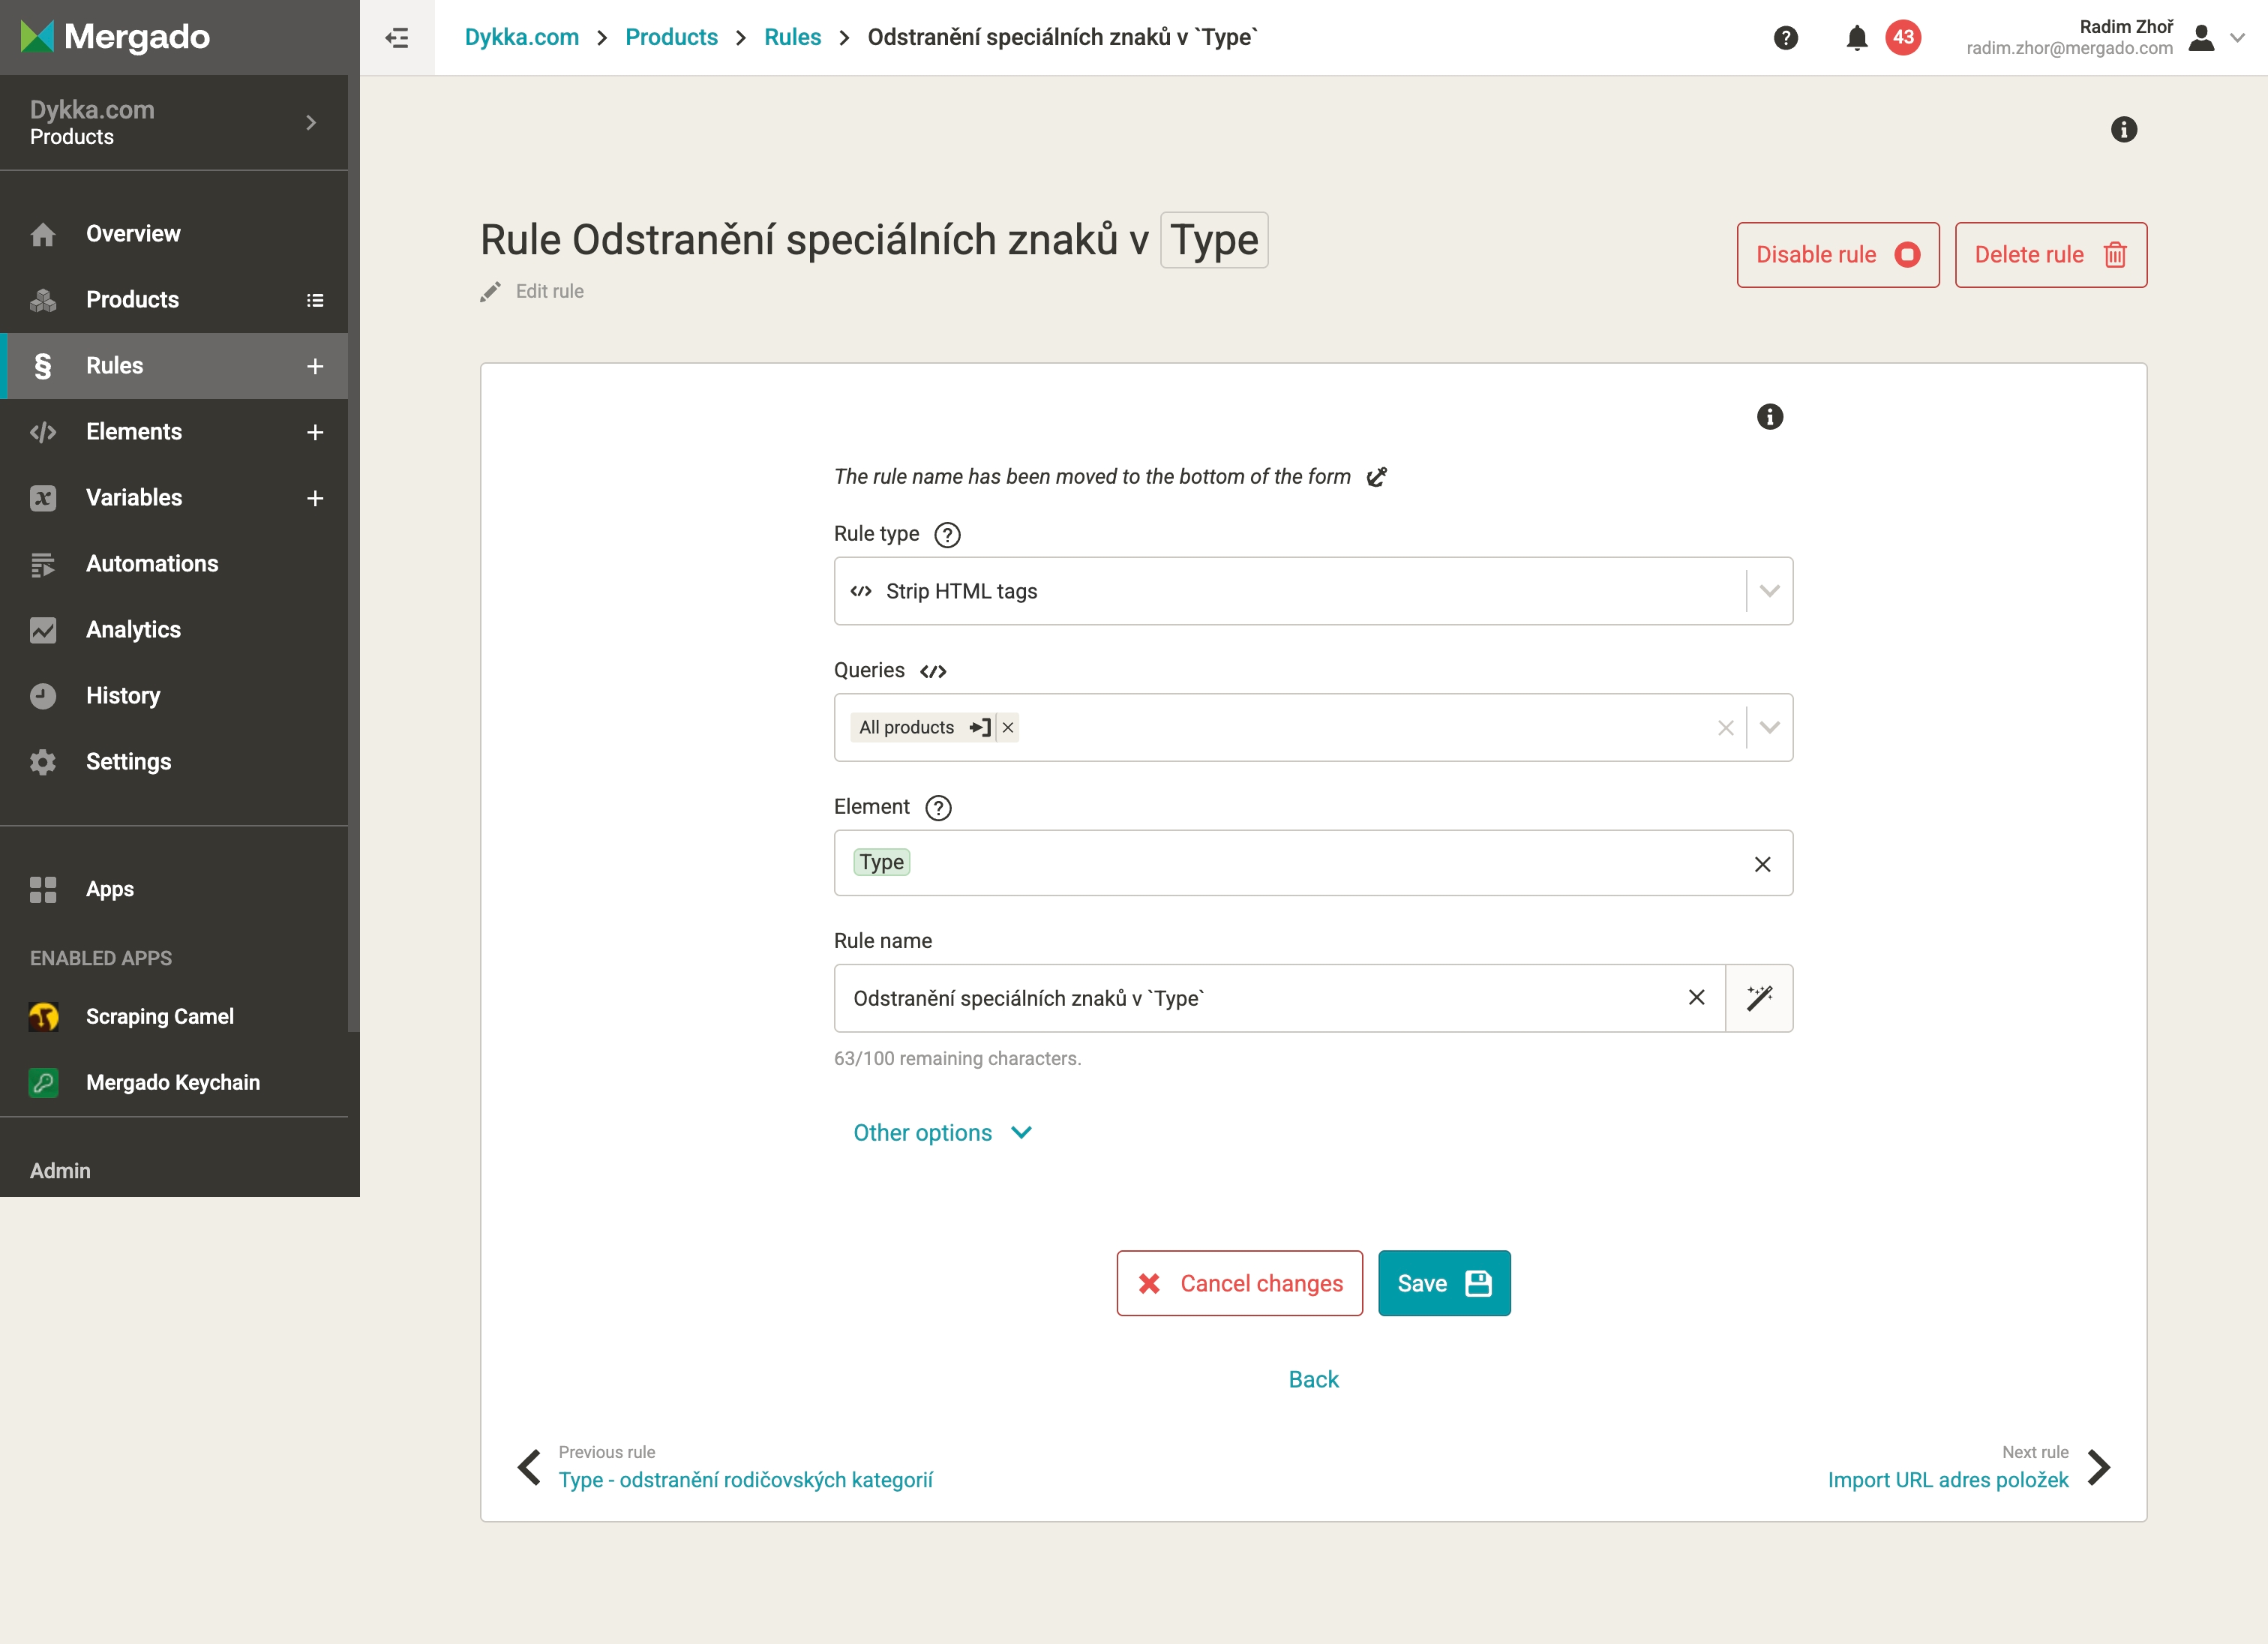
💡 In the CSV, there are product names instead of handles. You must replace them with the correct handles, otherwise Shopify will not match the reviews to products. 👇
- Rewrite of the
product_handle element:
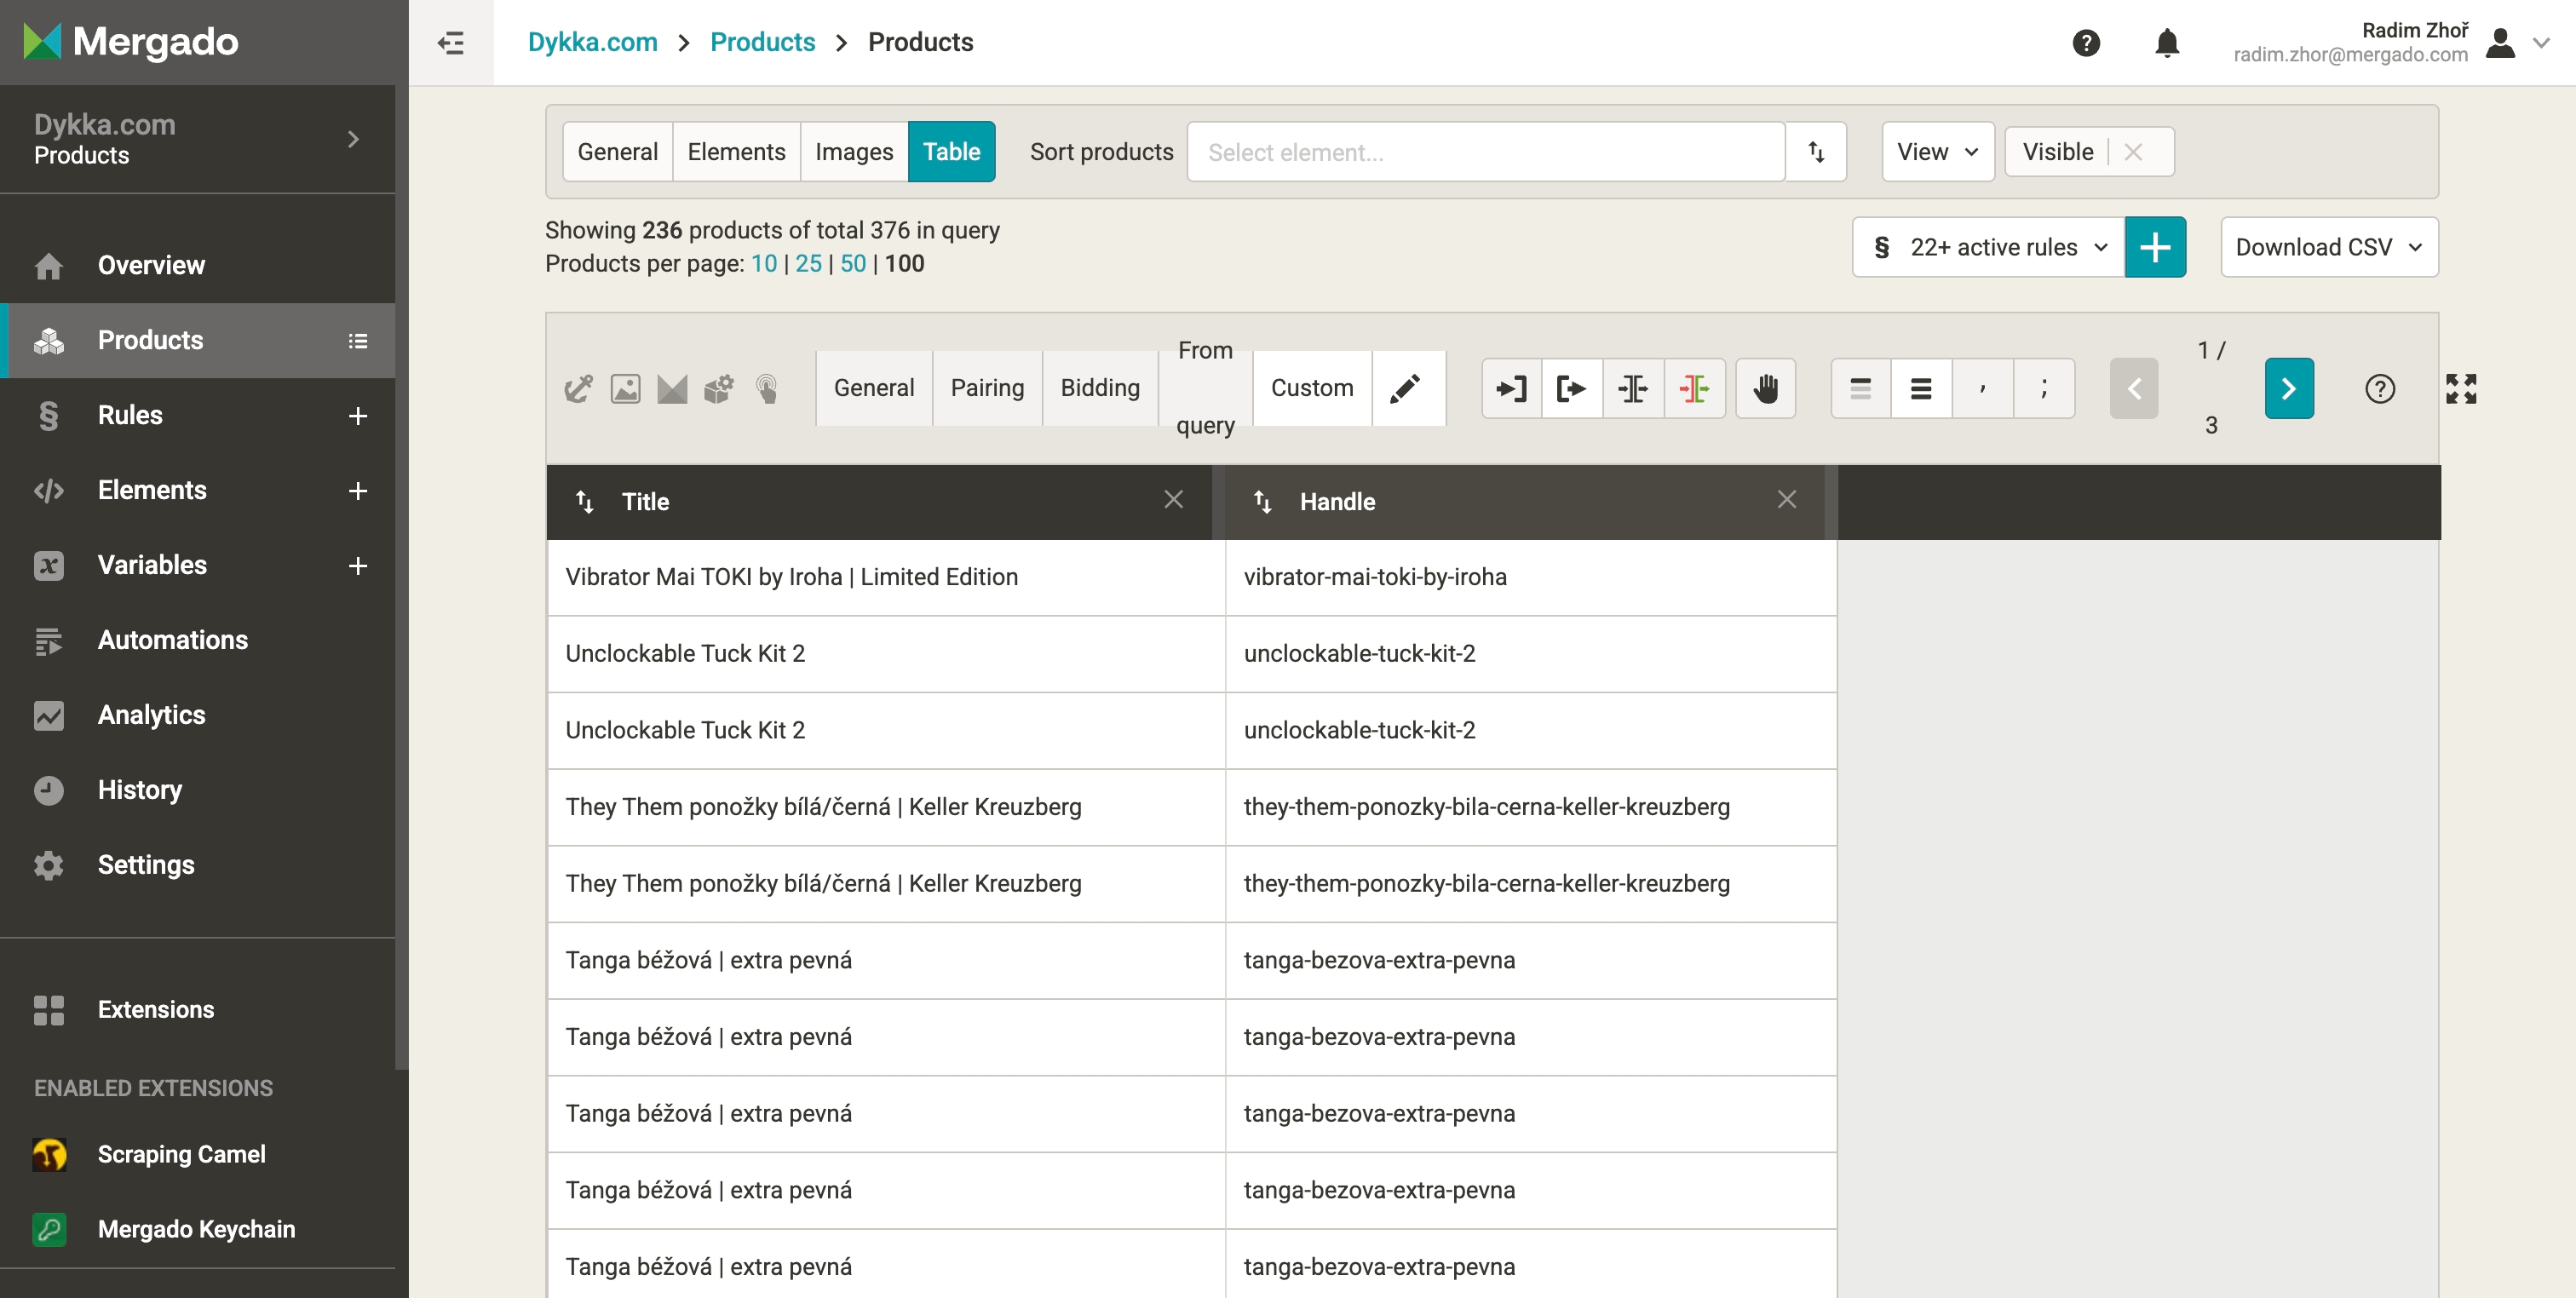
- In the Products project on the Products page → Table view → Custom, select only the Title and Handle elements.
- Download the selected columns to CSV.
-
In the CSV, rename the column headers as follows: Title → product_handle andHandle → product_handle (pairing element with the non-valid handle vs. the new/working handle).
- Import this file into the reviews project to supply the handles.
- Verify the matching. If
product_handle oes not contain “-”, it must be fixed manually.
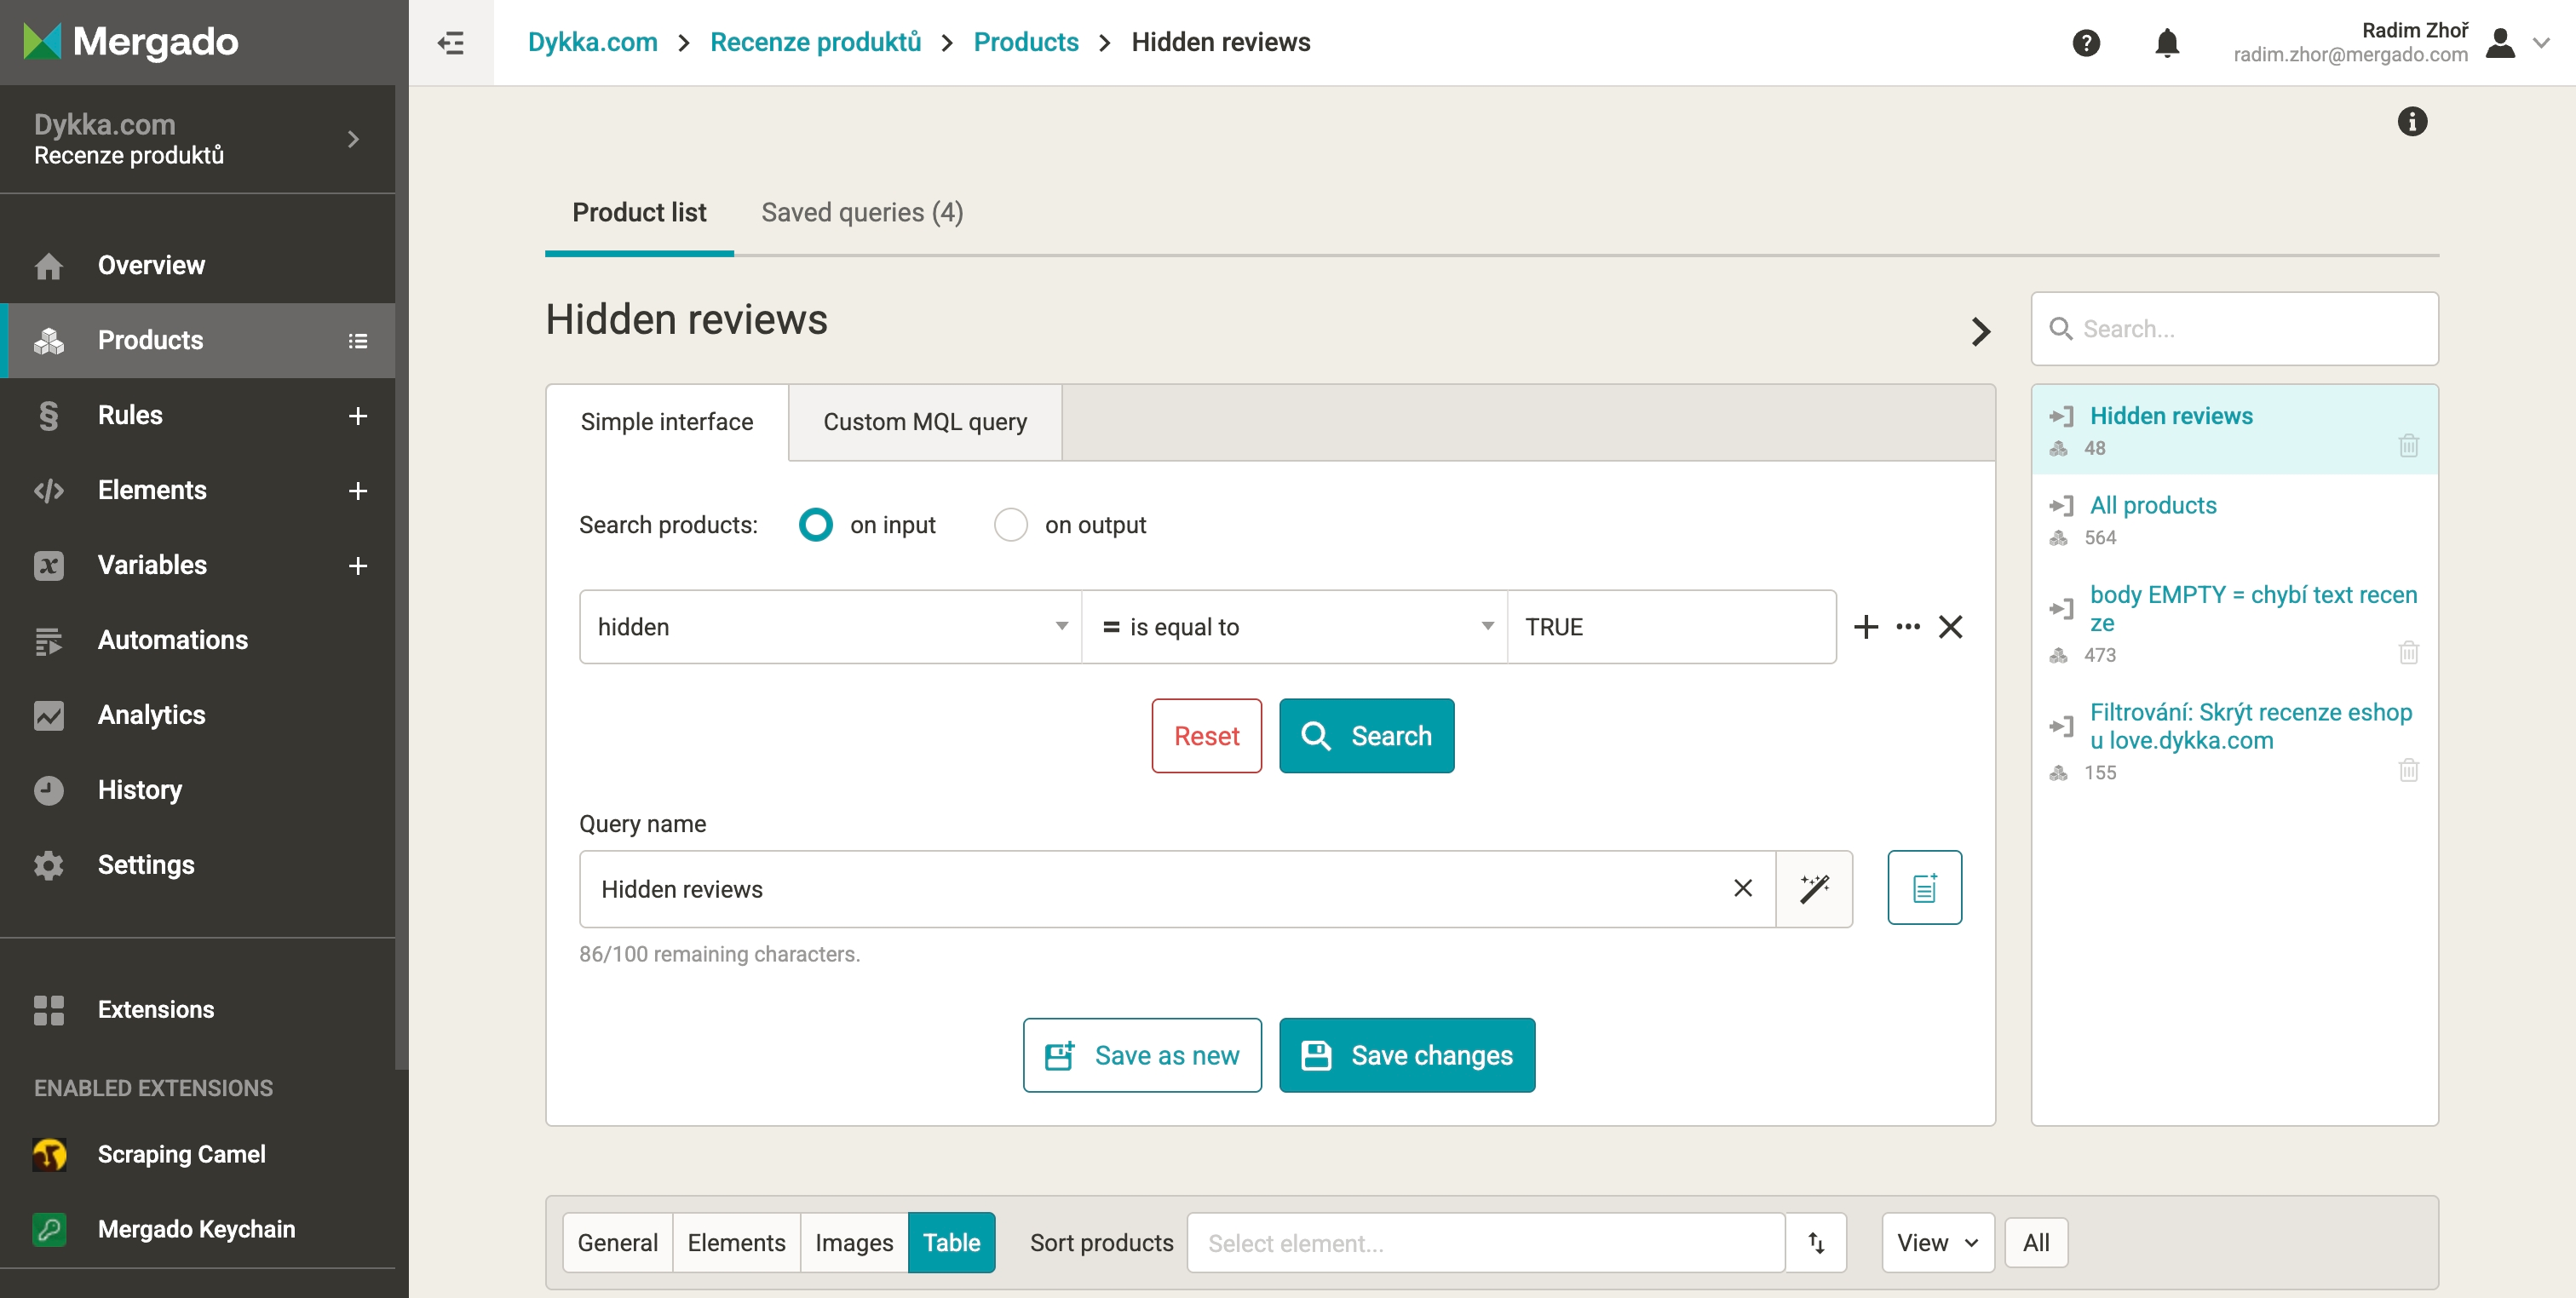
- In Mergado, hide reviews with
hidden=TRUE, if you do not want them to appear after the import.
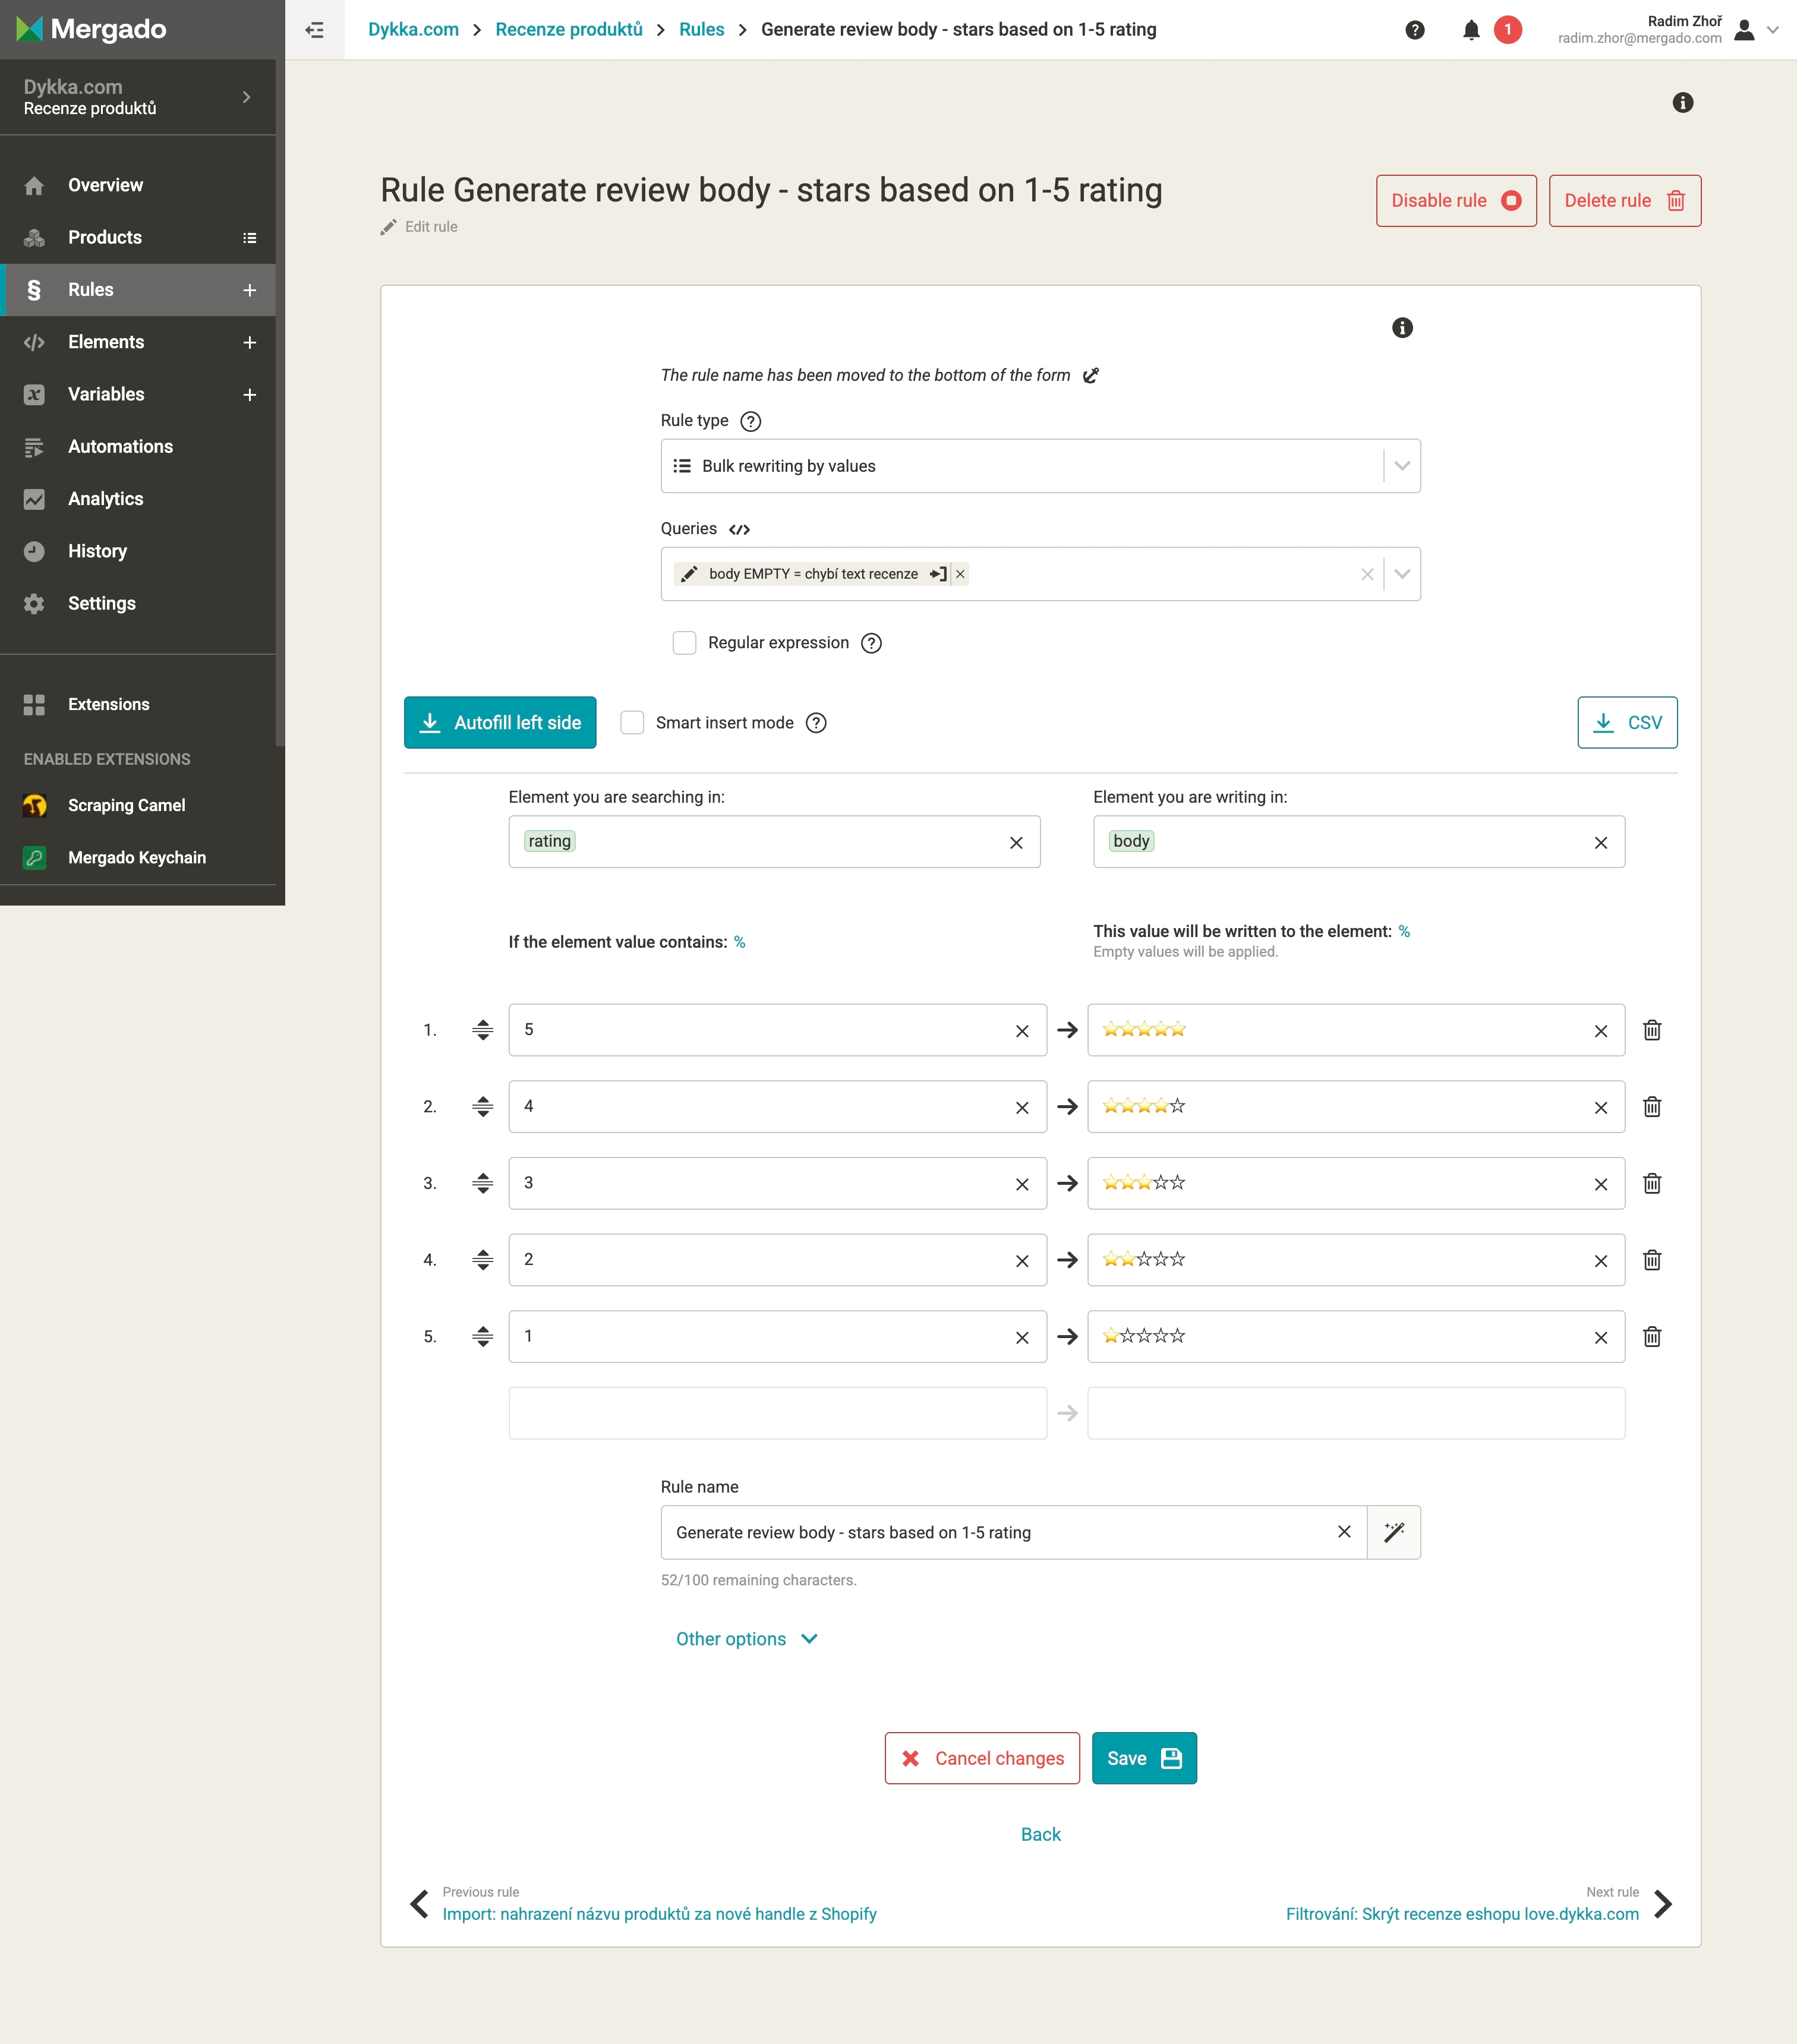
- Fix reviews without text (
body) – Shopify does not support them. You can:
- Add any text to the
body field.
-
Add star emojis according to the rating (rating → body) instead of text. This is what we did, see image:
- Download the CSV file.
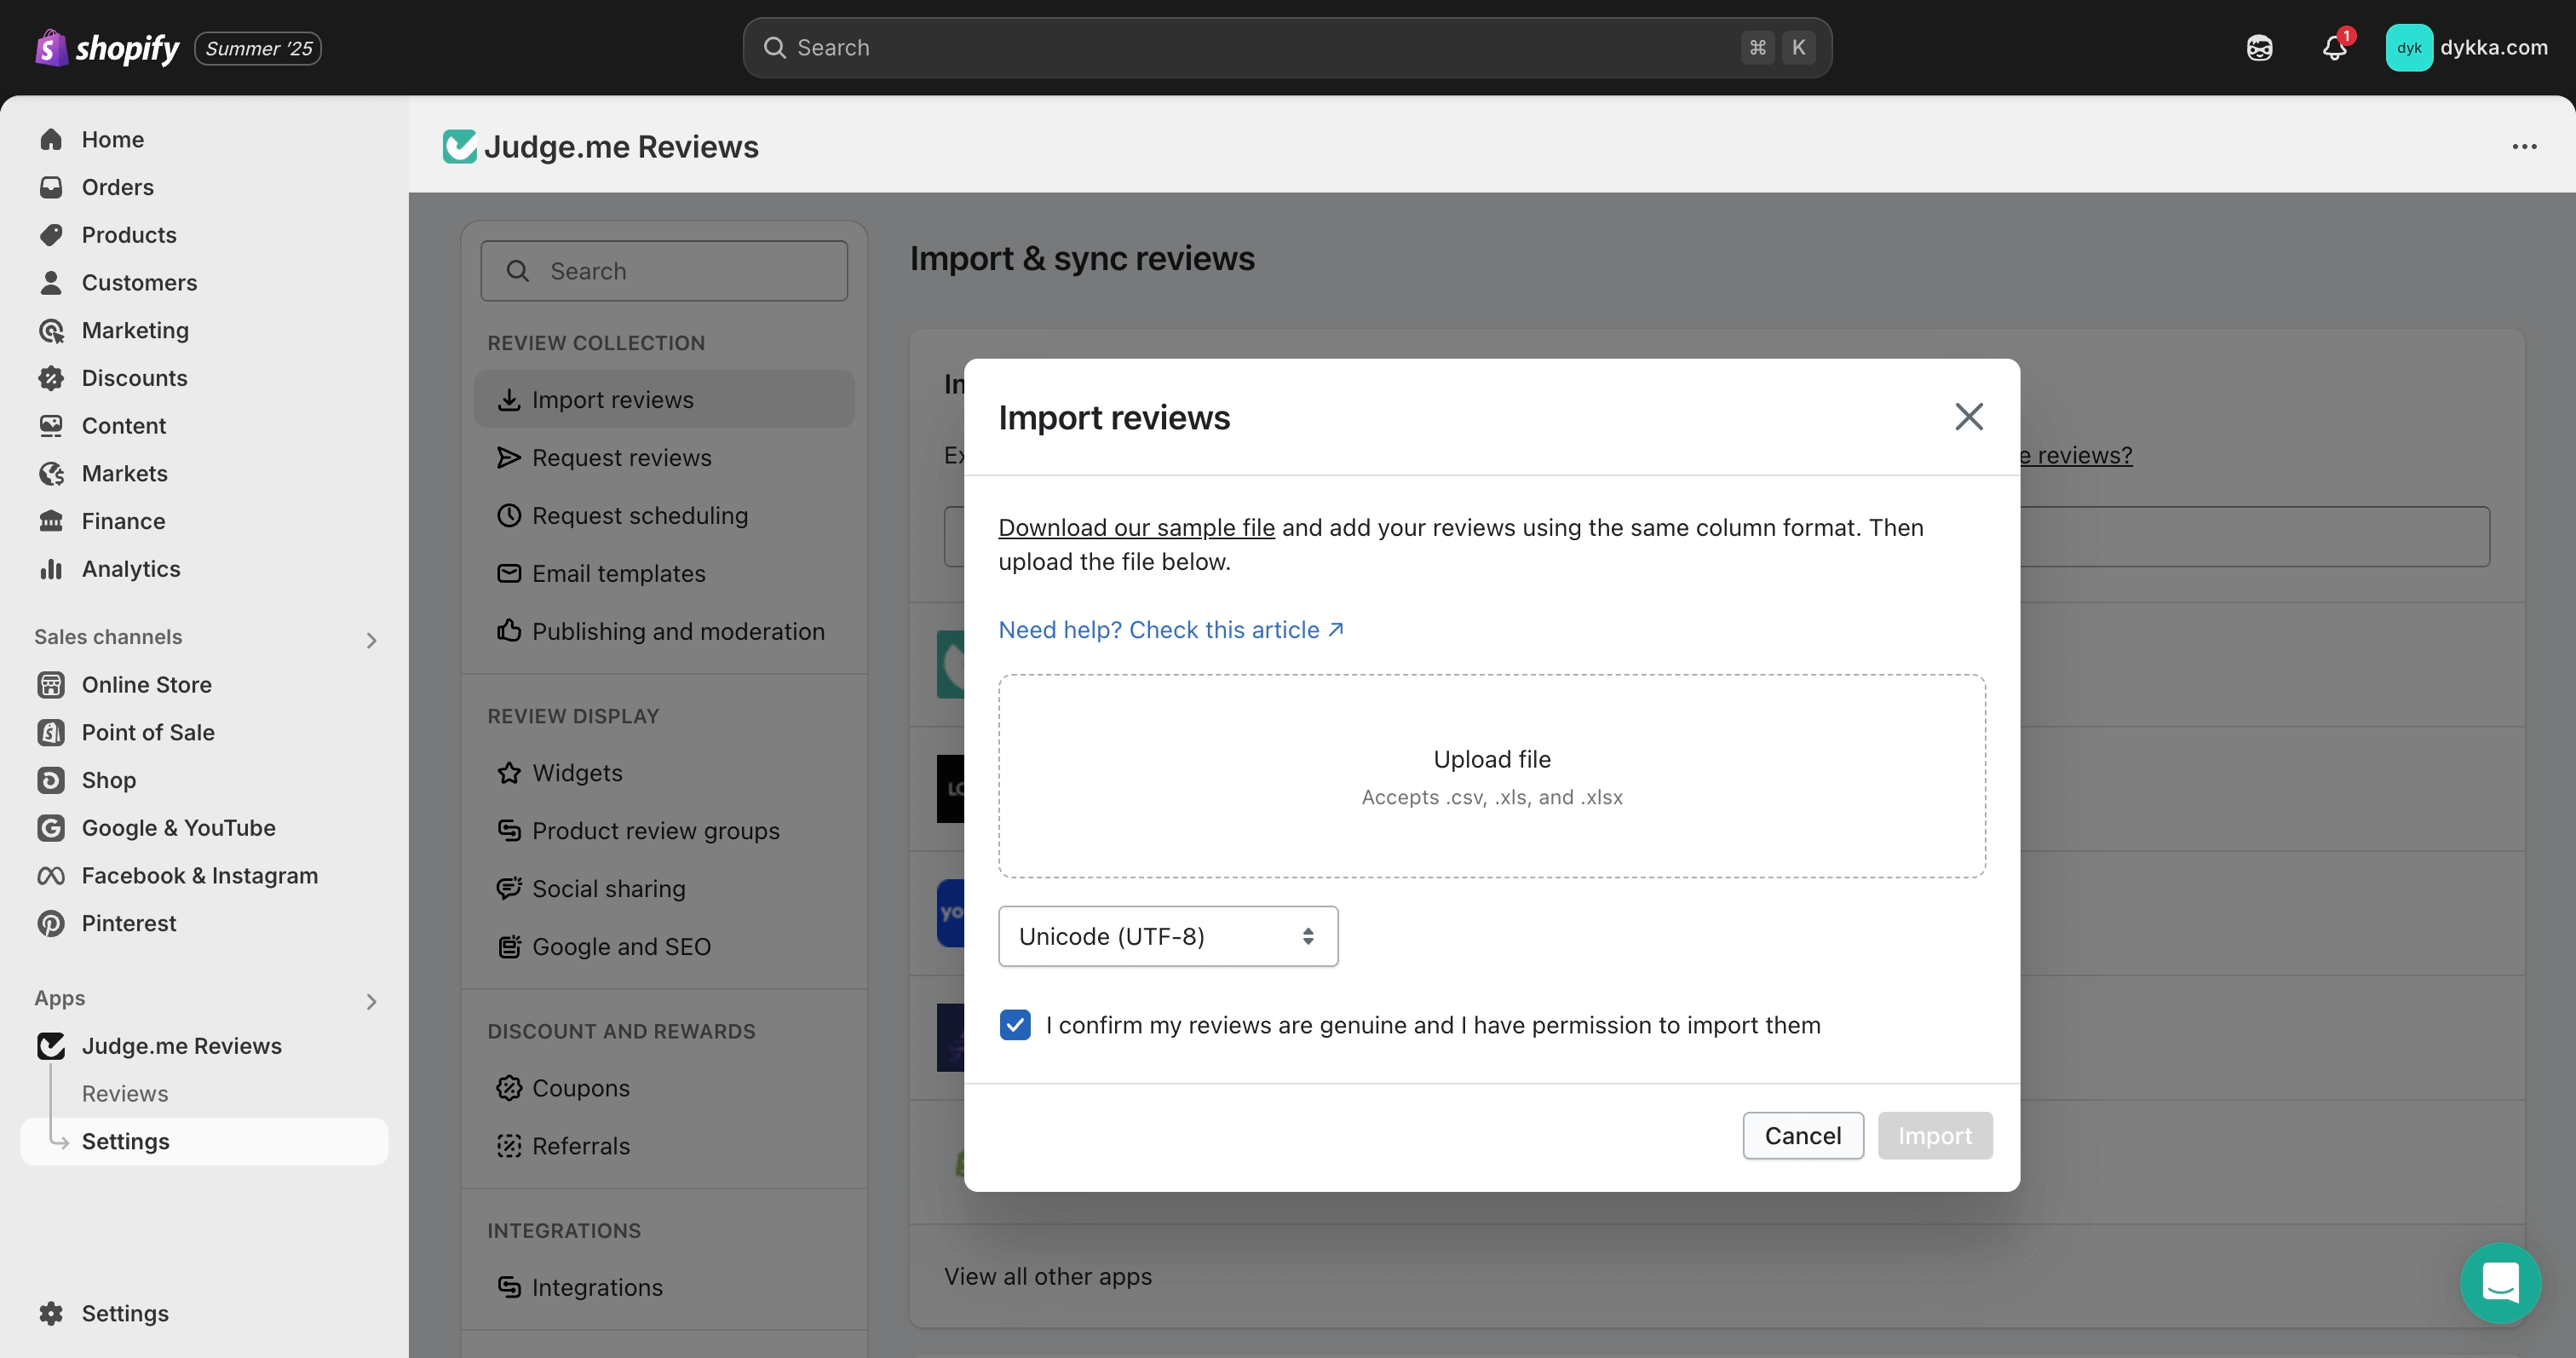
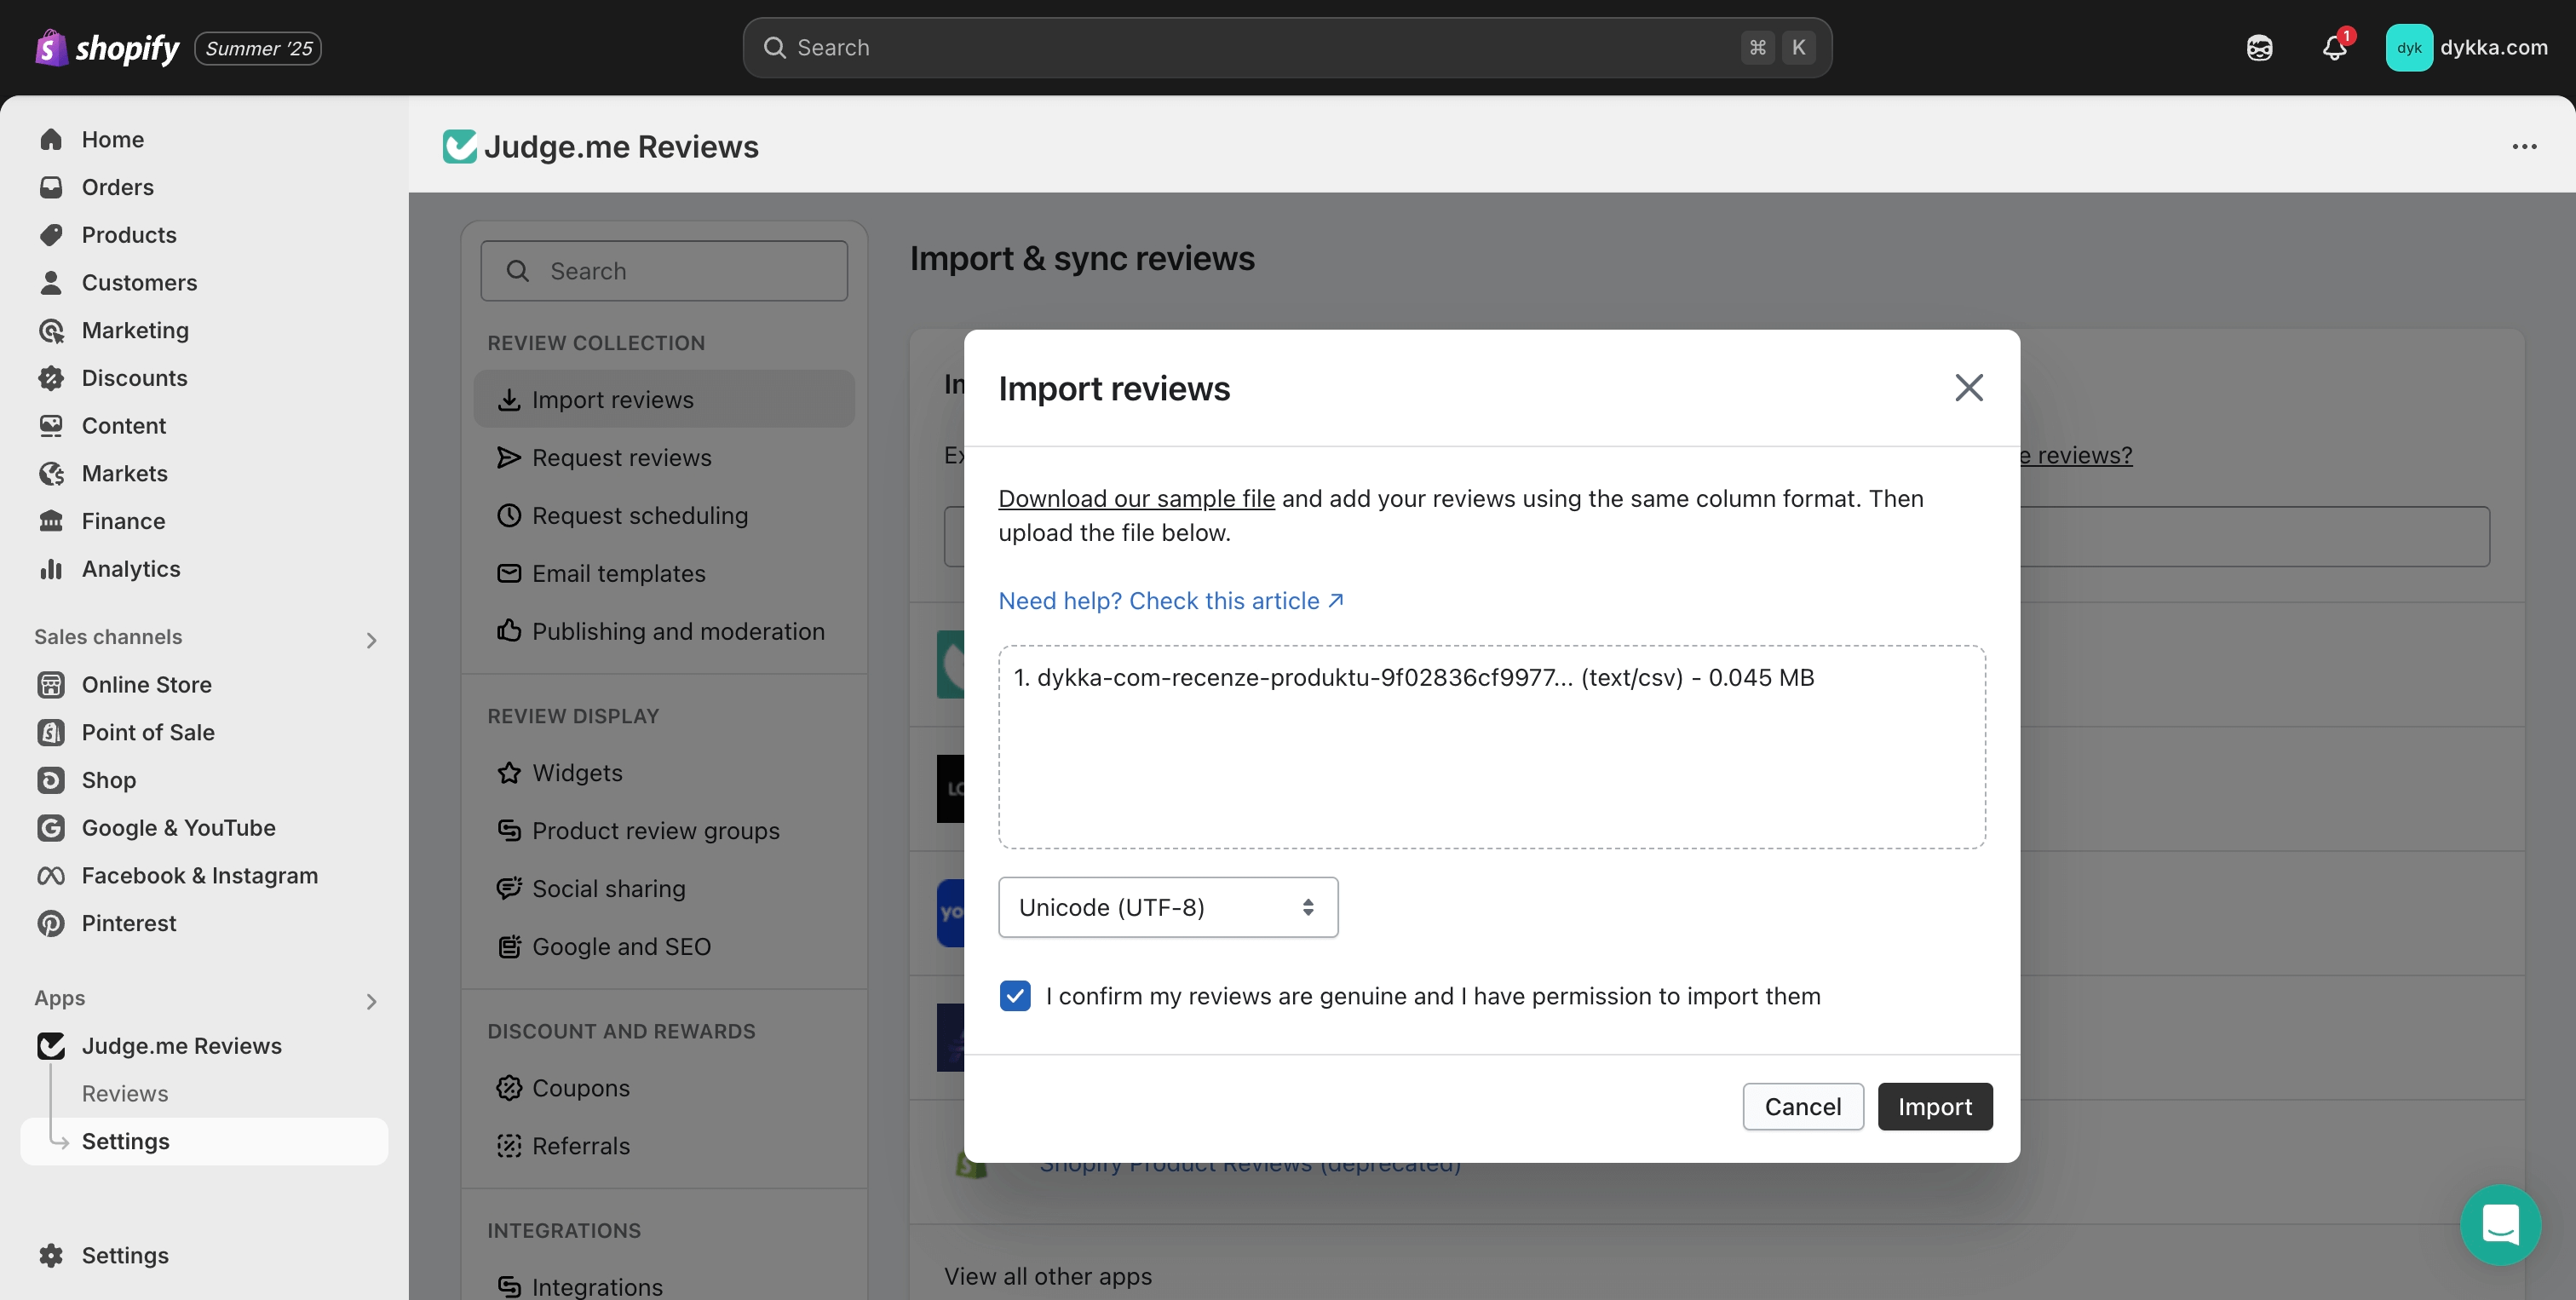
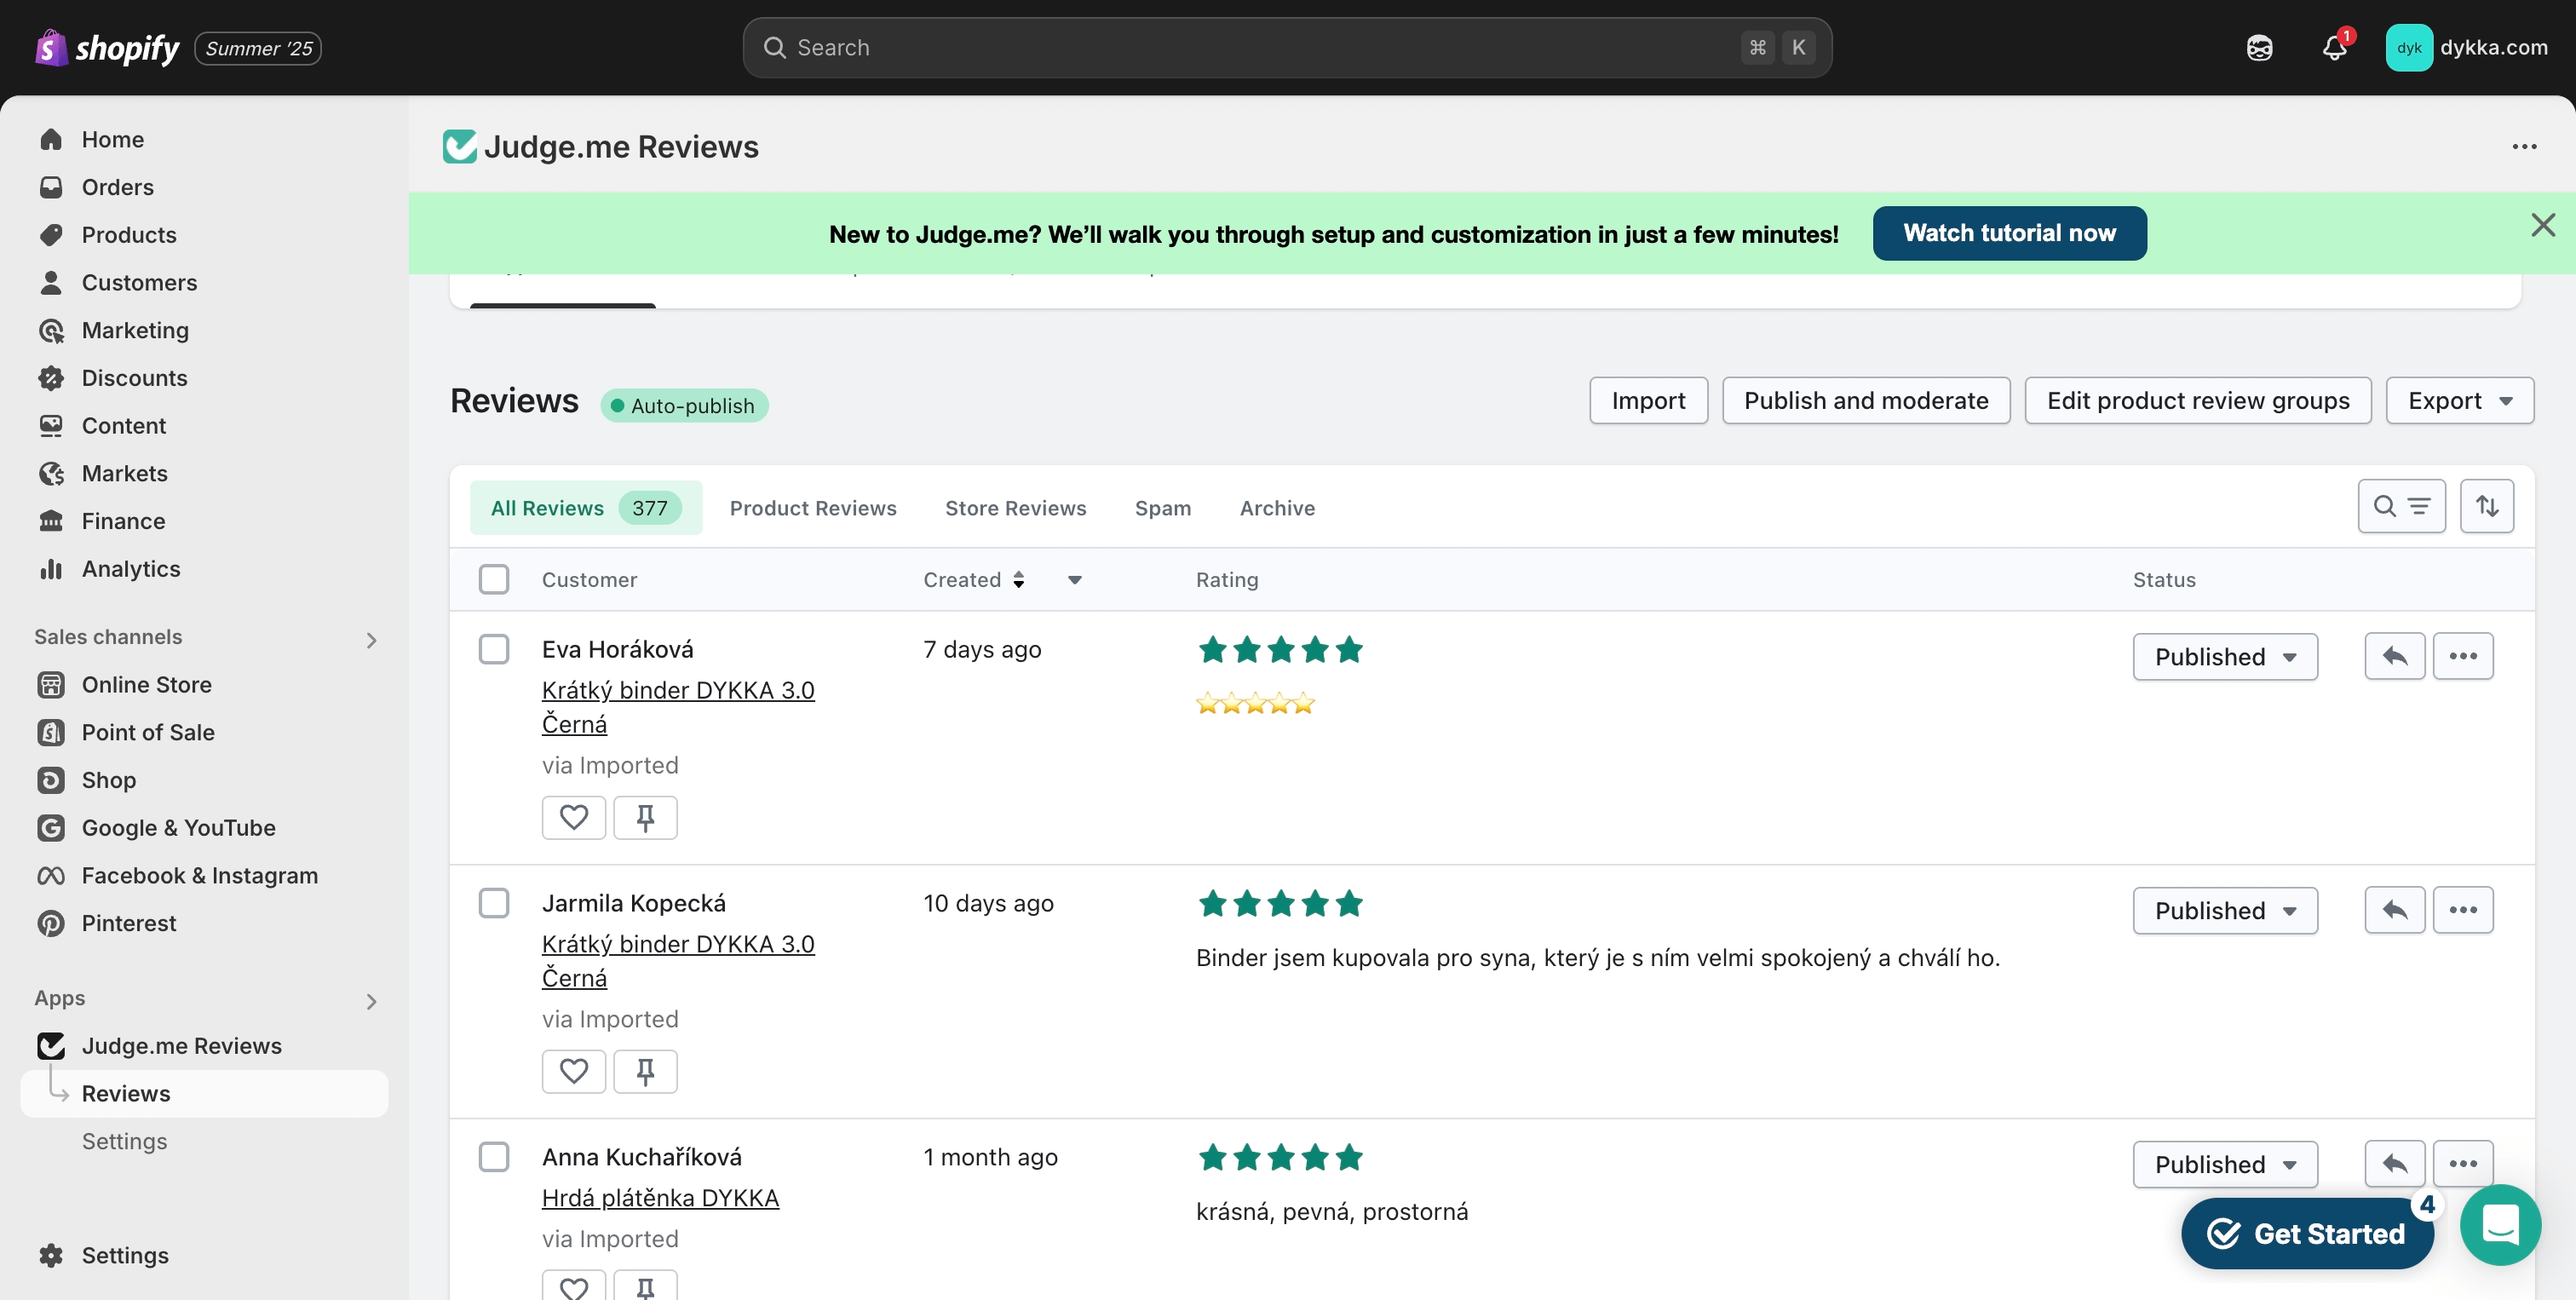
Shopify
- Activate the Judge.me Reviews app.
- Go to Apps → Judge.me Reviews → Reviews → Import reviews → Judgeme Format → Upload file.
- Upload the prepared CSV file.
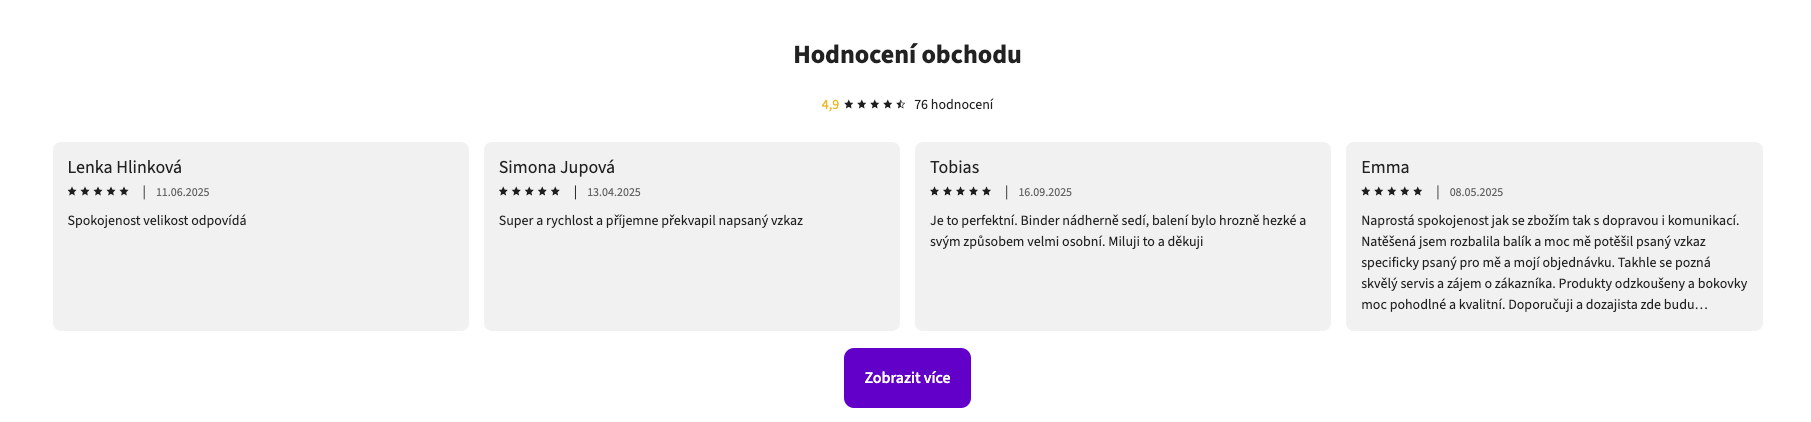
3.5 Shop reviews
3.5.1 What we need
Similar to product reviews, Shoptet does not support exporting shop reviews in a standard format. We exported them using our own script in Judge.me format and imported them into Shopify.
Shopify doesn’t support shop-level reviews natively, so we created a dummy product and assigned all shop reviews to it.
You need:
- Mergado account – for data prep
- Custom script – for exporting reviews
- Access to Shoptet admin
- Access to Shopify admin
- Google Sheets – for merging data
- Shopify app: Judge.me – for review import
- Dummy product in Shopify – to attach shop reviews
3.5.2 Step-by-step
Shoptet
- In admin, go to Marketing → Reviews → Shop reviews.
- Right-click the page and select Inspect
- In the Sources tab, create a new snippet and paste the script that:
- Generates a CSV in Judge.me format.
- Automatically starts the download.
- Run the script on all pages — max 50 reviews per page.
- Merge all files in Google Sheets.
Mergado
- Import the CSV (from Google Sheets) into Mergado to edit the data. Use Plain CSV for both input and output.
- Data adjustments
- Hide unpublished reviews (
hidden=TRUE).
- For reviews without text (
body), add text or generate star emojis based on the rating (rating → body), see section 3.4.3.
- Download the prepared CSV for import into Shopify.
3.6 Brands
3.6.1 What we need
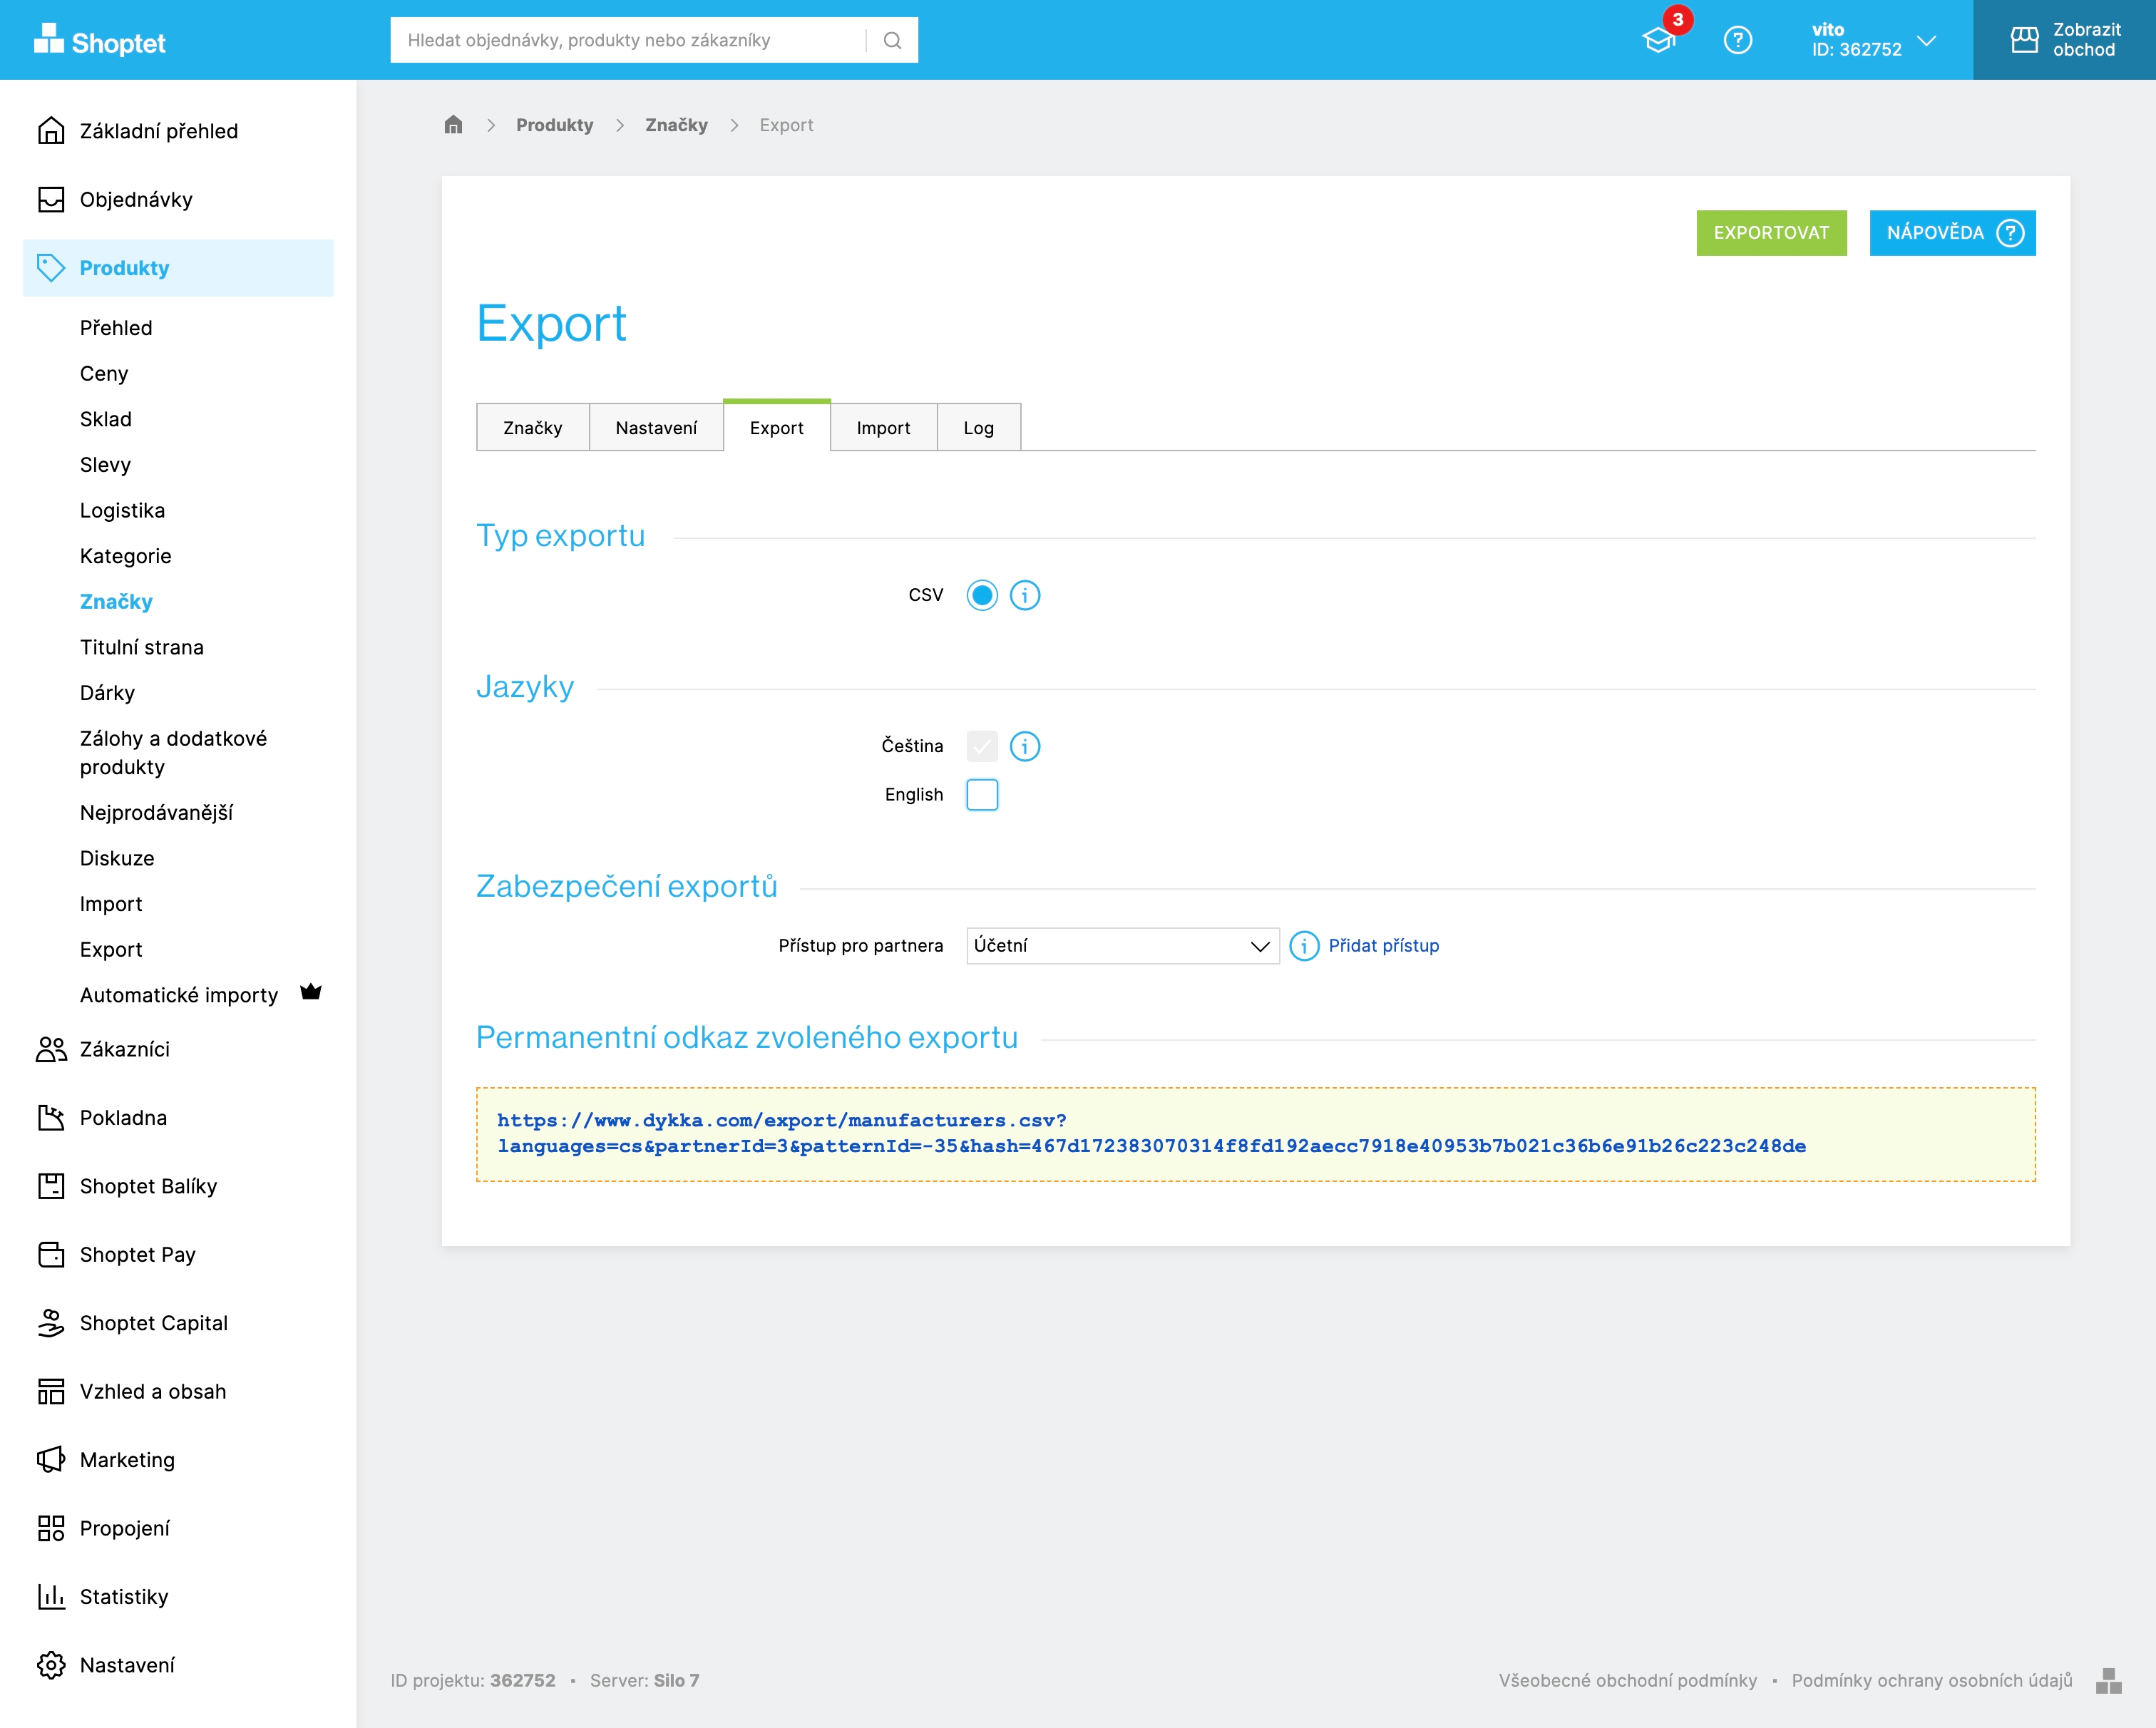
Shoptet allows brand export in CSV format. We adjusted the CSV in Mergado Editor (cleaning HTML tags, fixing links, filtering data) and uploaded brands into Shopify using Shopify Importer.
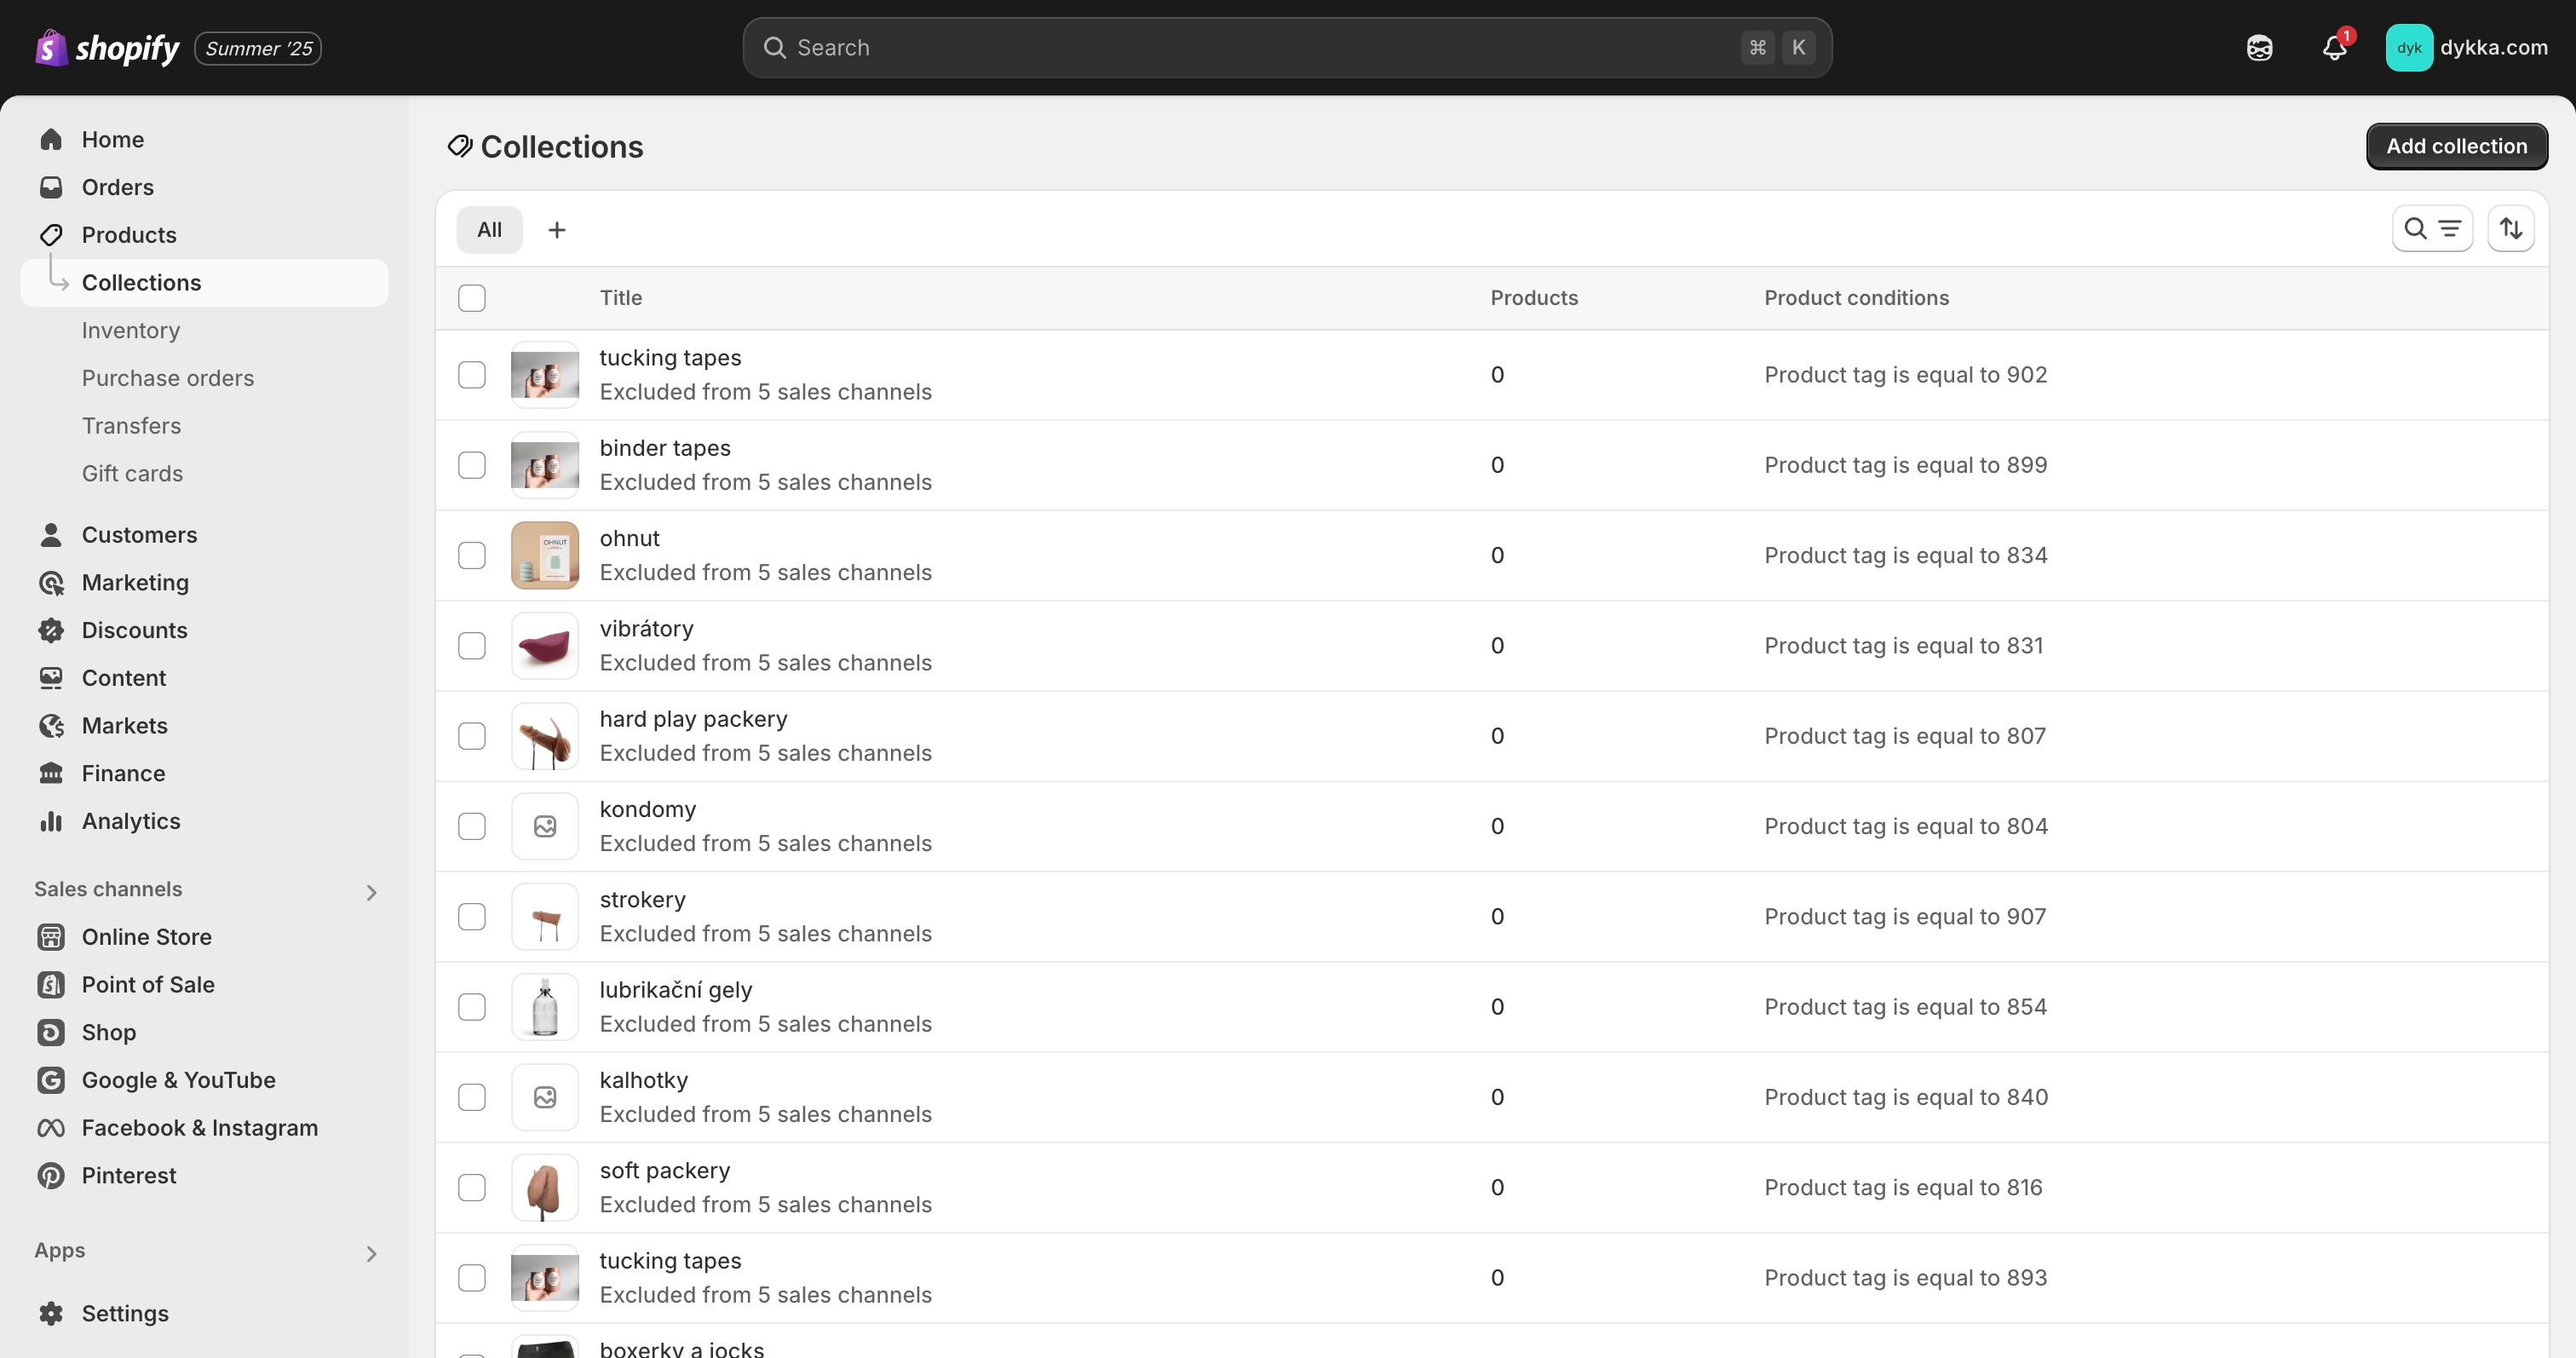
Shopify does not treat brands as a separate entity, so we imported them as Smart Collections.
You need:
- Access to Shoptet admin
- Access to Shopify admin
- Mergado account – for CSV cleanup
- Mergado extension: Shopify Importer – to import via API
3.6.2 Step-by-step
Shoptet
- In admin, go to Products → Brands → Export (CSV).
- Copy the feed URL.
3.7 Articles and pages
3.7.1 What we need
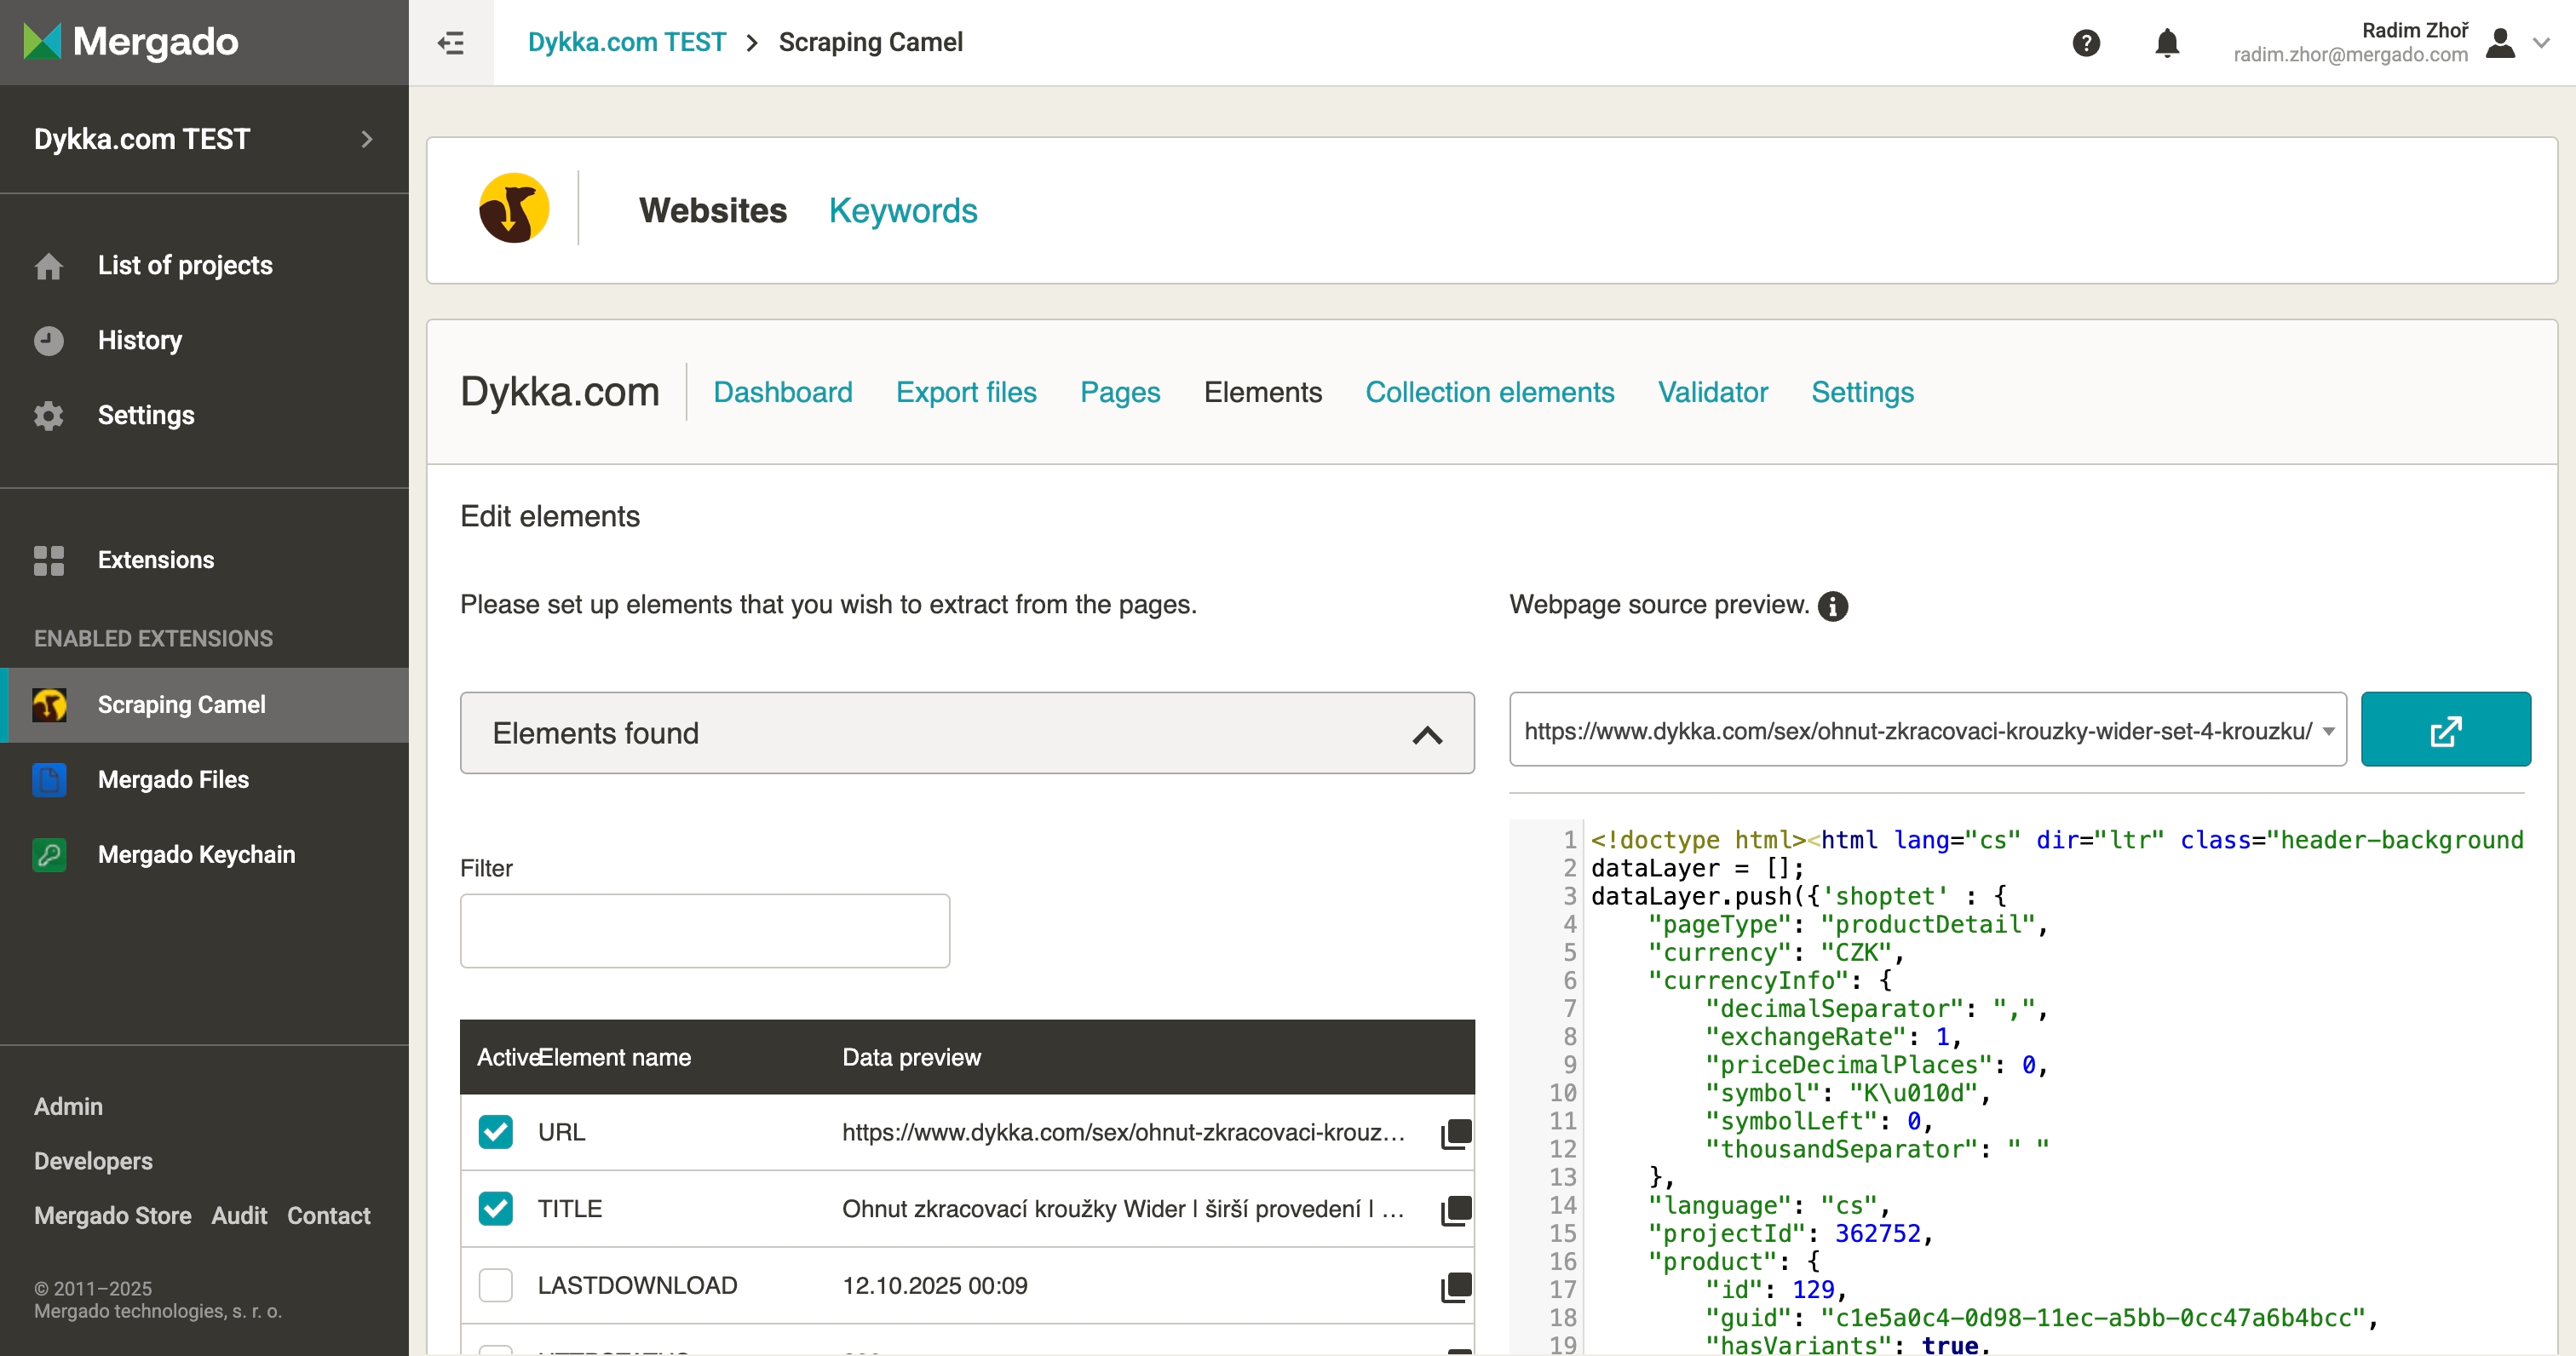
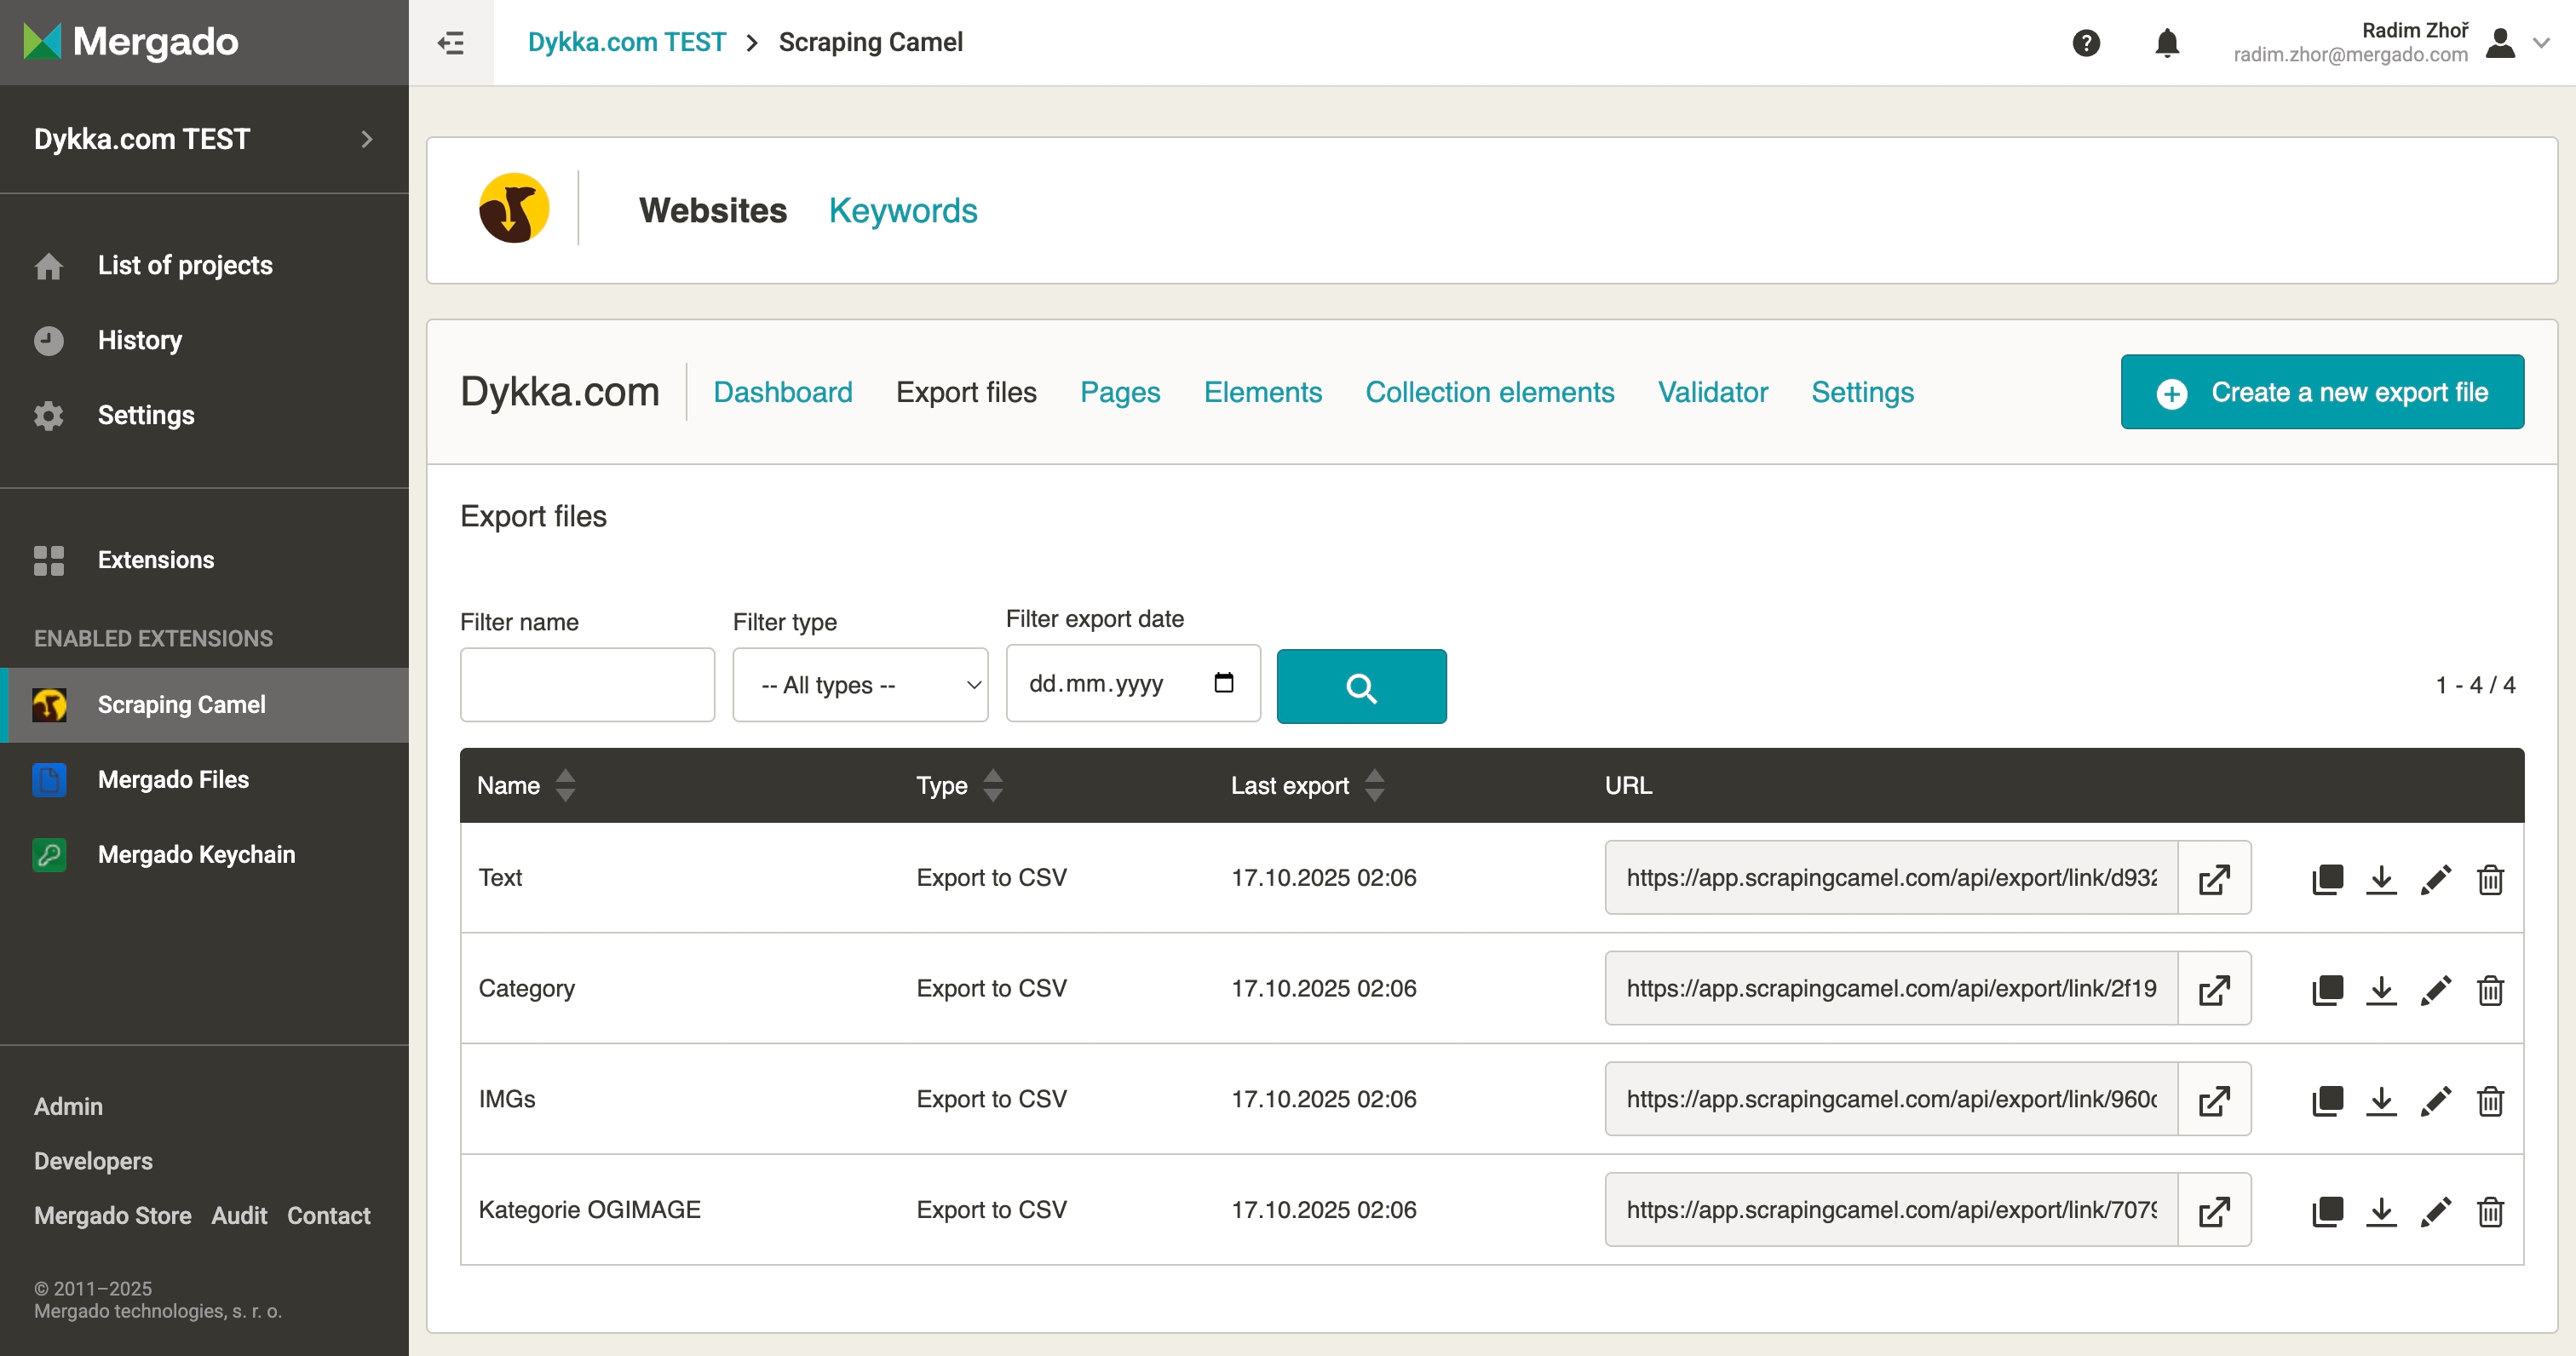
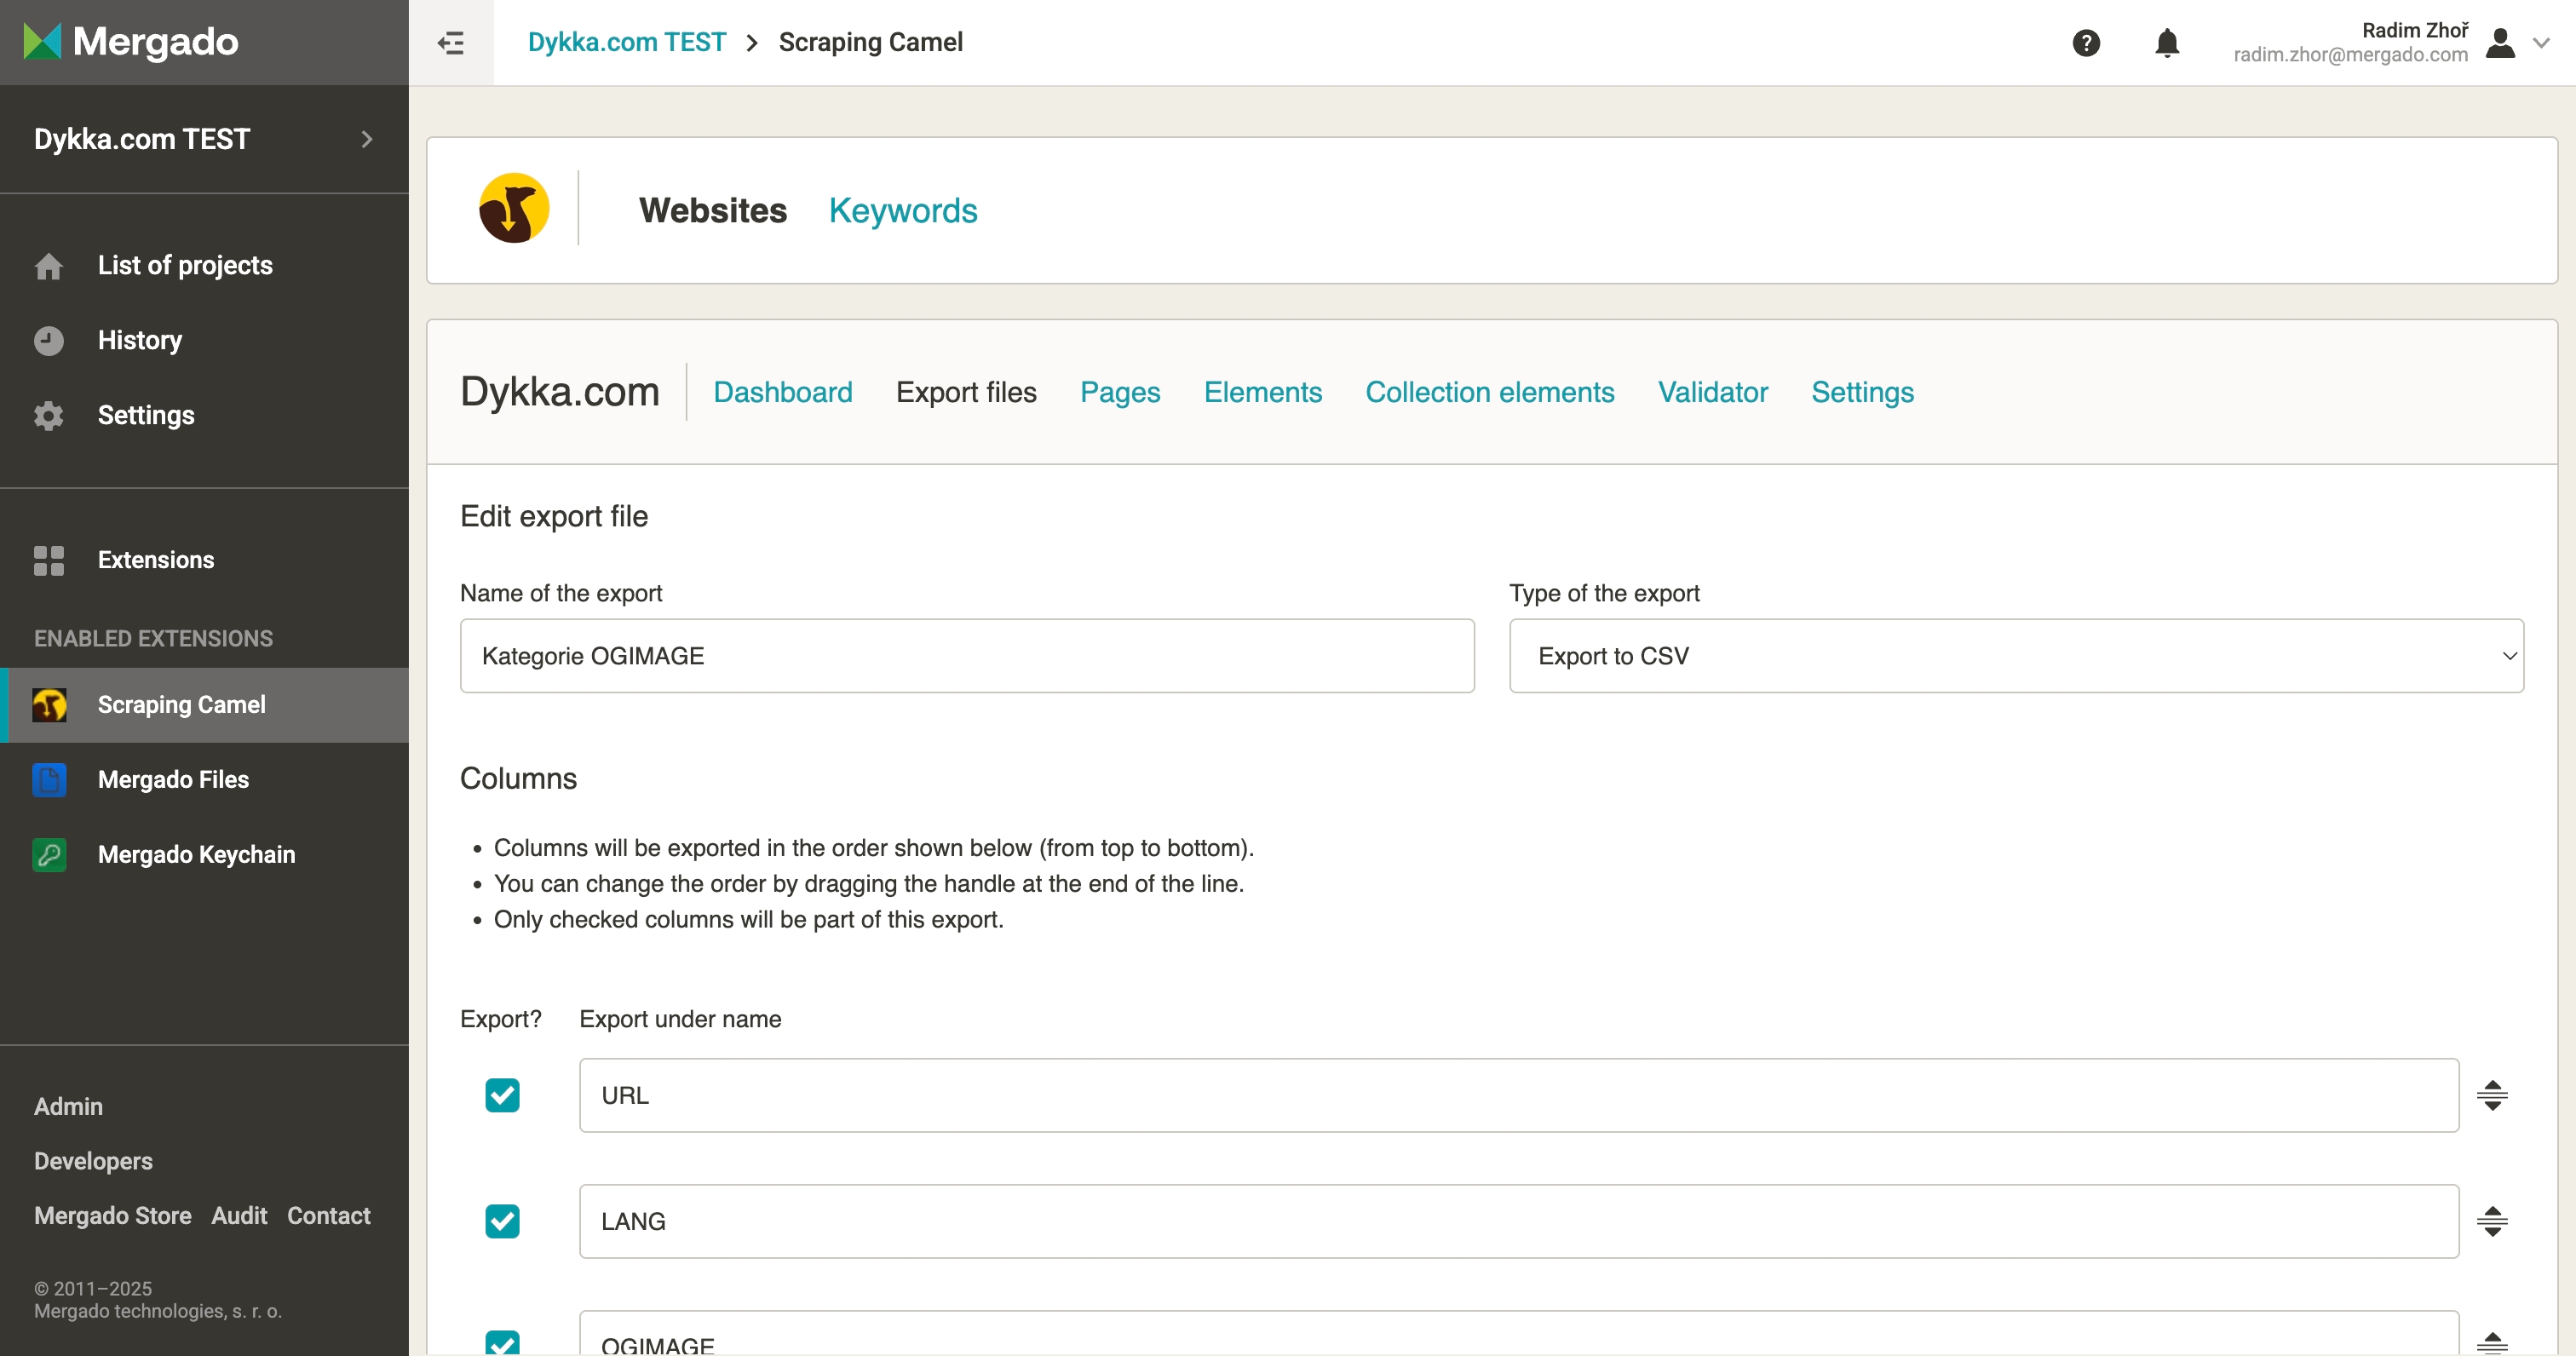
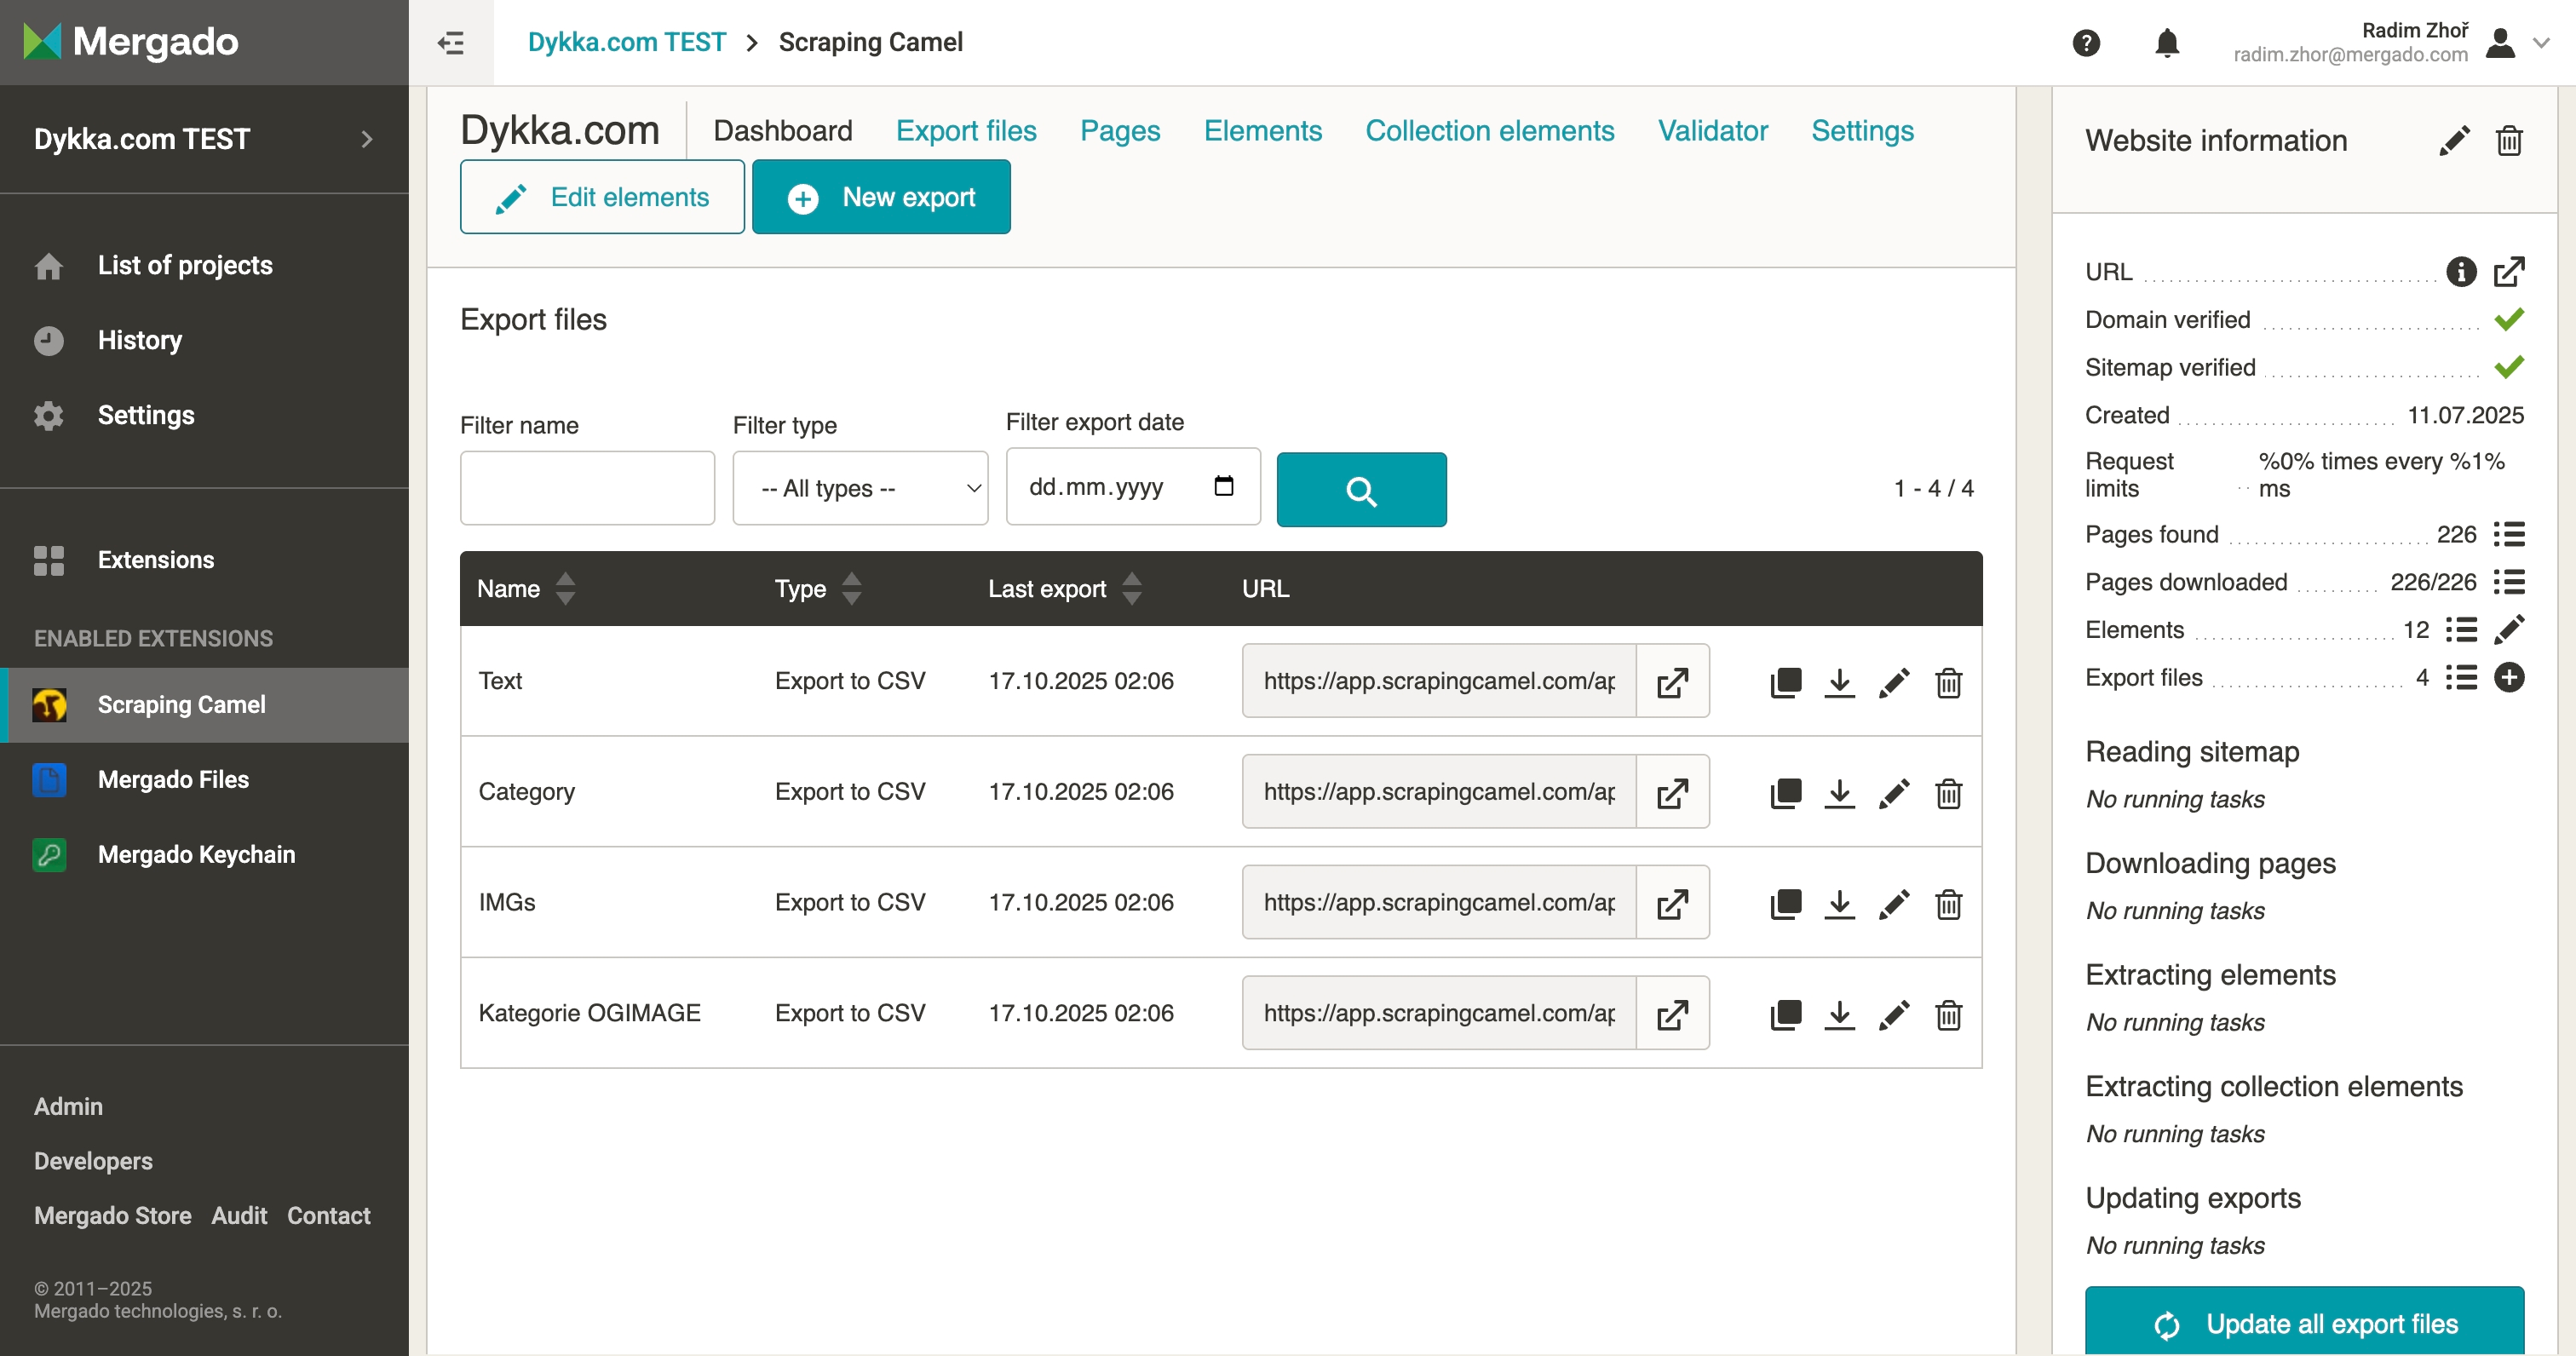
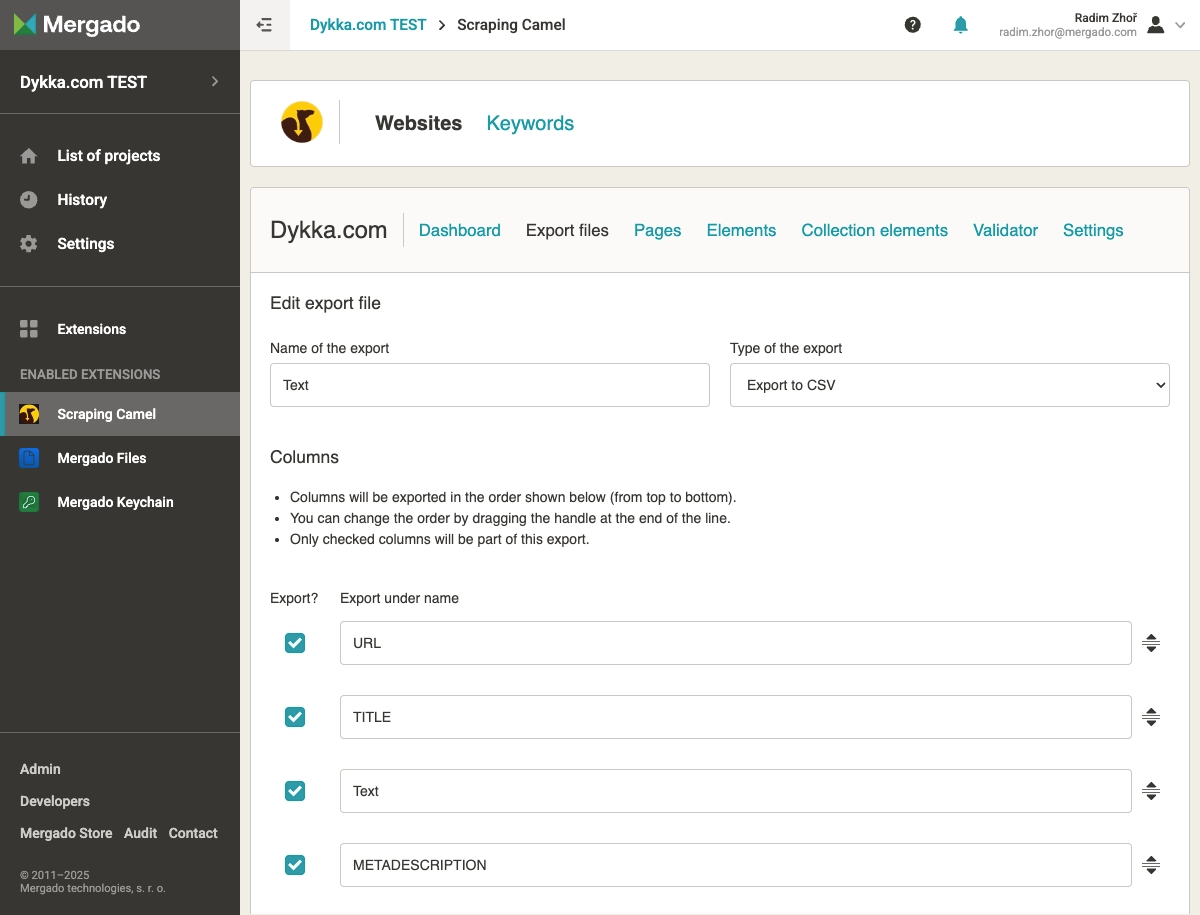
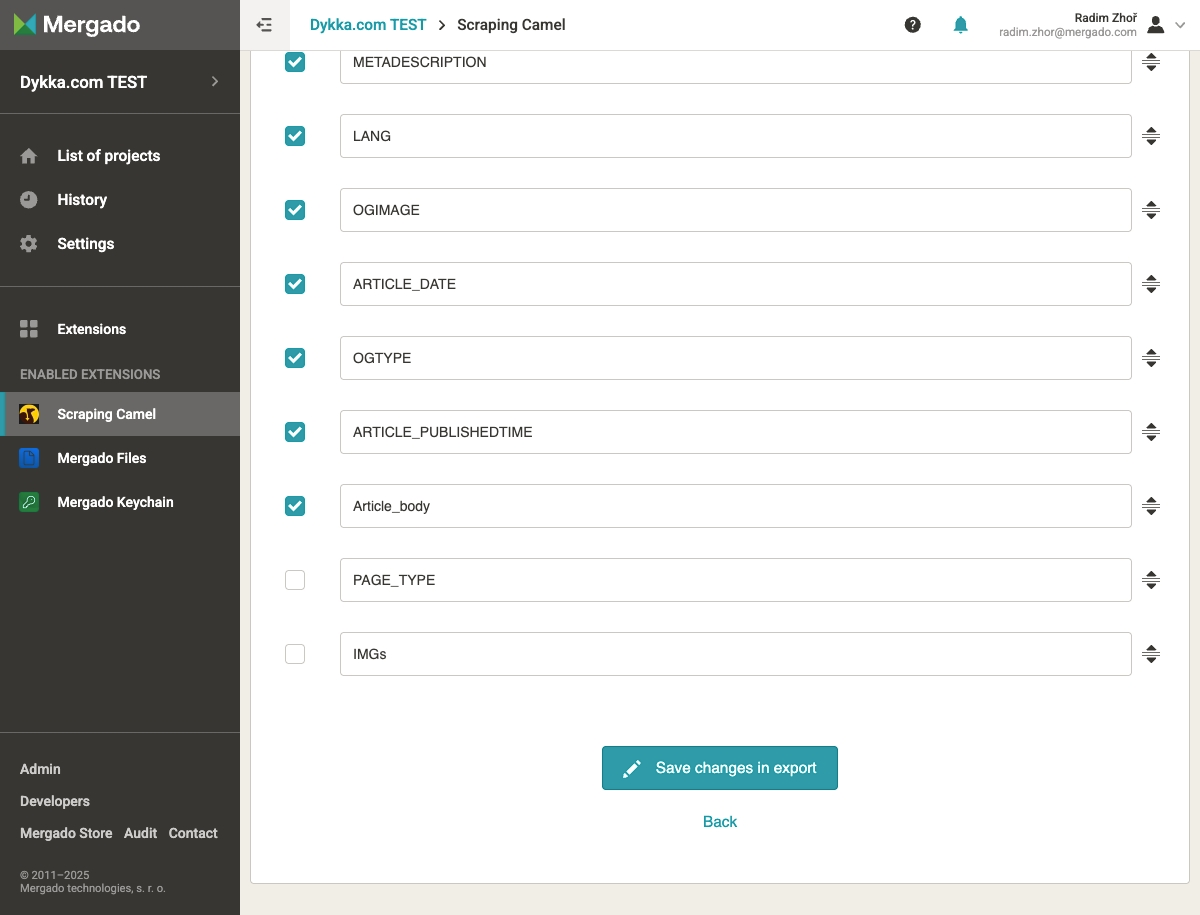
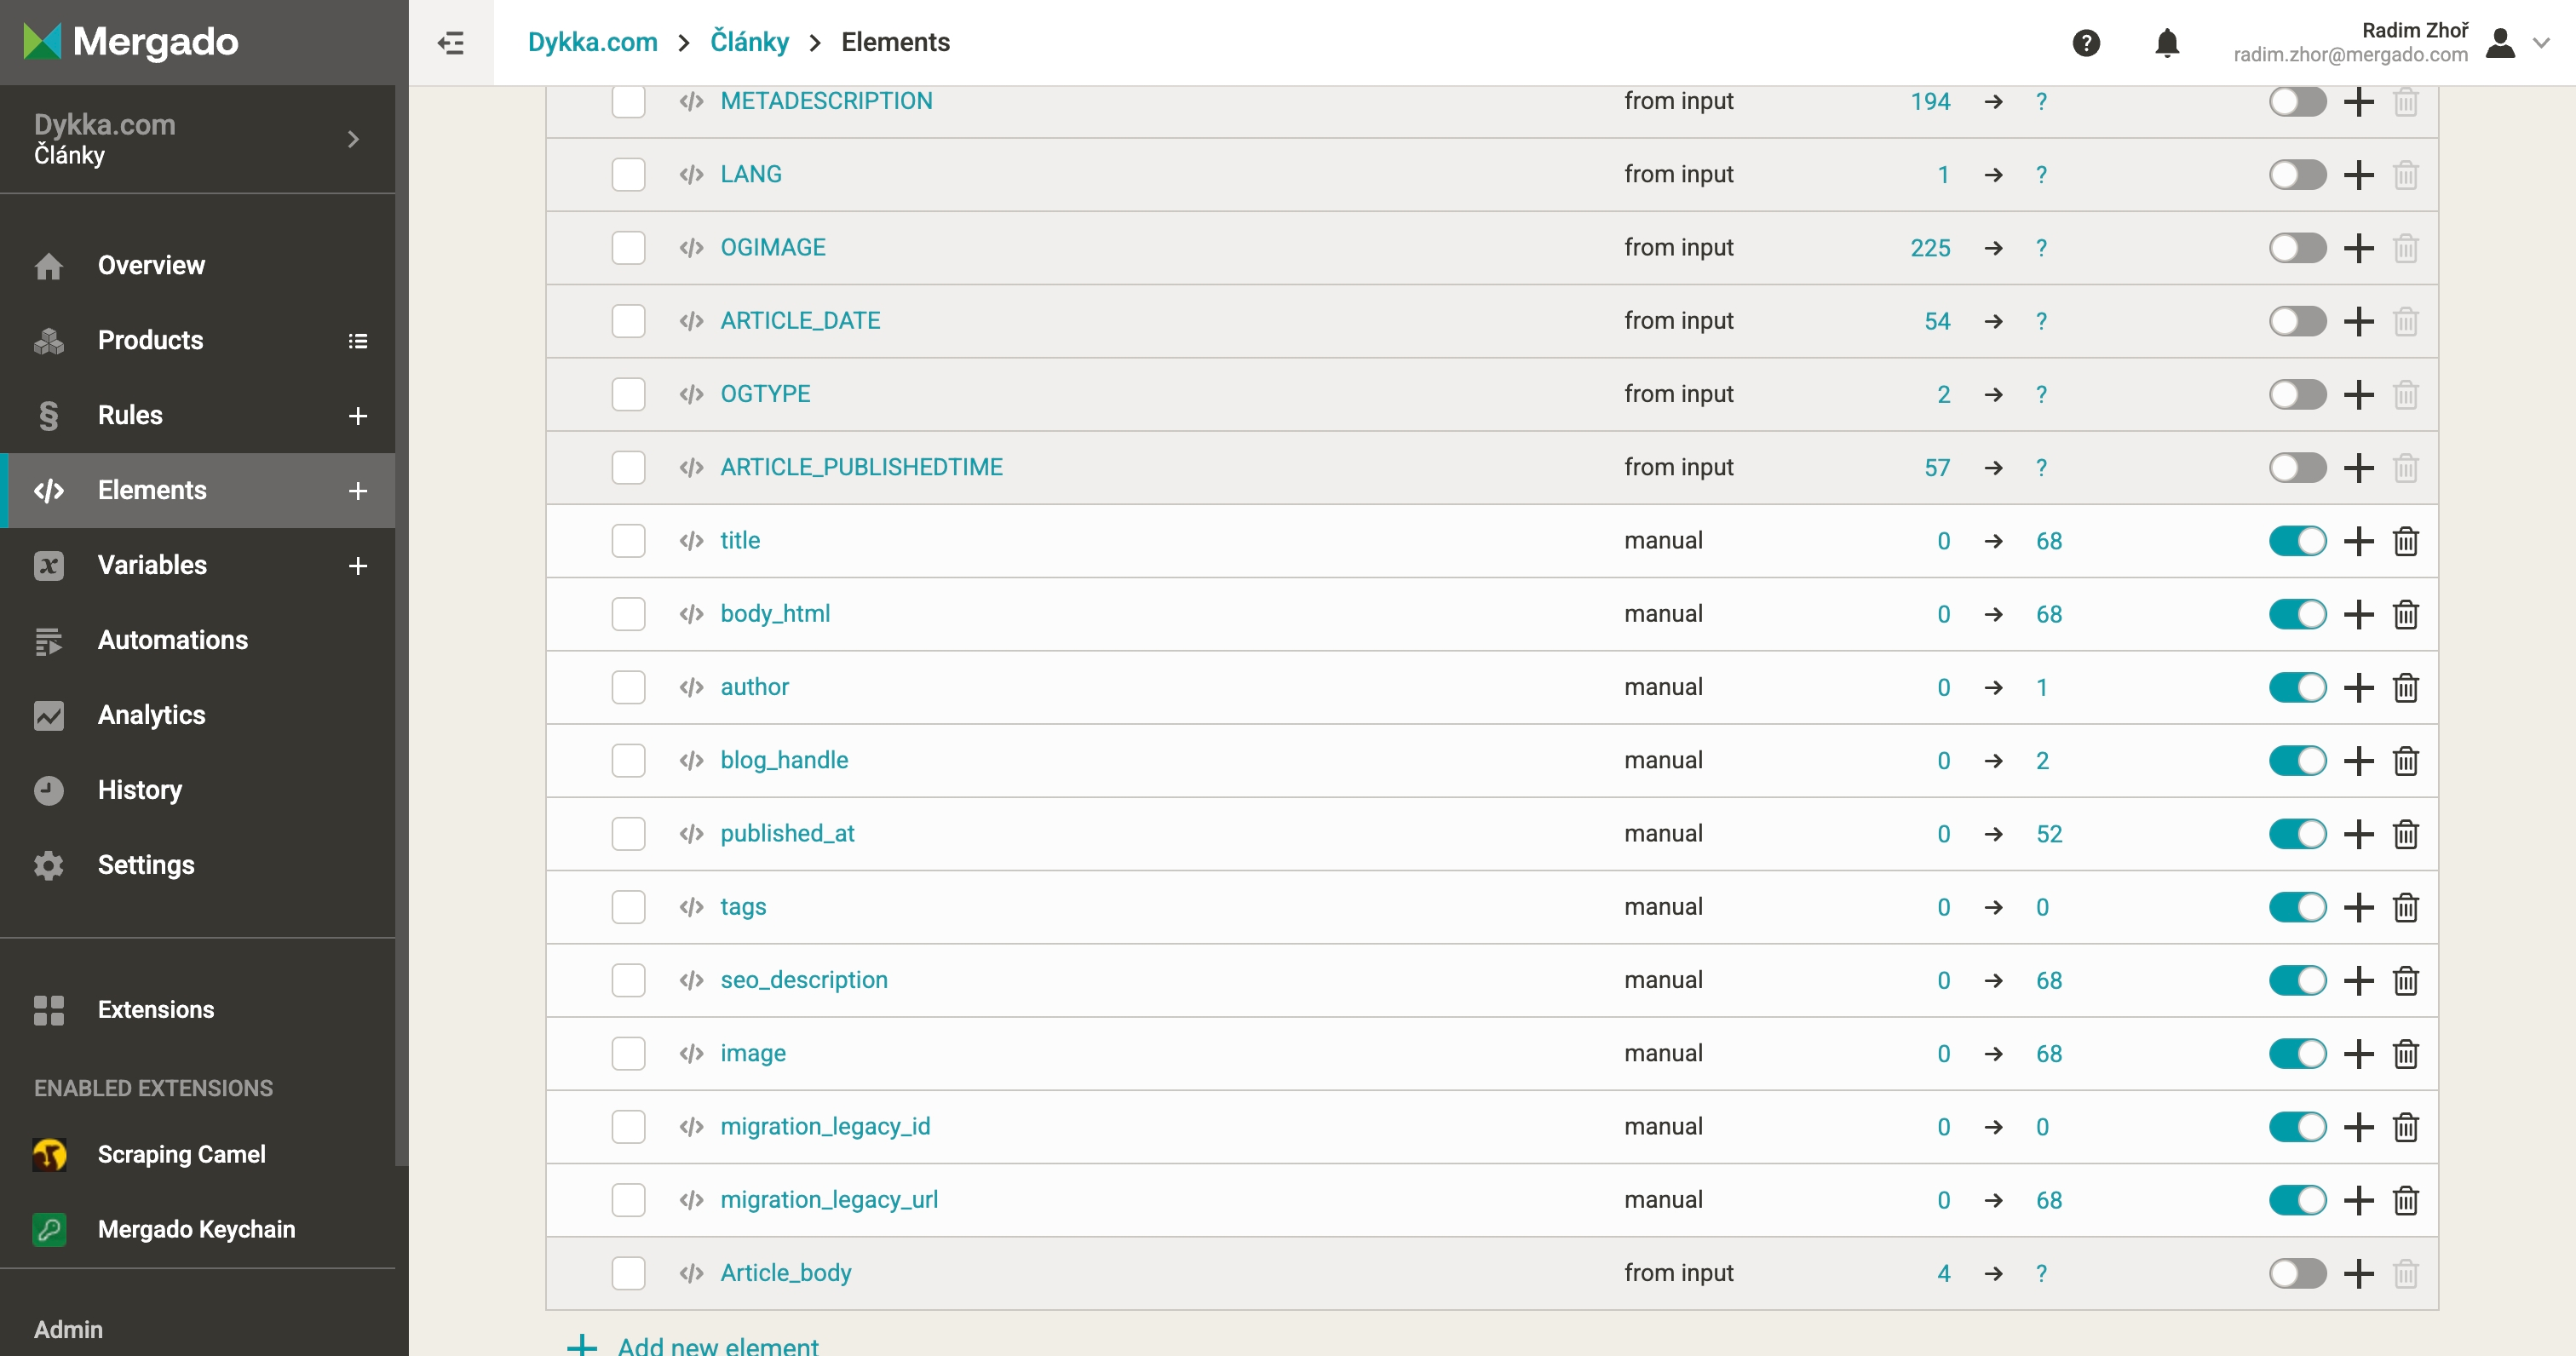
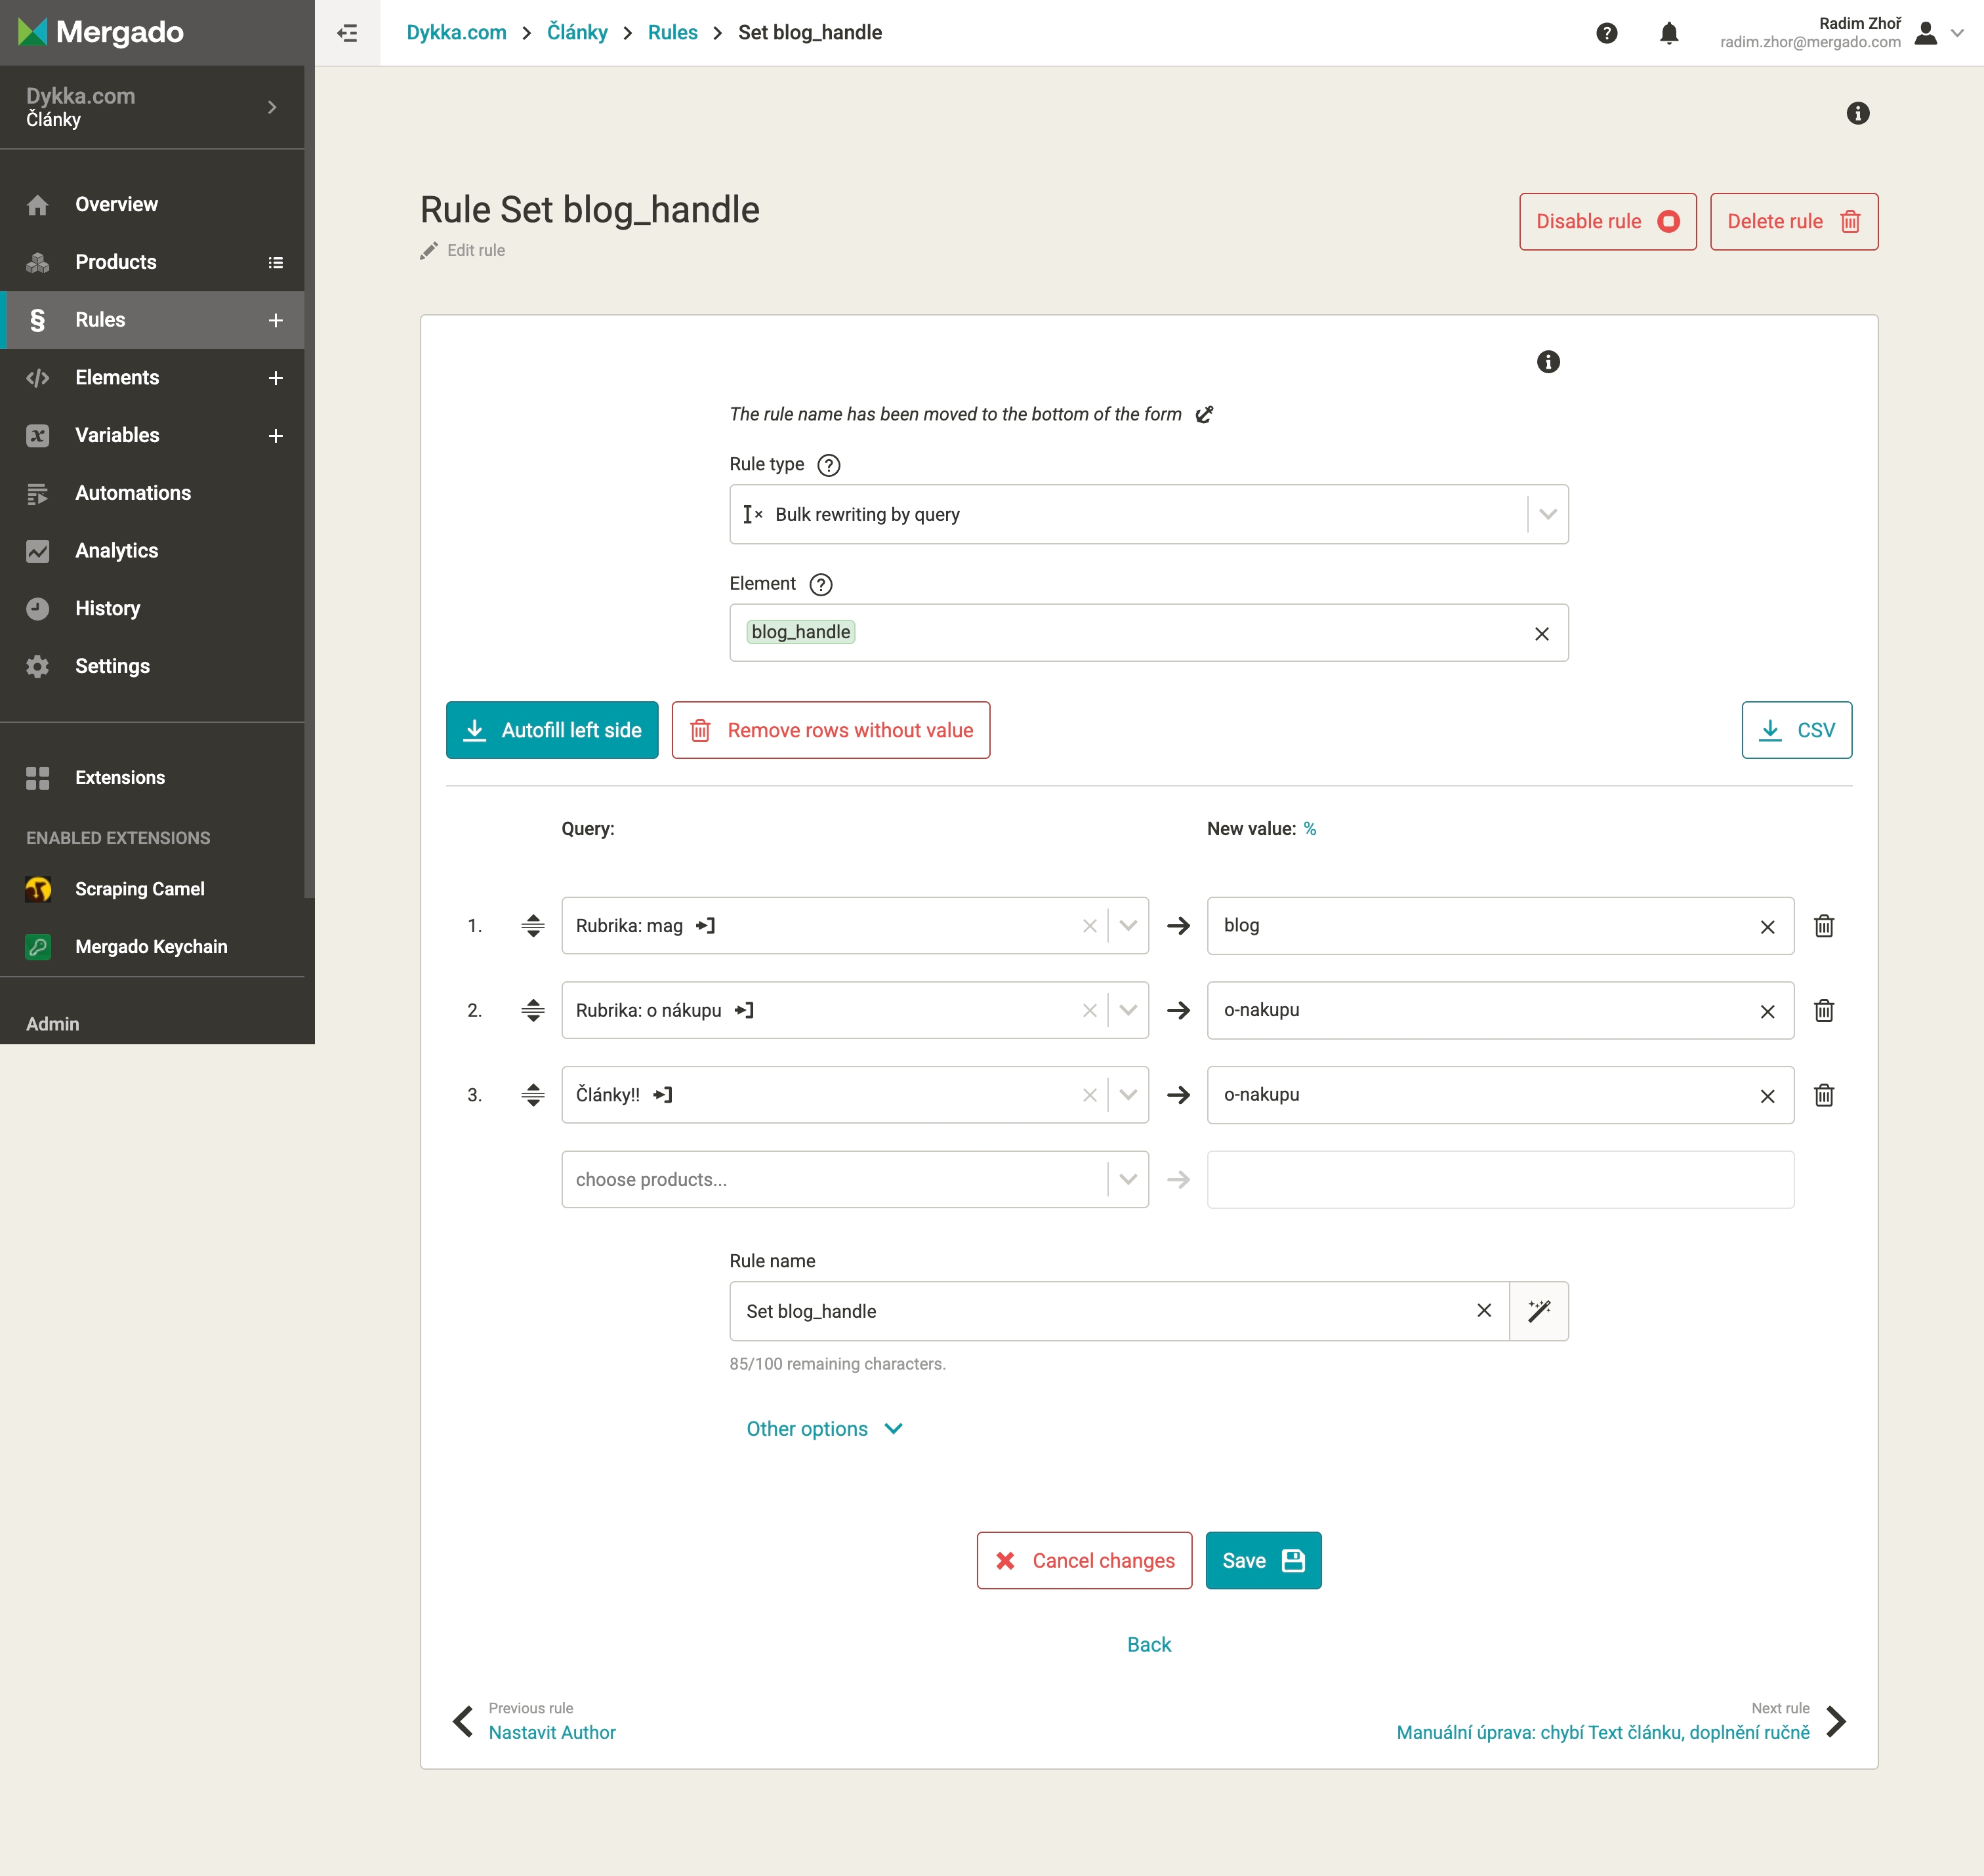
Shoptet cannot export articles in CSV. To retrieve them, we used Scraping Camel, edited data in Mergado Editor (assigned blog_handle, formatted text, fixed links), and imported them into Shopify via API using Shopify Importer.
On Shopify, Shoptet rubrics were turned into blogs. We created two blogs and split the articles accordingly.
You need:
- Access to Shoptet admin
- Access to Shopify admin
- Mergado account
- Mergado extension: Shopify Importer
- Mergado extension: Scraping Camel
3.7.2 Step-by-step
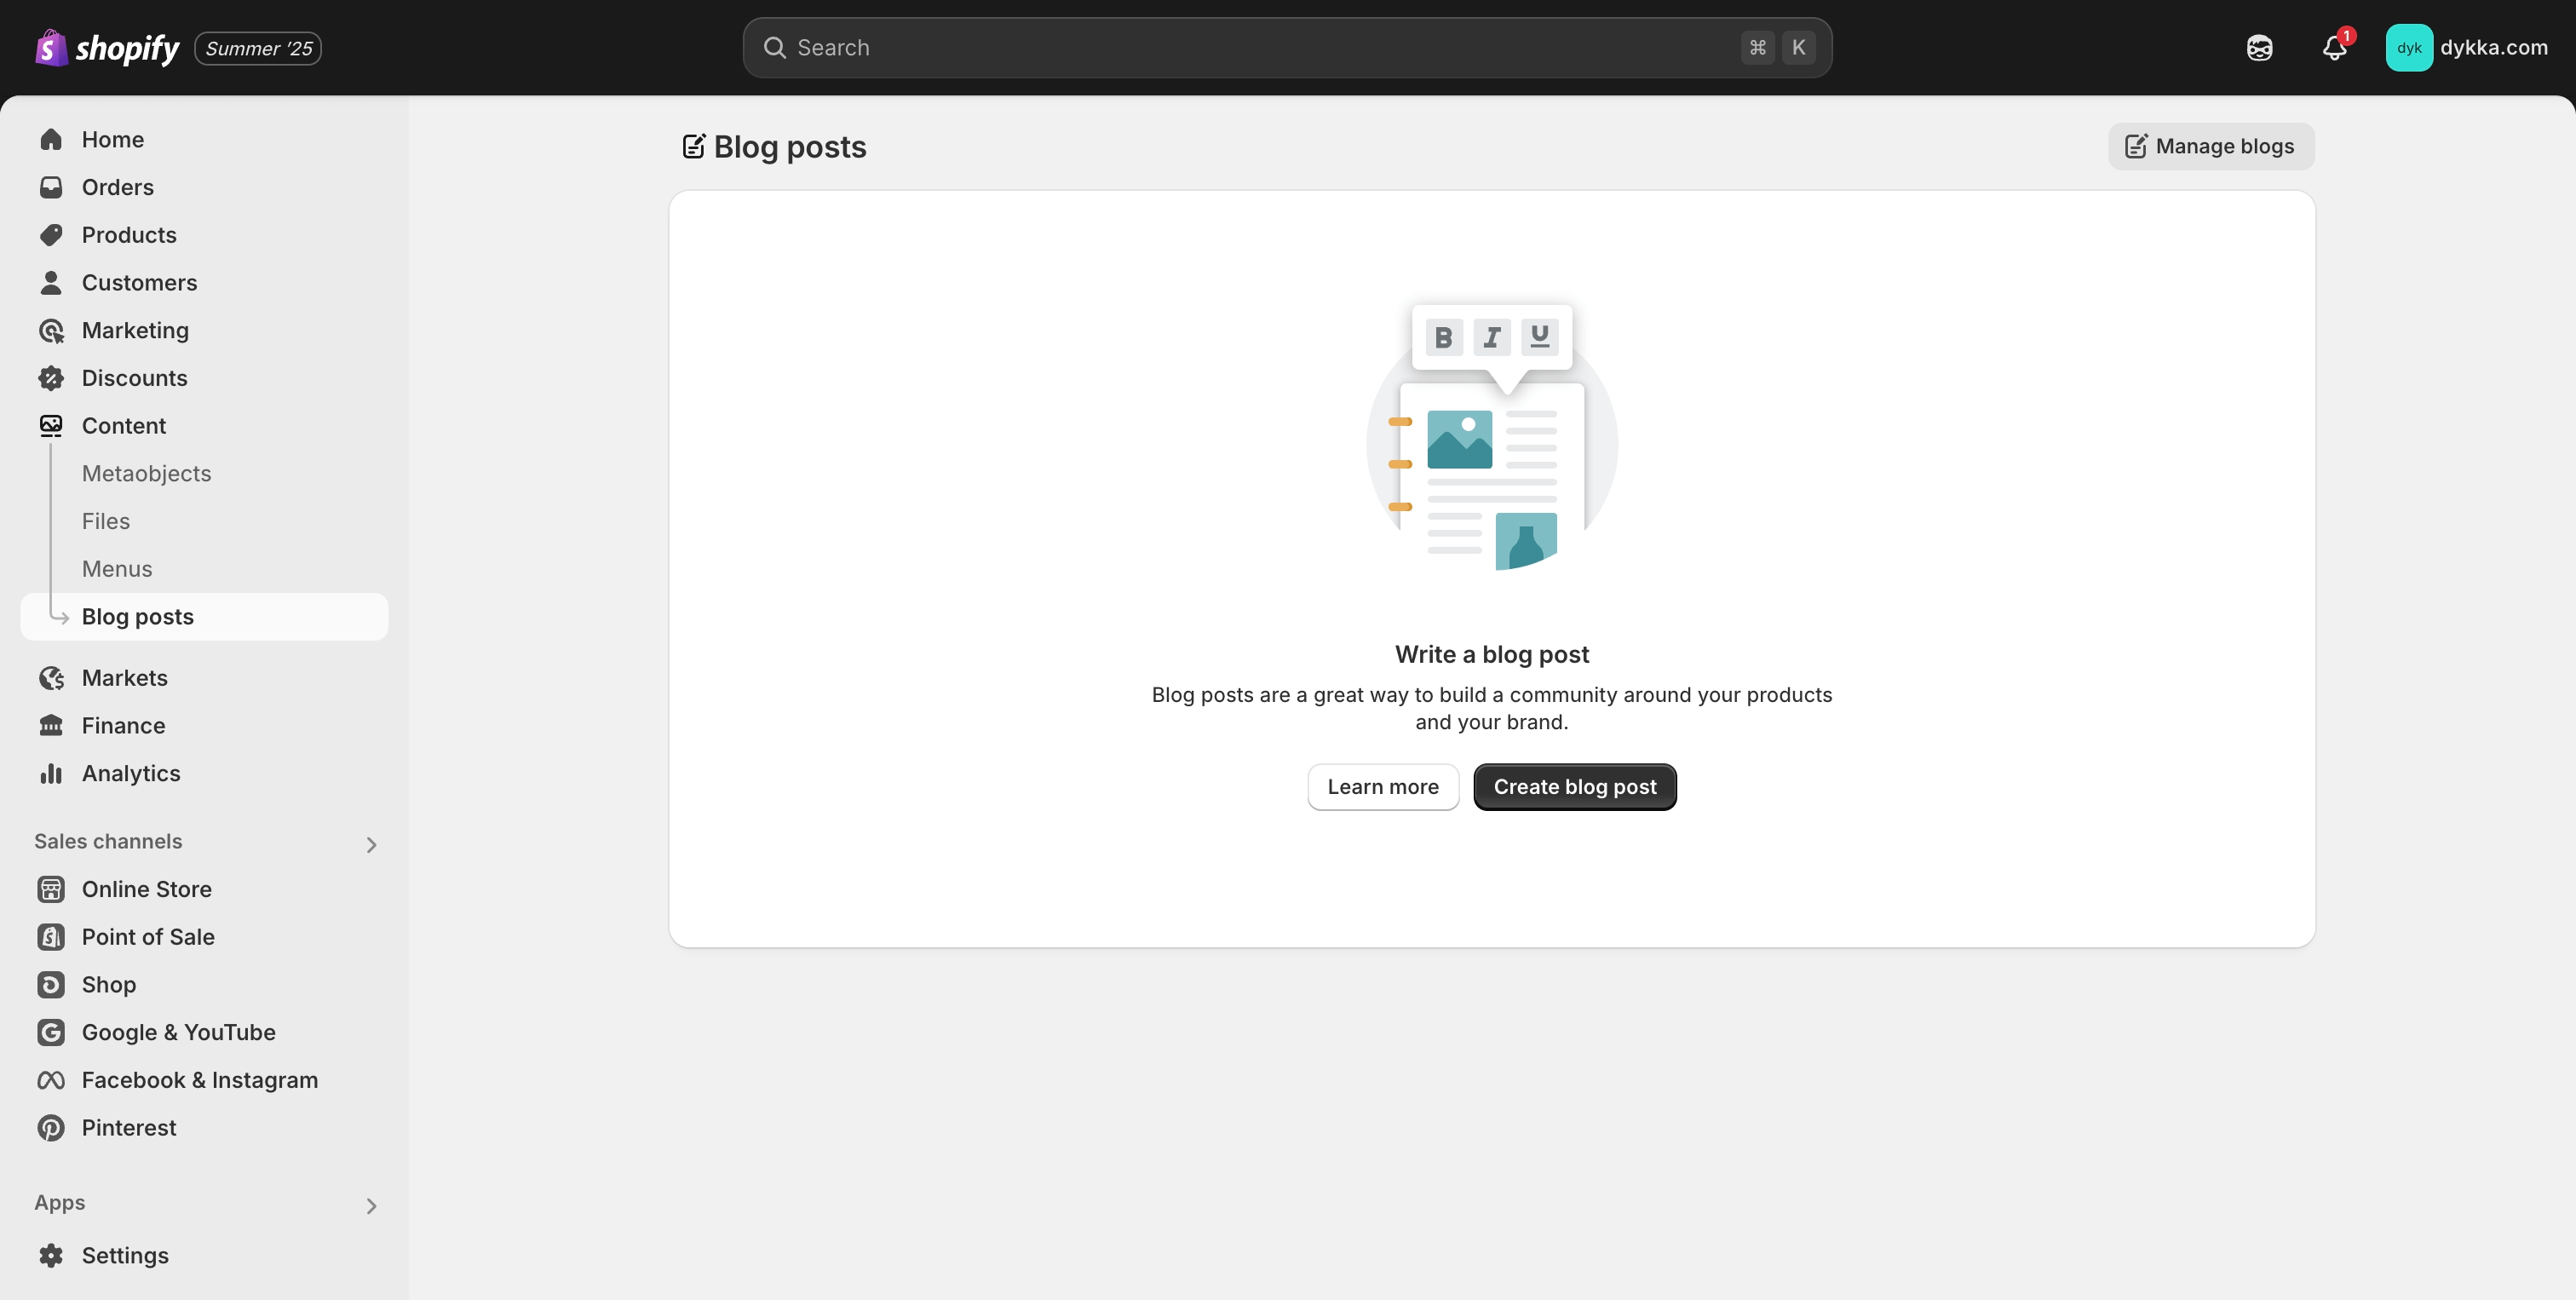
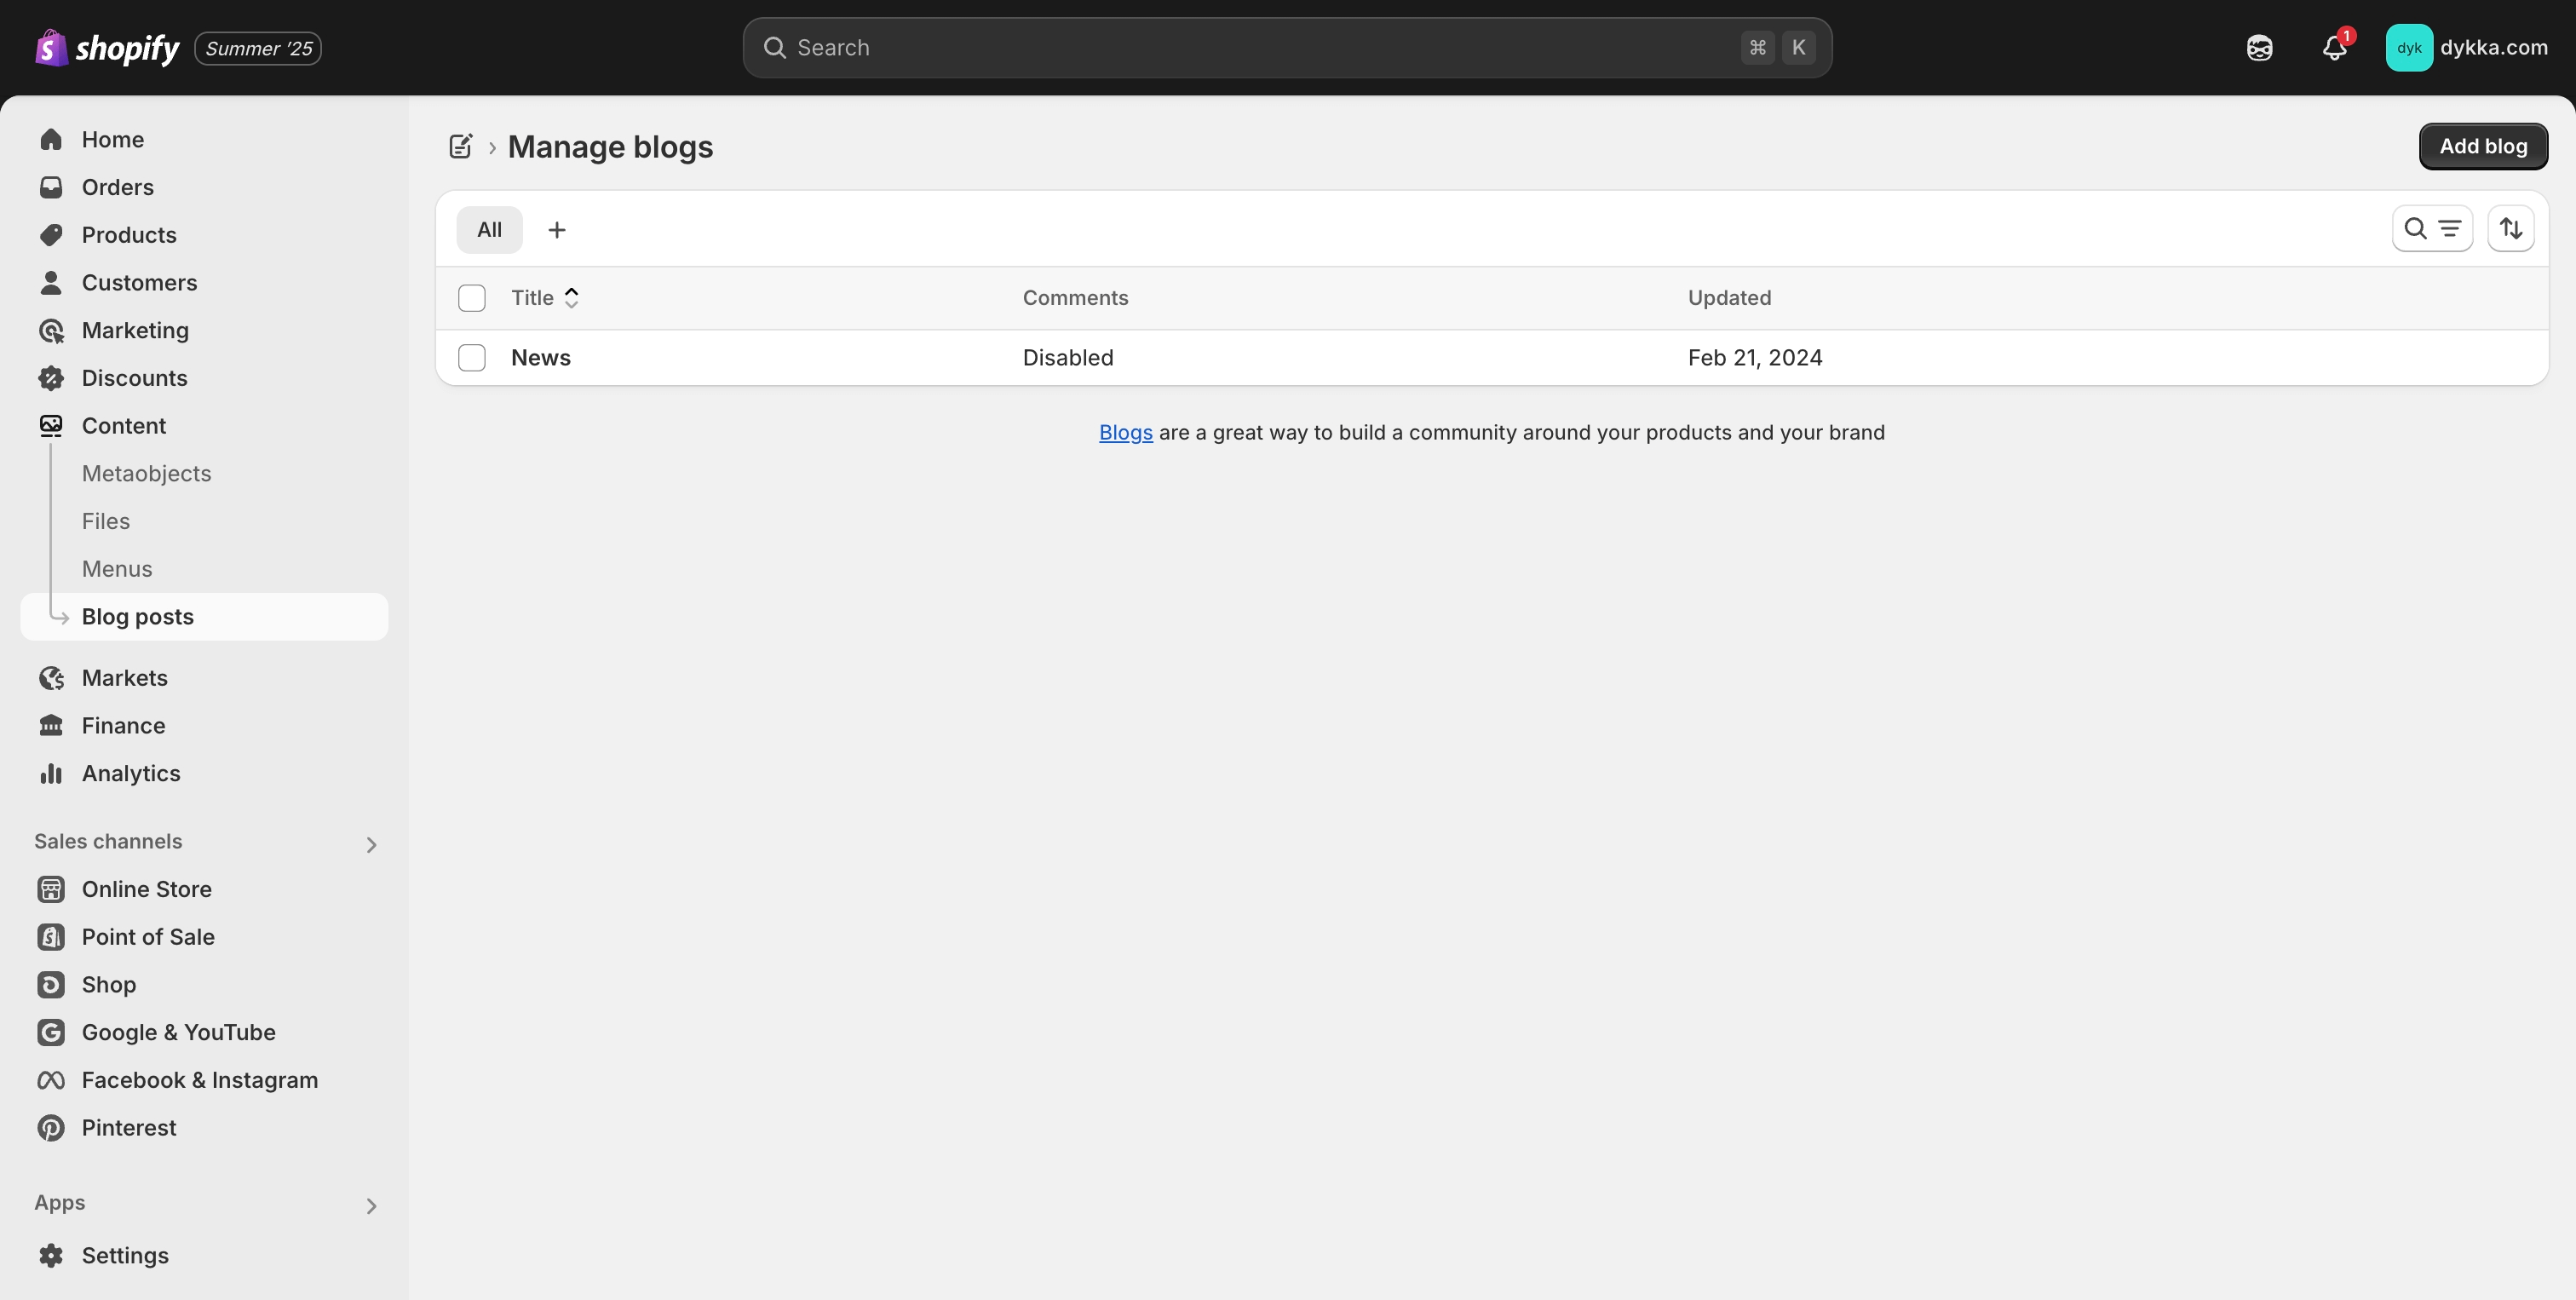
Shopify
- In Shopify, create blogs matching Shoptet rubrics: Content → Blog posts → Manage blogs → Add blog.
- Set the blog title according to the rubric name, and adjust the handle (the URL part) if needed — you’ll need it for cross-linking.
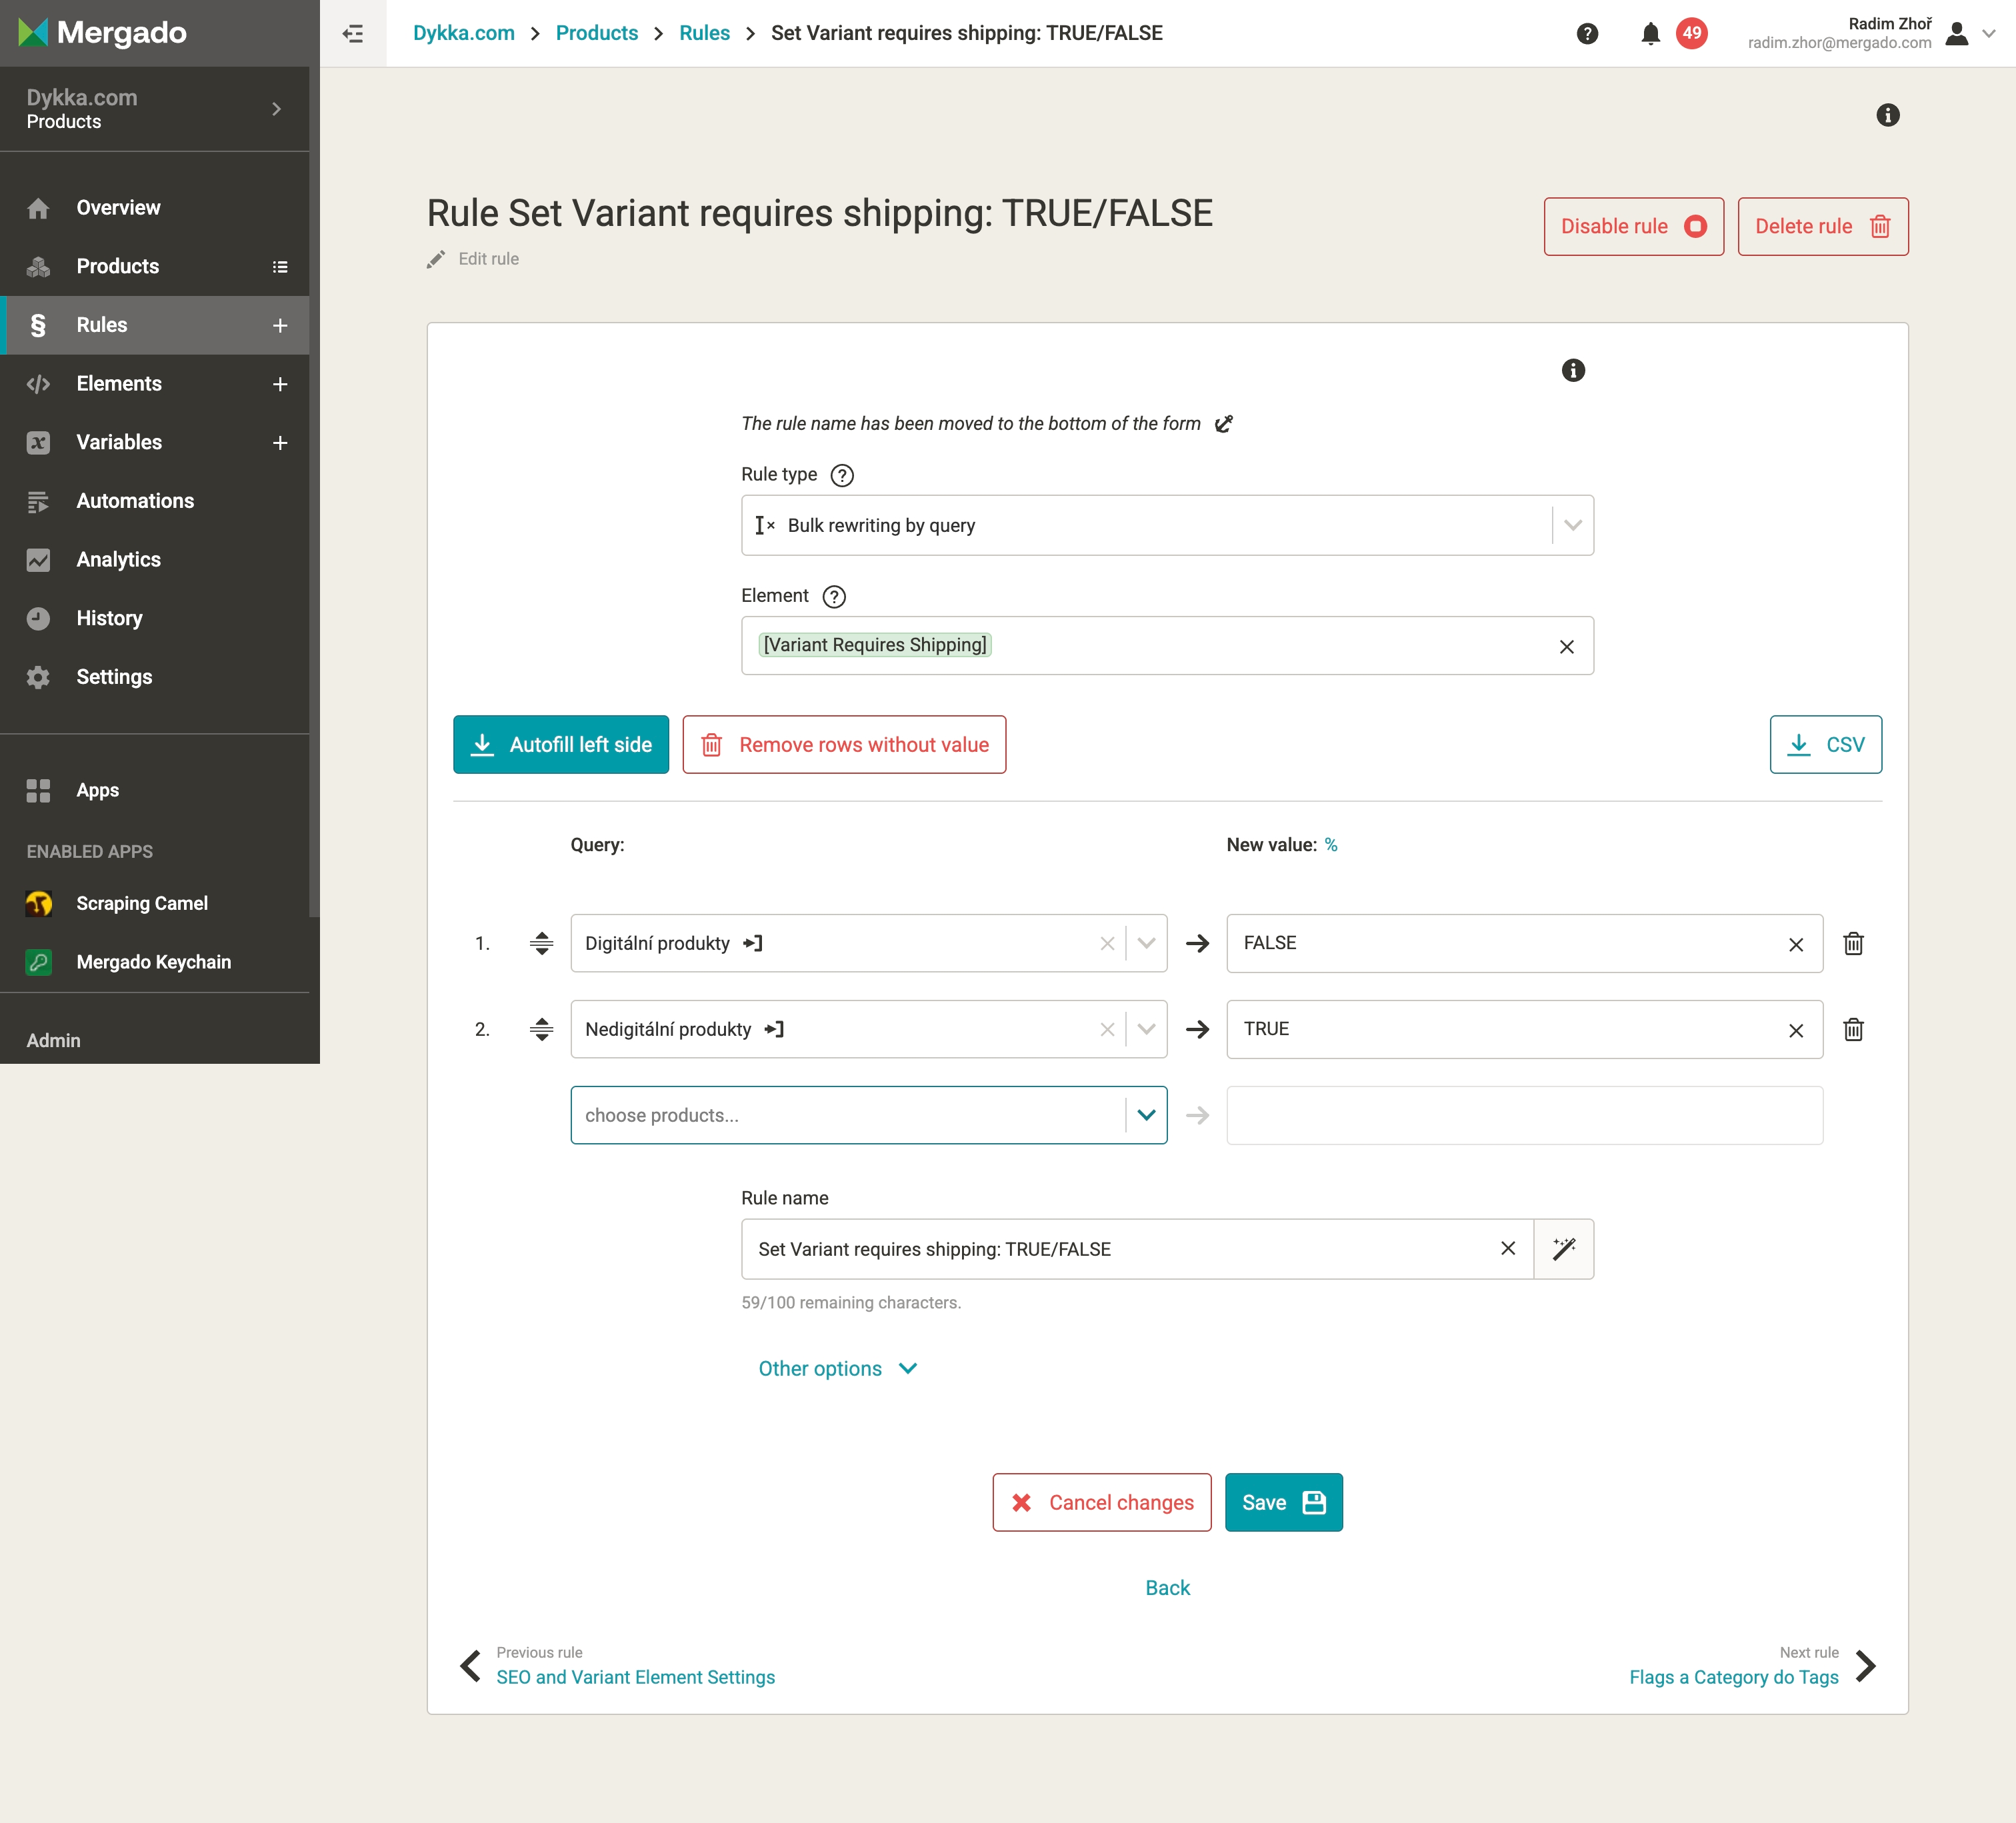
3.8 Orders
3.8.1 What we need
Shoptet allows exporting orders in CSV format. However, the file cannot be uploaded directly, because Shopify requires importing orders via API only. So we again used the Mergado extension Shopify Importer.
The individual orders and order items were matched to existing customers and products in Shopify based on email and product SKU.
You need:
- Access to Shoptet admin – for exporting orders
- Access to Shopify admin – for importing orders
- Mergado account
- Mergado extension: Shopify Importer
3.8.2 Step-by-step
Shoptet
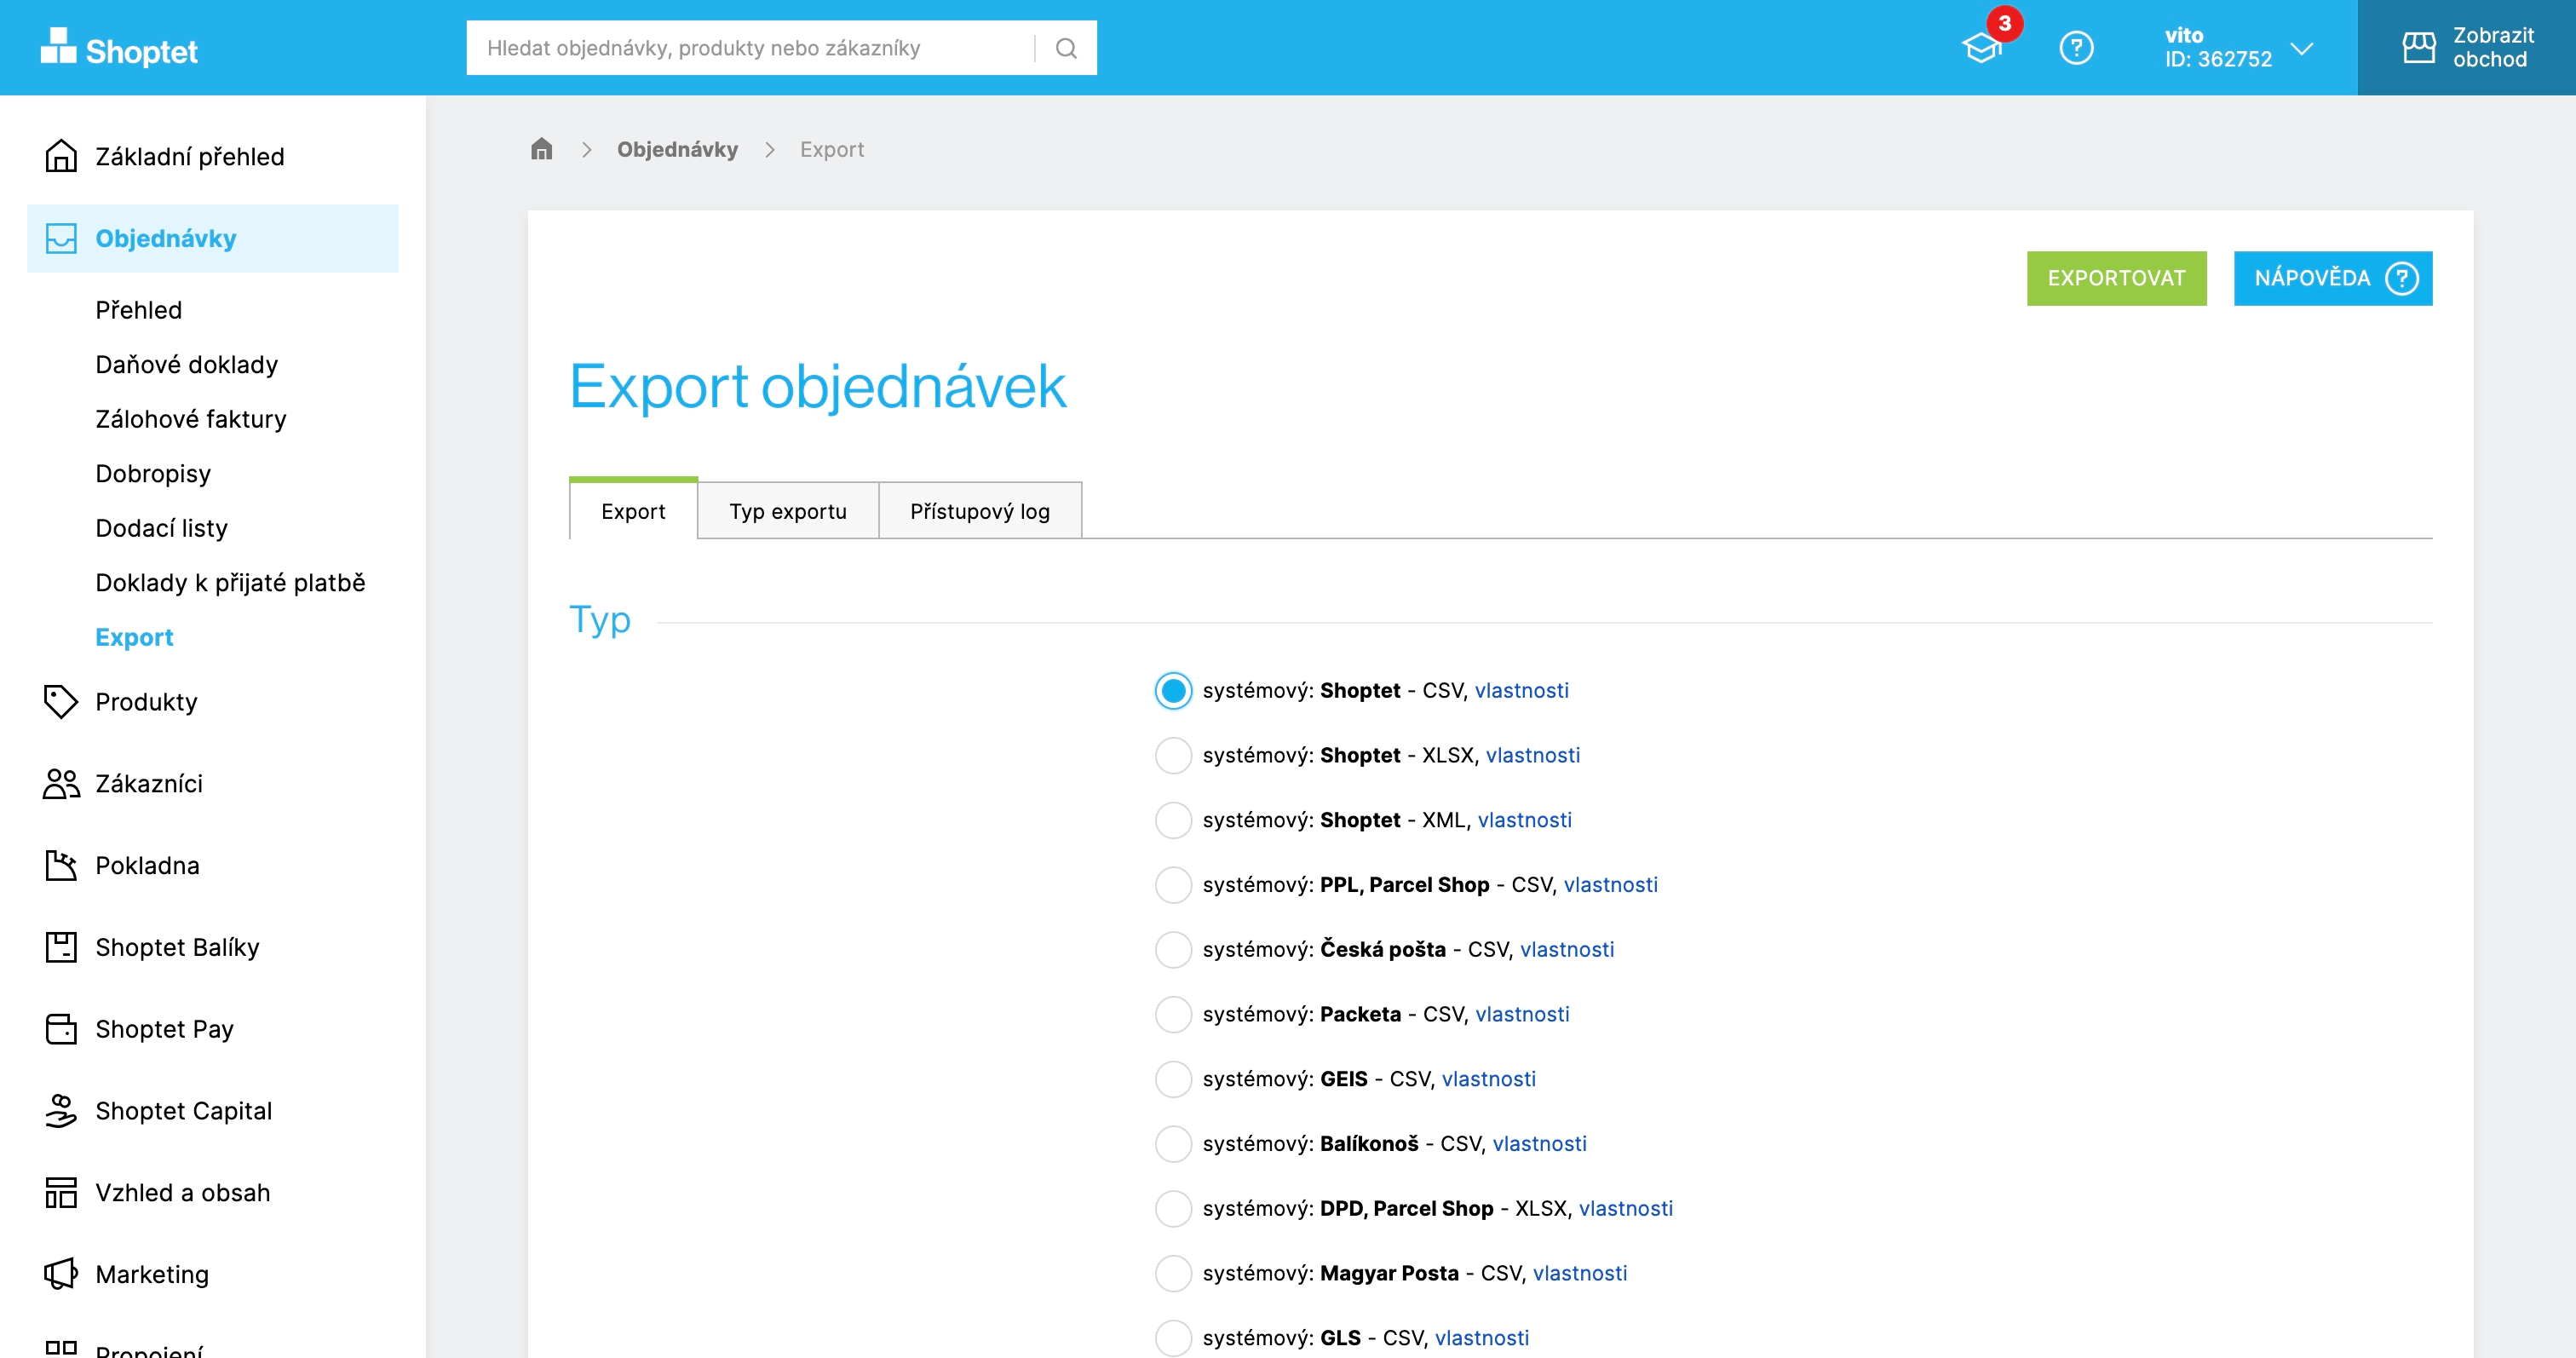
- In admin, go to Orders → Export → systémový formát: Shoptet CSV.
- Copy the feed URL.
Mergado
- Open the Shopify Importer extension in Mergado.
- Upload the CSV file with orders. Shopify Importer can process the data directly; no additional edits are needed.
- The import runs without triggering other actions (e.g., automated emails) and the orders are set to “fulfilled.”
- The extension pairs orders with customers by email. If a customer doesn’t exist, a new one is created automatically.
Shopify
In Shopify, check the imported orders in the Orders section.
💡 Note: The Shoptet orders CSV displays each order item on a separate row, which means a single order can appear on multiple rows. For this reason, orders are not uploaded directly into a Mergado project, because the individual order items would be treated as duplicates and Mergado would always import only one item.
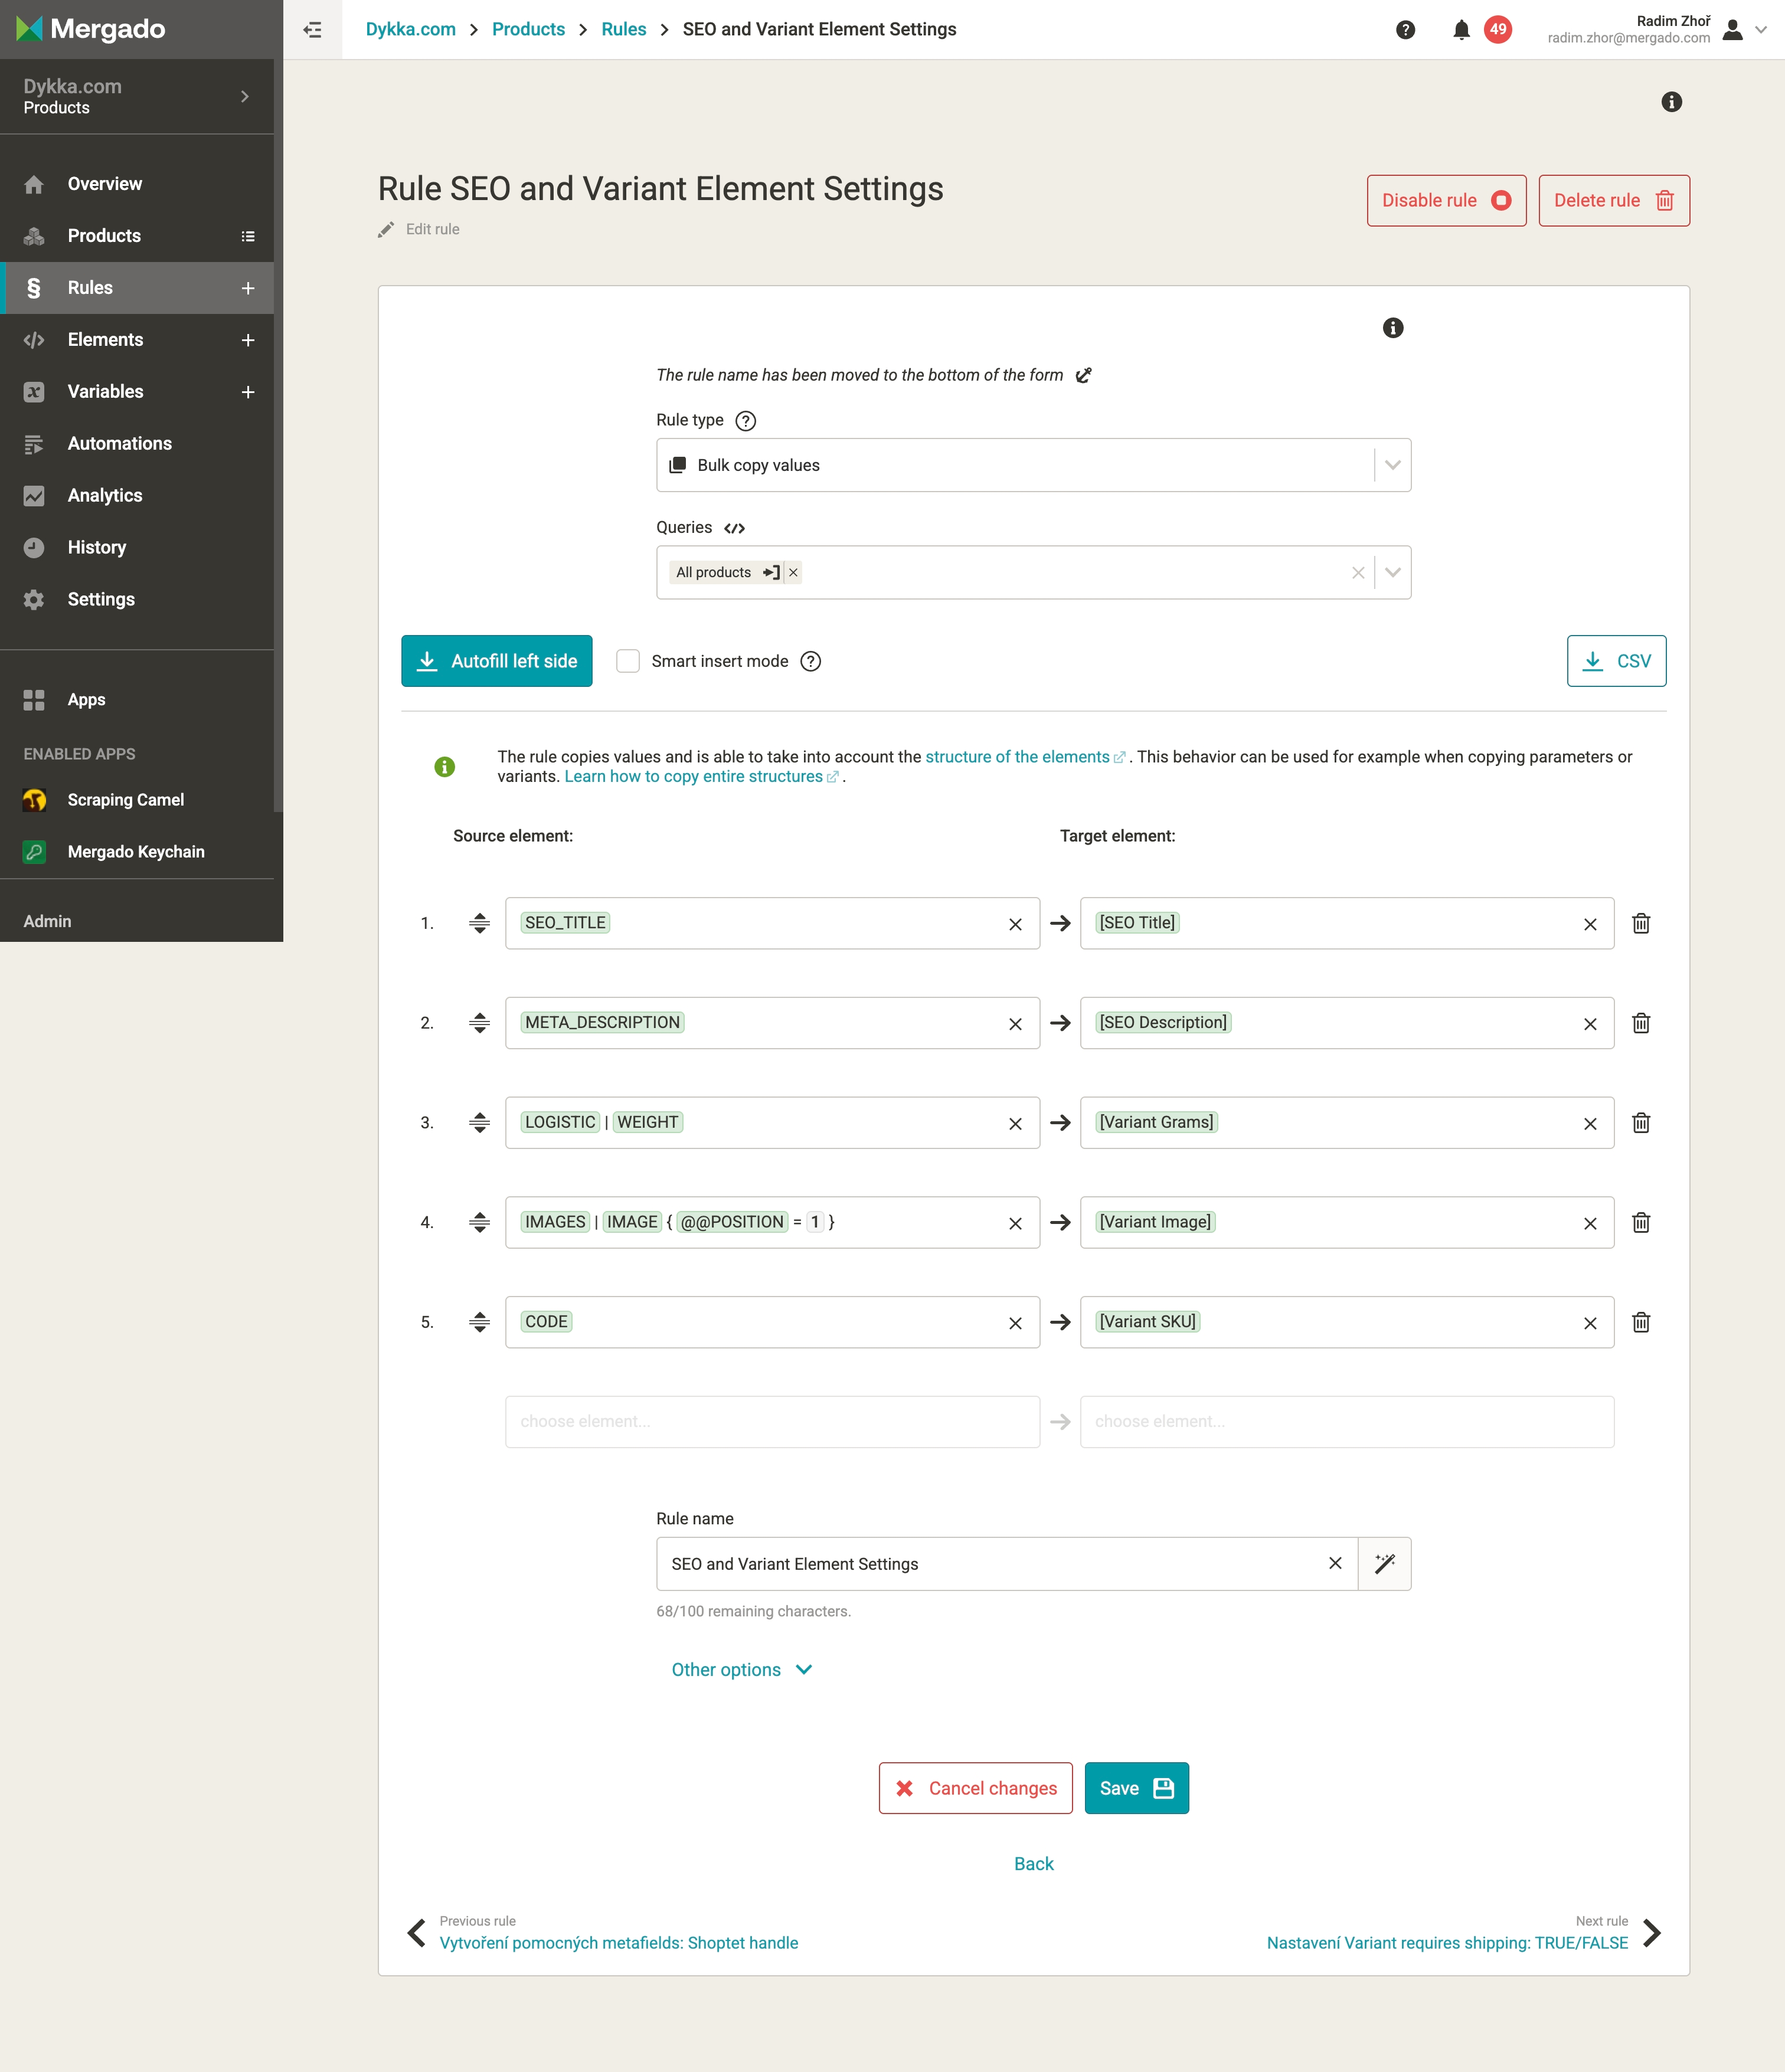
3.9 Images
3.9.1 What we need
When transferring images, we considered downloading and uploading them via FTP. However, this approach isn’t ideal, because new handles were generated for part of the images during the process which created troubles when replacing the original image URLs with new ones in all texts.
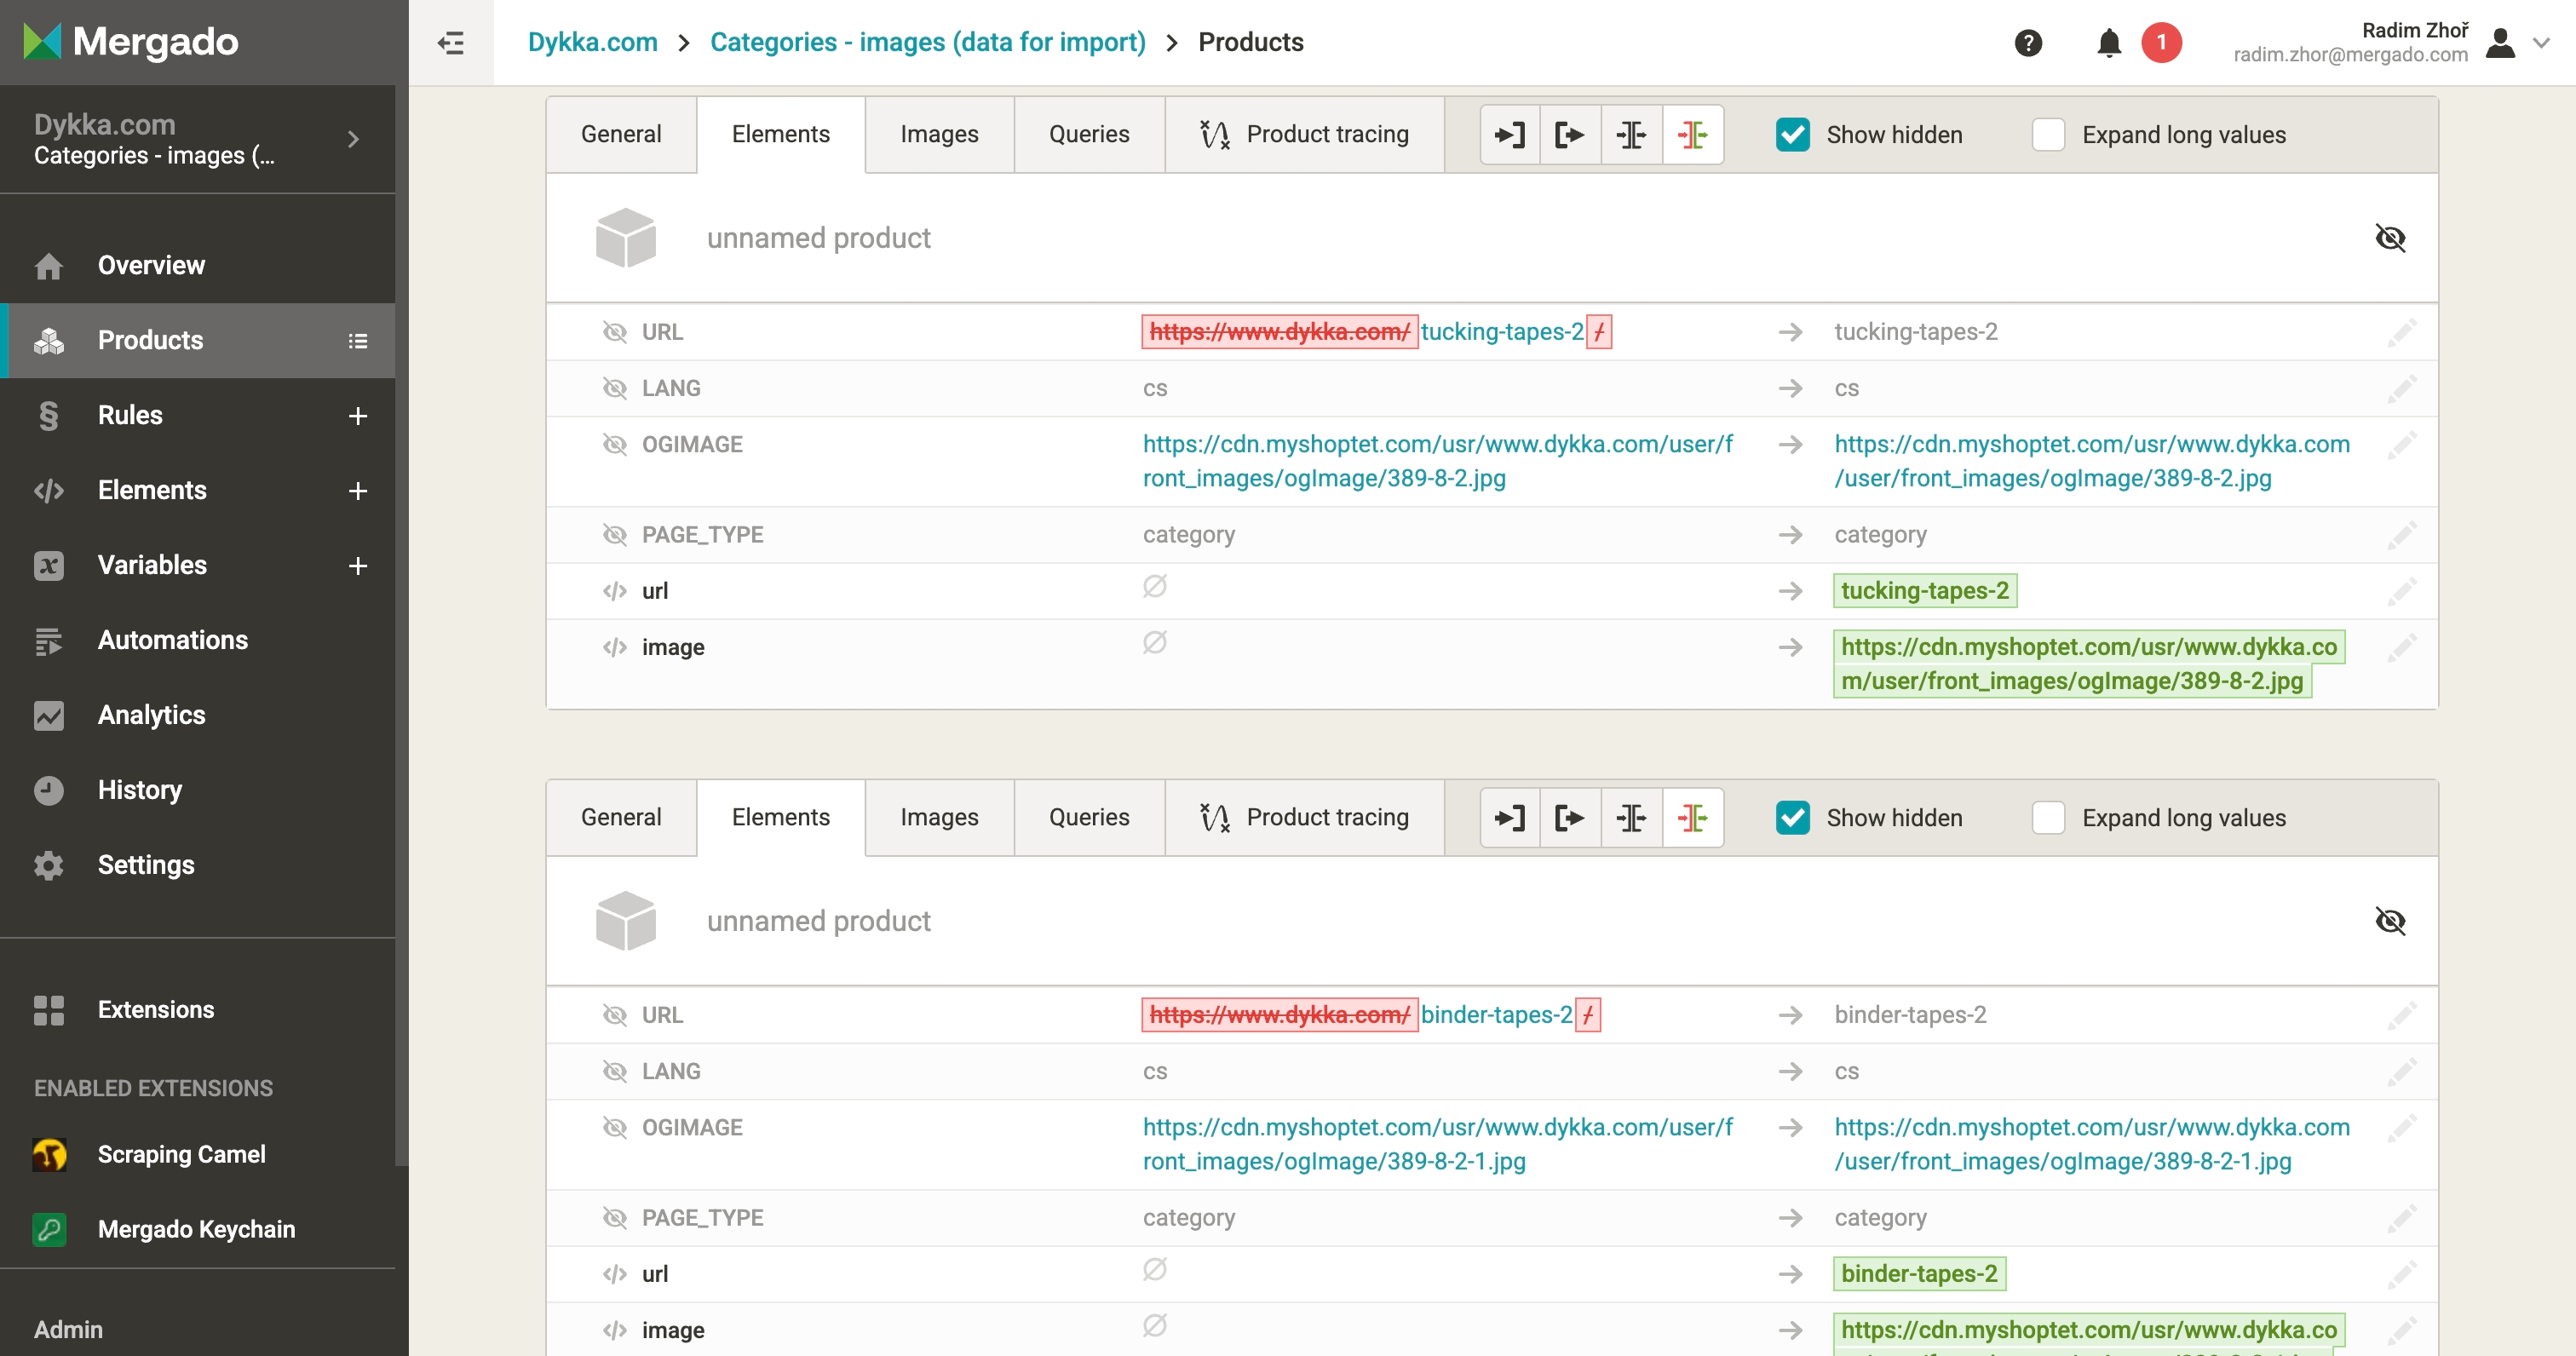
We therefore decided to upload the images that are embedded in texts (e.g., in product descriptions, articles, categories, brands) and that point to the original store’s storage into Shopify via Shopify Importer. This gave us a file with both the original and the new image URLs. We then used a rule in Mergado Editor to replace the old URLs with the new ones.
You need:
• Access to Shopify admin — to import data
• Mergado account — to edit data and use the Shopify Importer extension
• Mergado extension: Shopify Importer — to import the adjusted data into Shopify via API
3.9.2 Step-by-step
Mergado
- Select the CSV files of objects (products, articles, categories, brands) that contain image URLs inside a text field. These are the same files you used for the actual object upload to Shopify.
- Upload them to Shopify Importer and choose the element that contains the image URLs (e.g., description).
- Click Extract Image URLs
- The output will be a separate CSV for each object with columns for the image URL and ALT.
- Merge the CSV files from all objects and remove duplicate values directly in Shopify Importer.
Shopify
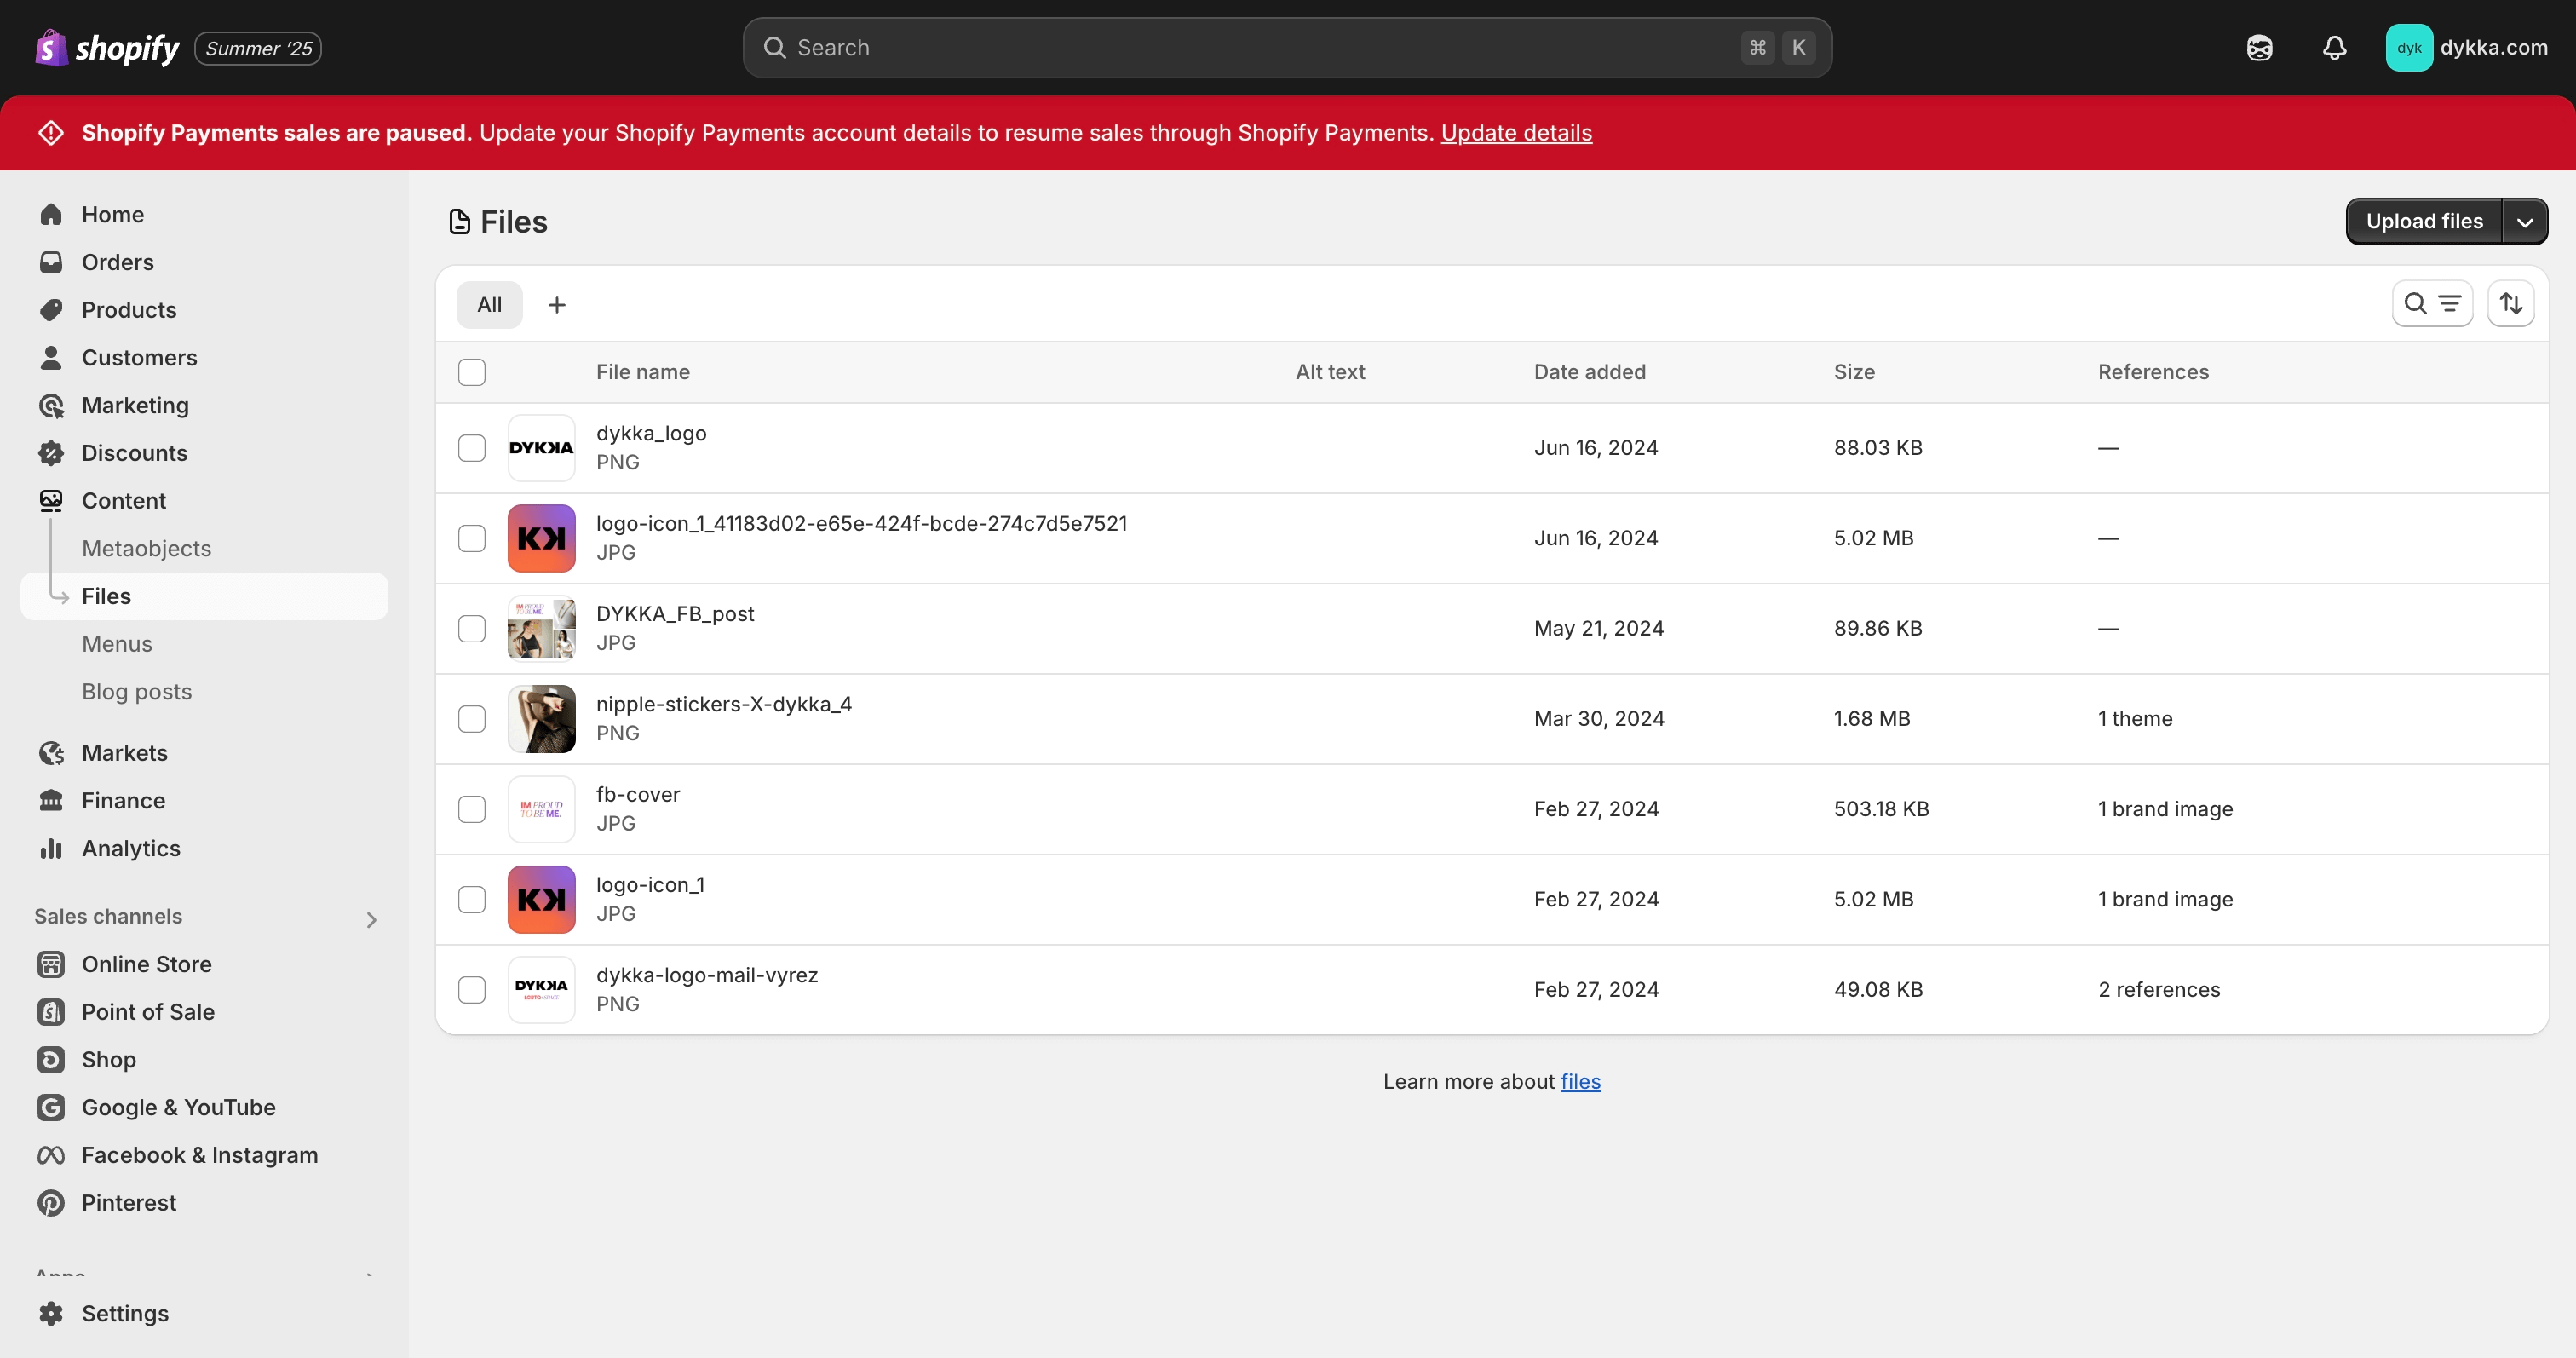
Upload the images via API to Content → Files using Shopify Importer. After the upload, a mapping CSV with the original and new URLs is generated.
Tip: During upload, you can automatically resize images if needed.
Updating URLs in texts
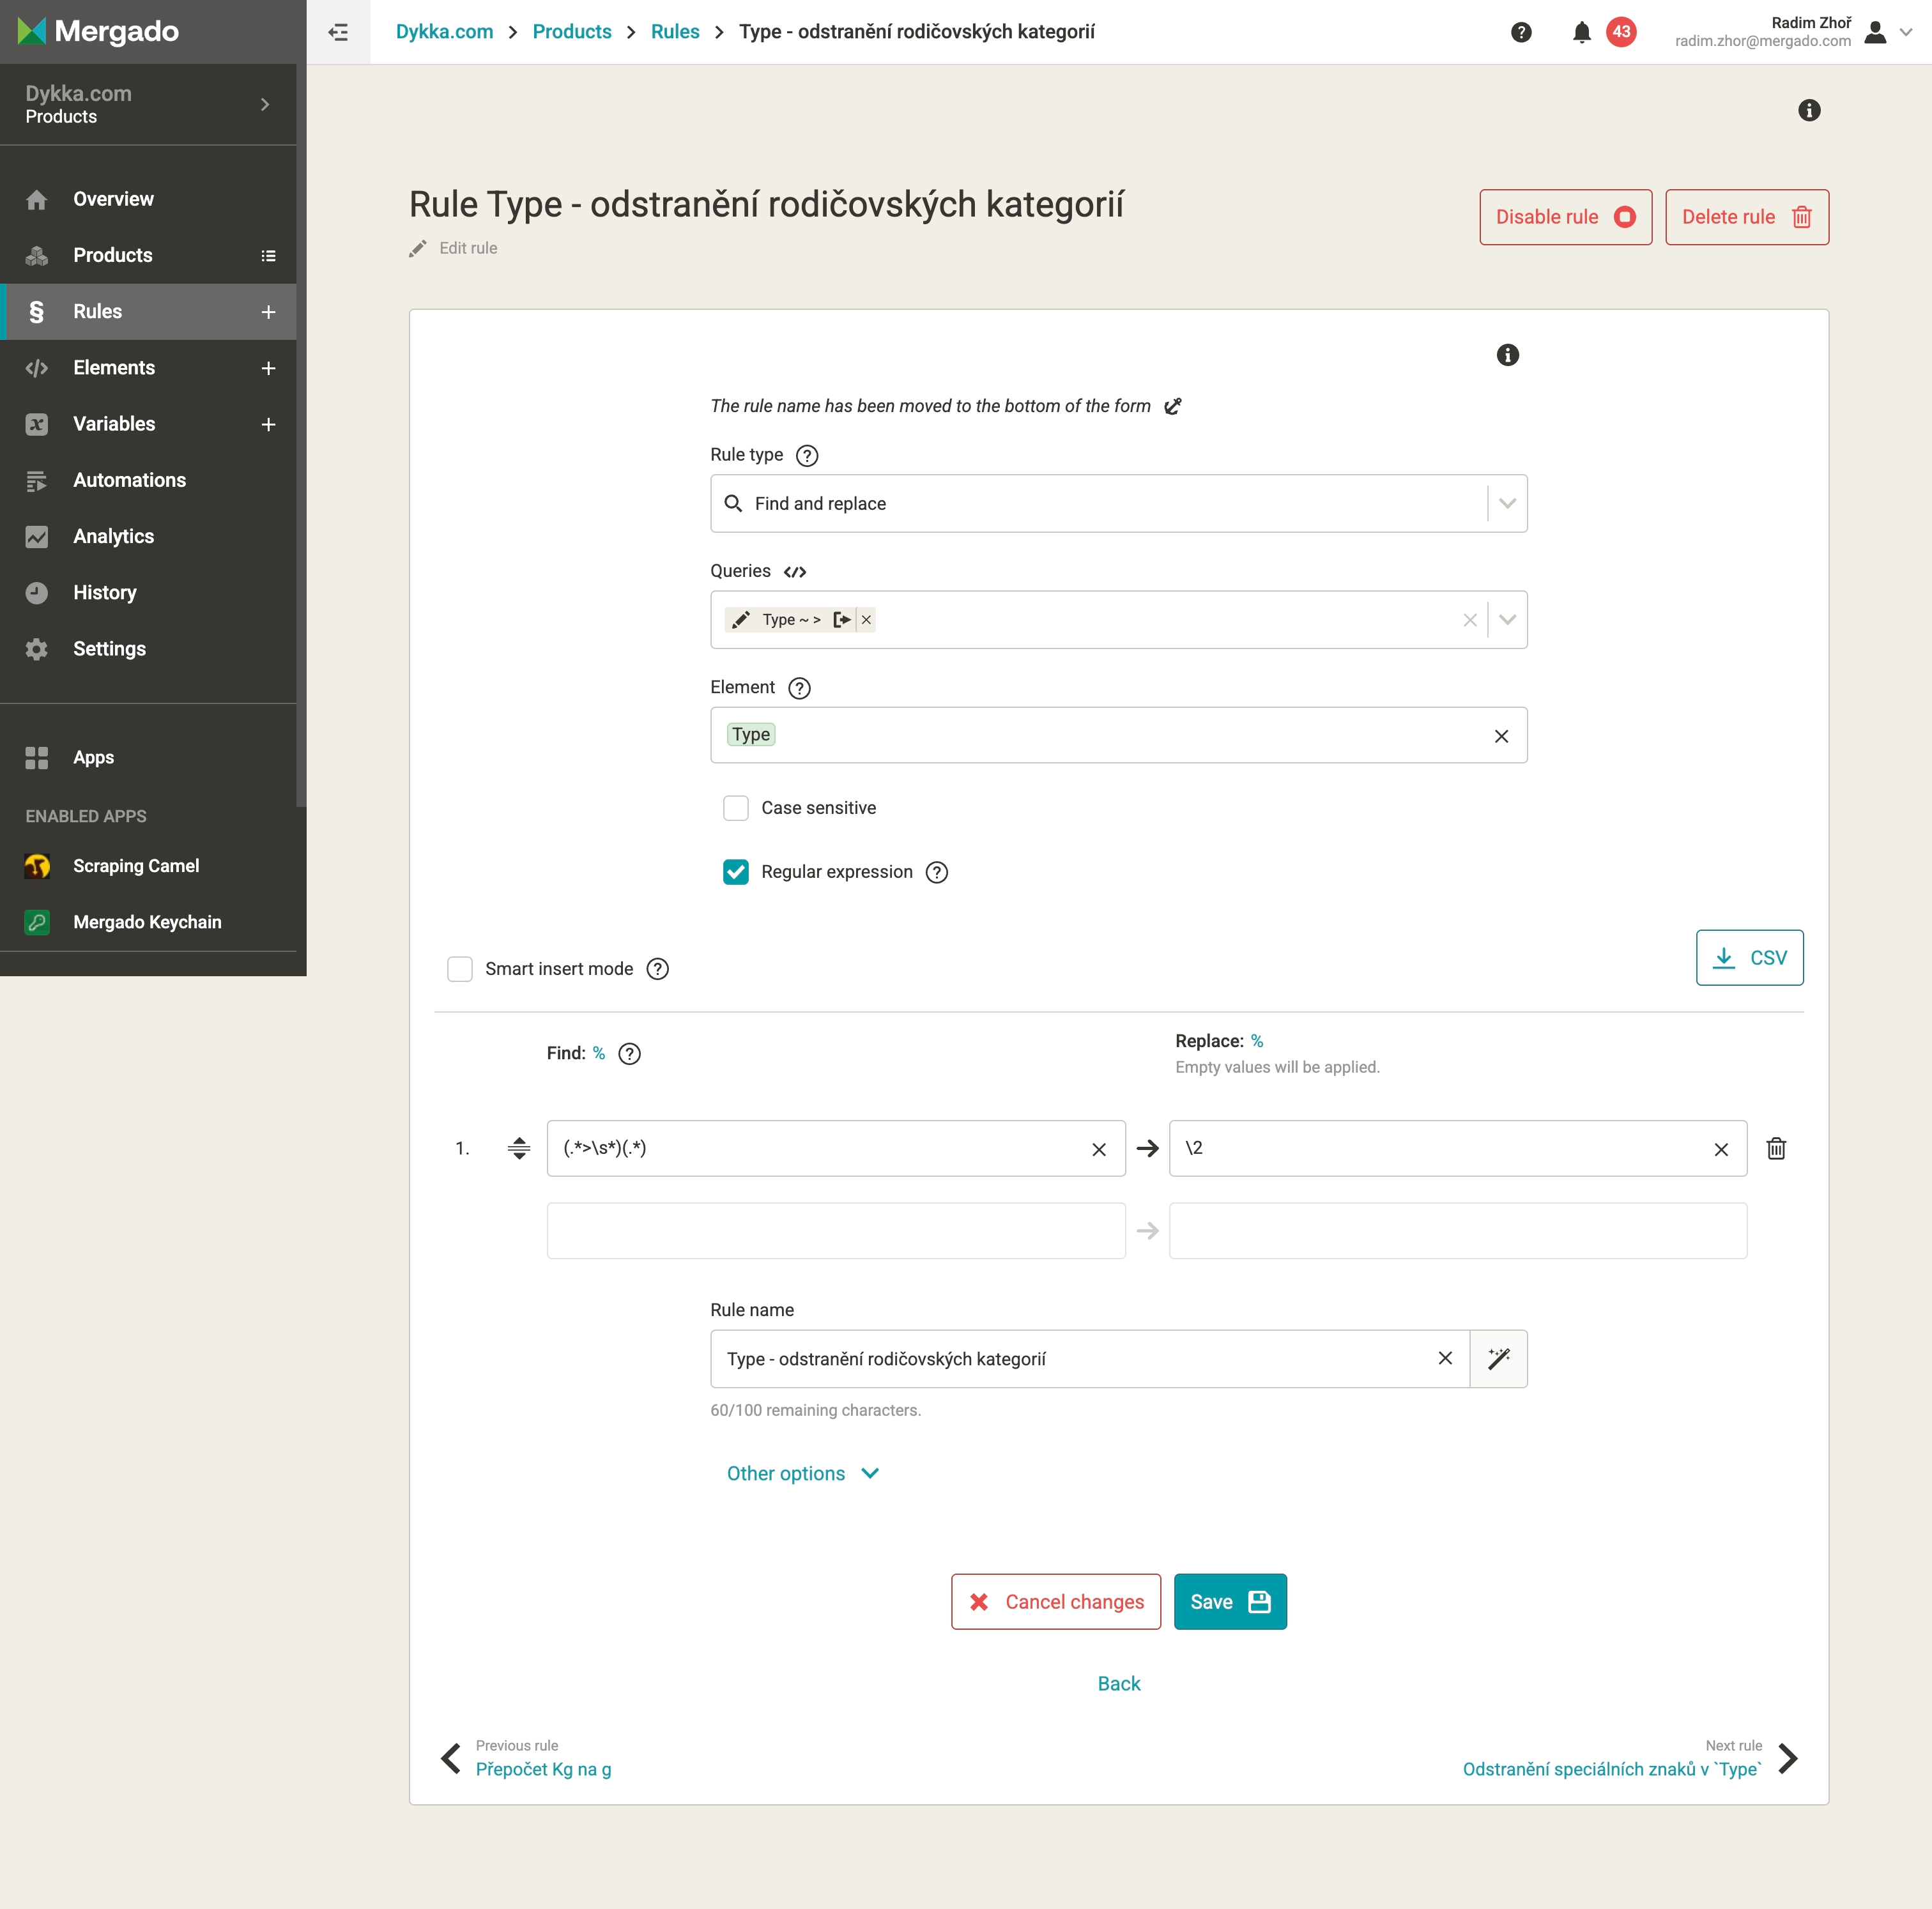
- In Mergado, open all objects (products, articles, categories, brands) and create a Find and replace rule.
- In the rule, select the element that contains the texts with images.
- Use smart paste and upload the columns with the original and new URLs.
- Re-import the CSV files — only the image URLs will be updated.
3.10 Interlinking
3.10.1 What we need
When migrating from Shoptet to Shopify, correct internal linking in HTML is crucial for both functionality and SEO.
Possible scenarios:
- 301 redirects only – a quick fix without editing content, but it can slow page loads and cause SEO losses.
- Full link rewrite – clean HTML and better SEO, but more complex to implement; requires finding and rewriting all links to match the new structure.
- Hybrid approach (recommended) – rewrite all links that can be clearly mapped, leave the rest to 301 redirects, and after launch check internal links with a crawler.
To set up internal links correctly, you need:
- Access to Shopify admin – to import data
- Mergado account – to edit data
- Mergado extension: Shopify Importer – to import the adjusted data into Shopify via API
3.10.2 Step-by-step
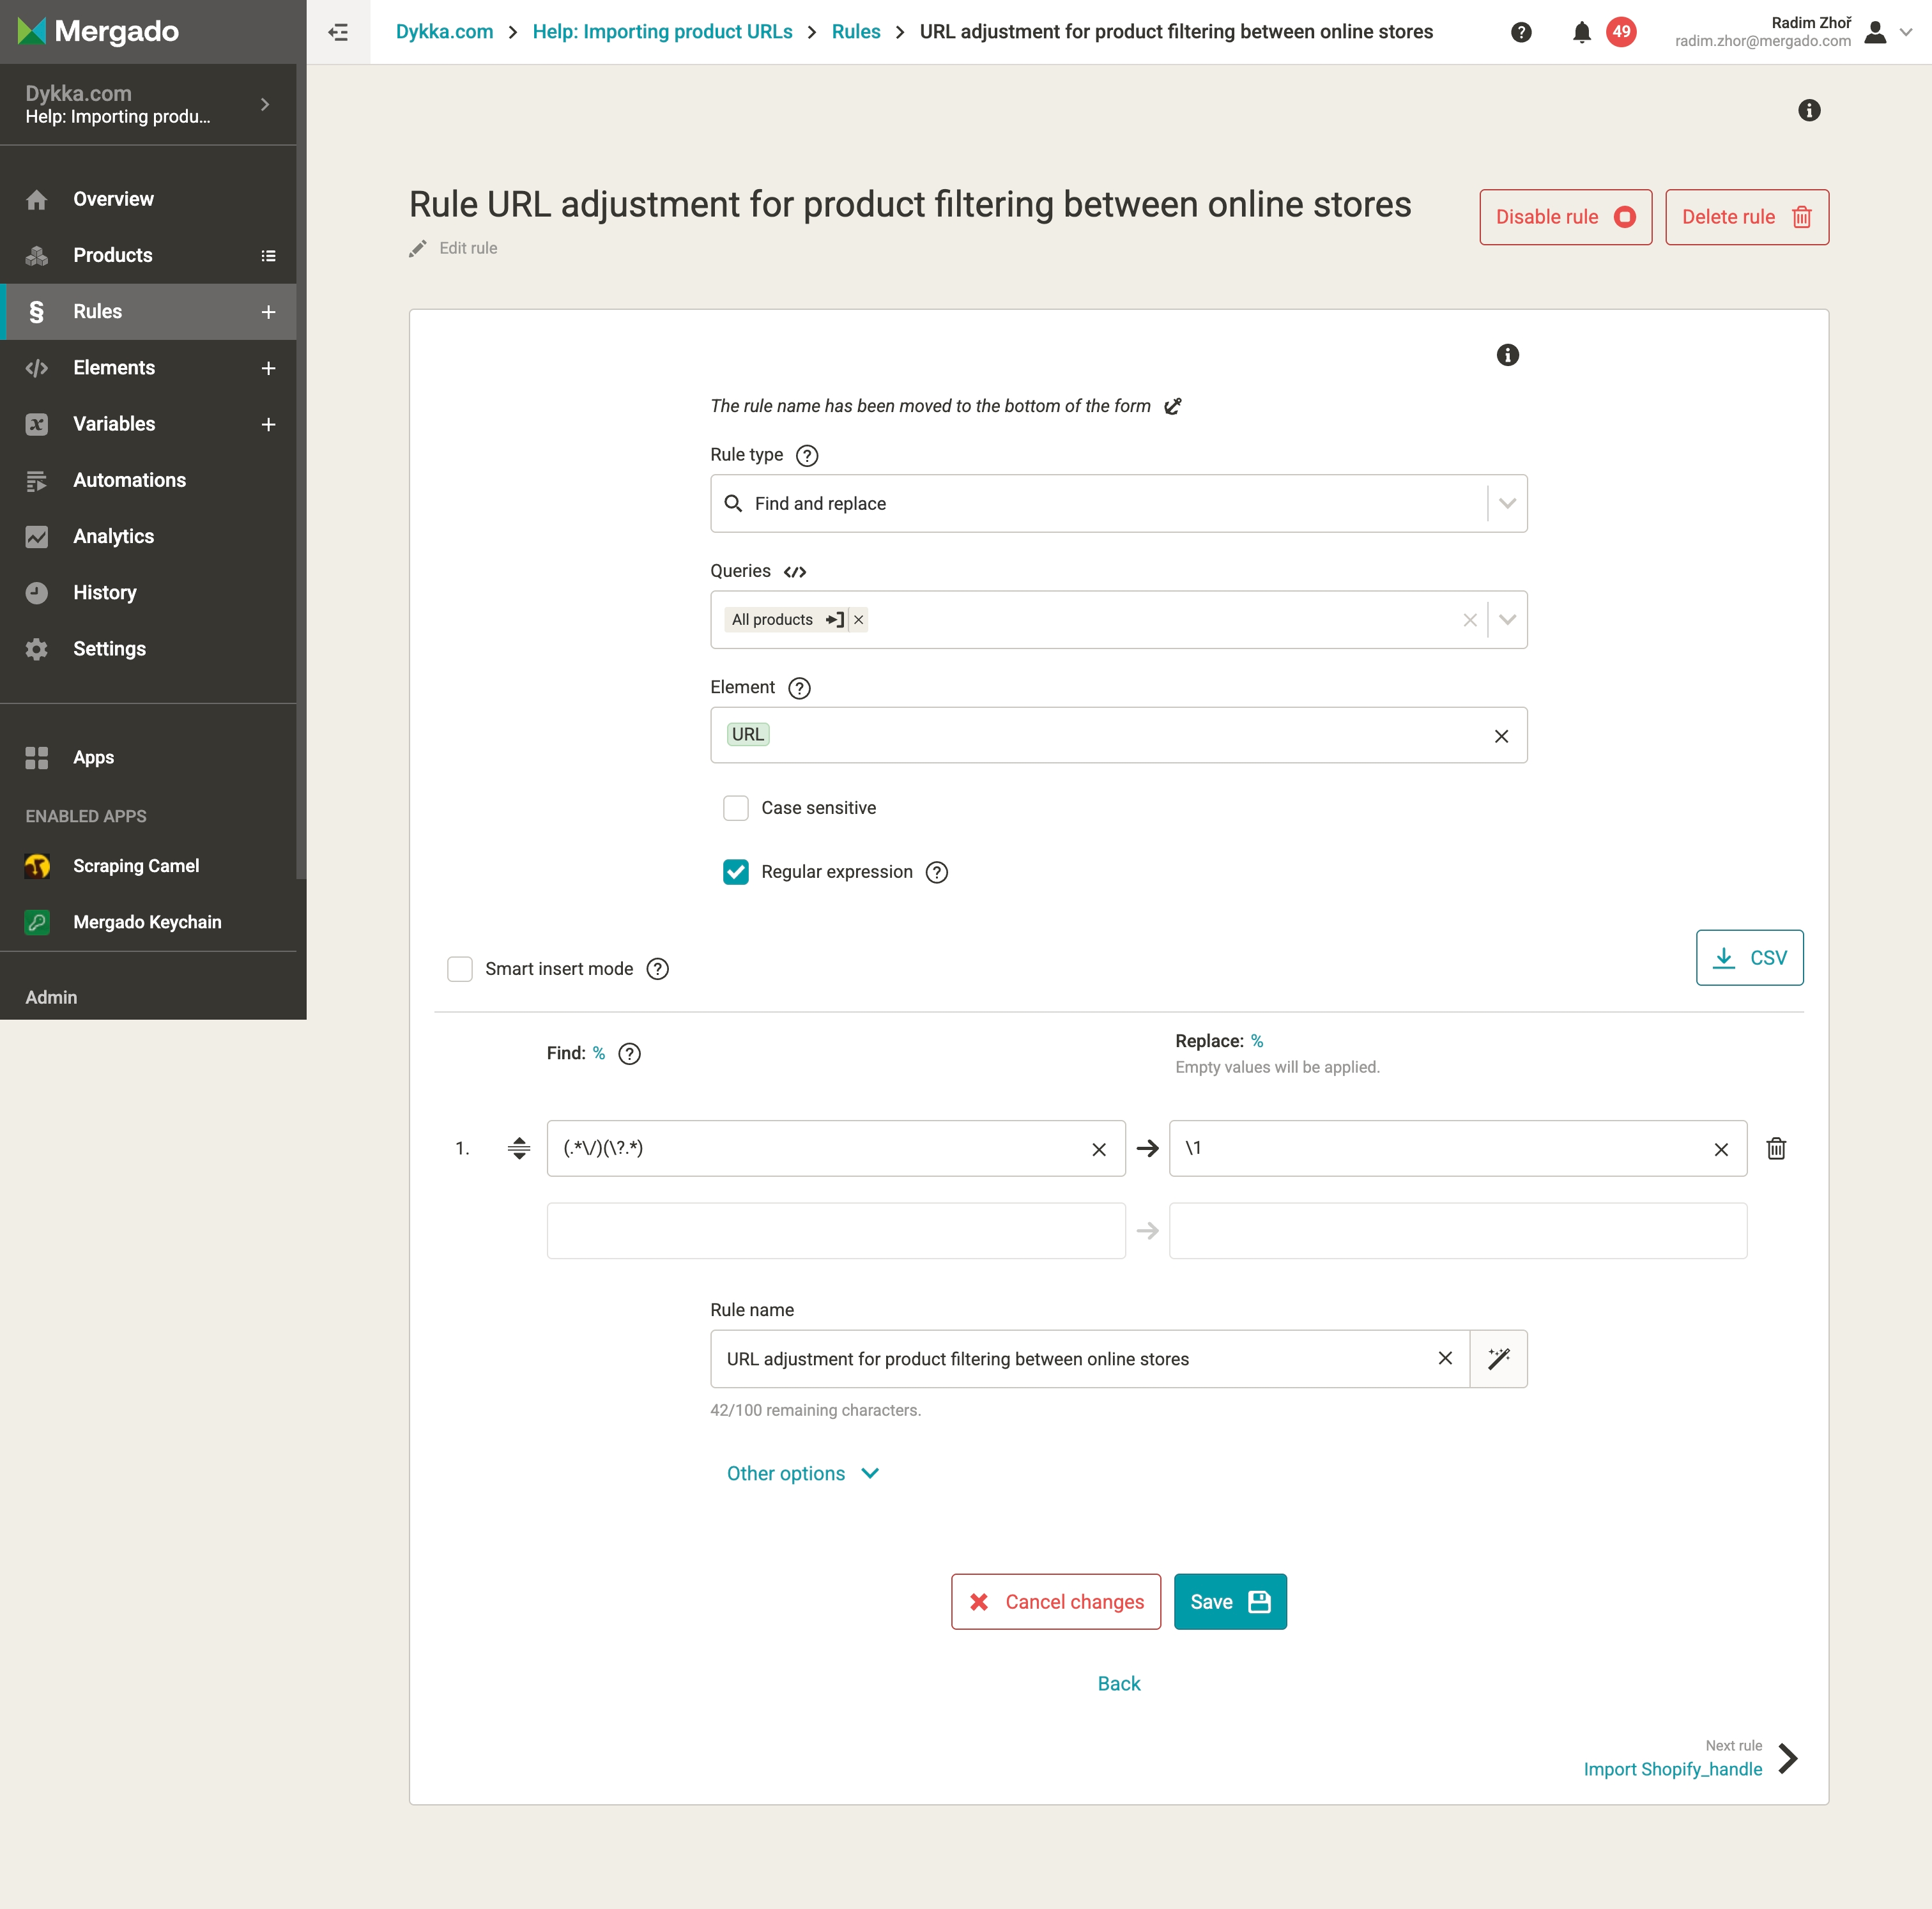
- In Mergado, open all text-based objects (products, categories, brands, articles) that contain URLs.
- Upload them to Shopify without modifying the URLs.
- In Shopify, create two metafields — original ID and original URL — that store the original Shoptet ID and URL. The goal is for every object to have a new URL plus the stored original URL and ID.
- In the Mergado Shopify Importer extension (Migrator section), run Extract all URLs:
- Upload, in a single CSV, all files that were uploaded to Shopify (products, articles, categories, brands).
- Specify the element that contains URLs (e.g.,
description). If you have multiple elements, repeat the process for each.
- Enter the original domain (e.g., http://www.dykka.com) so the system ignores external links.
- Select the object type (product, article, brand, category).
- For the Shopify CSV format, provide the original Shoptet ID (e.g.,
variantSKU).
- Run Extract URLs — the result is a CSV containing all URLs (including duplicates).
- Export a map of new vs. original URLs from Shopify:
- Enter the domain (e.g.,
example.myshopify.com), the Admin API token z Mergado custom app (ze Shopify) a veřejnou doménu nového e‑shopu (např.shop.dykka.com). the Admin API token from the Mergado custom app (in Shopify), and the public domain of the new store (e.g., shop.dykka.com).
- Download the CSV file.
- Prepare the basis for the Find and replace rule:
- Upload the map, enable “include path-only variant” and “wrap as href ‘…’”.
- The output contains two columns — original URL and new URL (including versions with and without the domain).
- In Mergado, create a Find and replace rule for each object type:
- Choose the element that contains the URLs.
- Use smart paste and upload the original/new URL columns.
- Regenerate the project and verify the links.
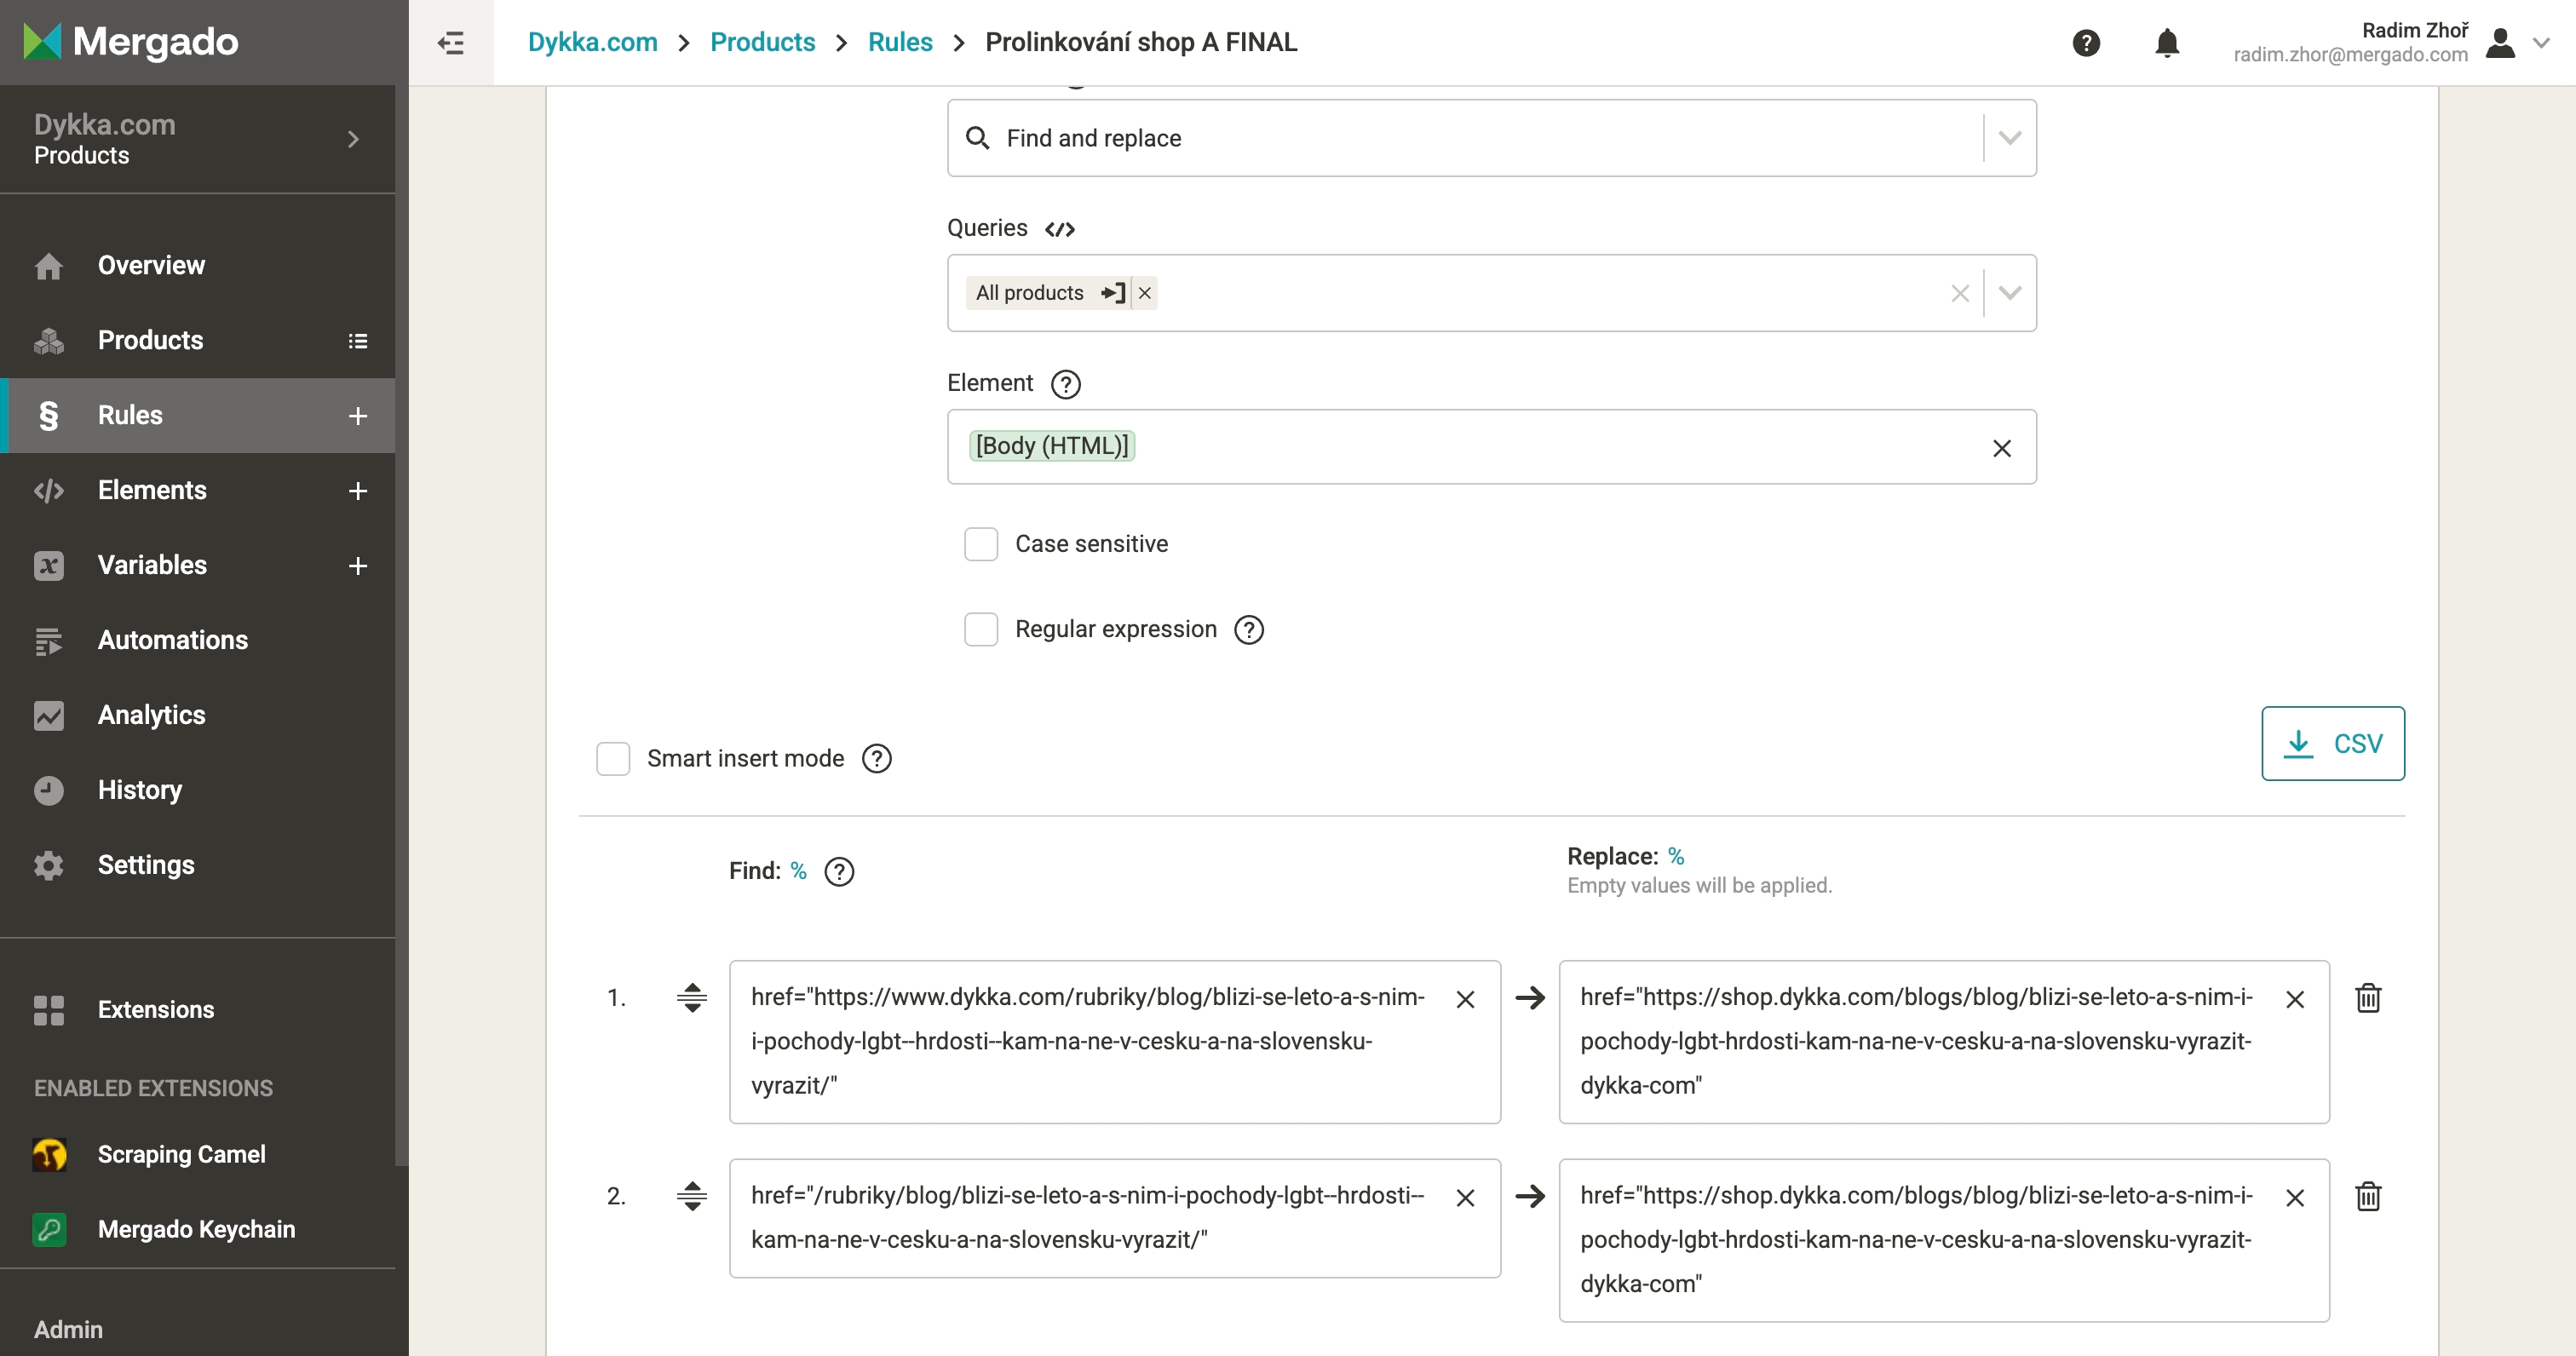
- Reupload the CSVs to Shopify — only the URLs will be updated.
3.11 Language versions
3.11.1 What we need
Shoptet allows exporting translations for most objects to a CSV file. However, Shopify requires importing them via API only, not via manual upload. We therefore edited the data in Mergado Editor and then uploaded it to Shopify via API using the Shopify Importer extension.
For this procedure you need:
- Access to Shoptet admin — to export translations
- Access to Shopify admin — to import dat
- Mergado account — to edit data
- Mergado extension: Shopify Importer — to upload data to Shopify via API
3.11.2 Step-by-step
Shoptet — Products
- In the admin, go to Products → Export → Languages – CSV.
- Select CSV format and, in the Language section, choose English (or other language).
- The export contains the pairing element, the default language, and the translated text.
- If a translation is missing, that element will not be imported.
💡 Missing translations can be supplemented using Mergado extensions or functions (e.g., Mergado Translate or the Data file import rule).
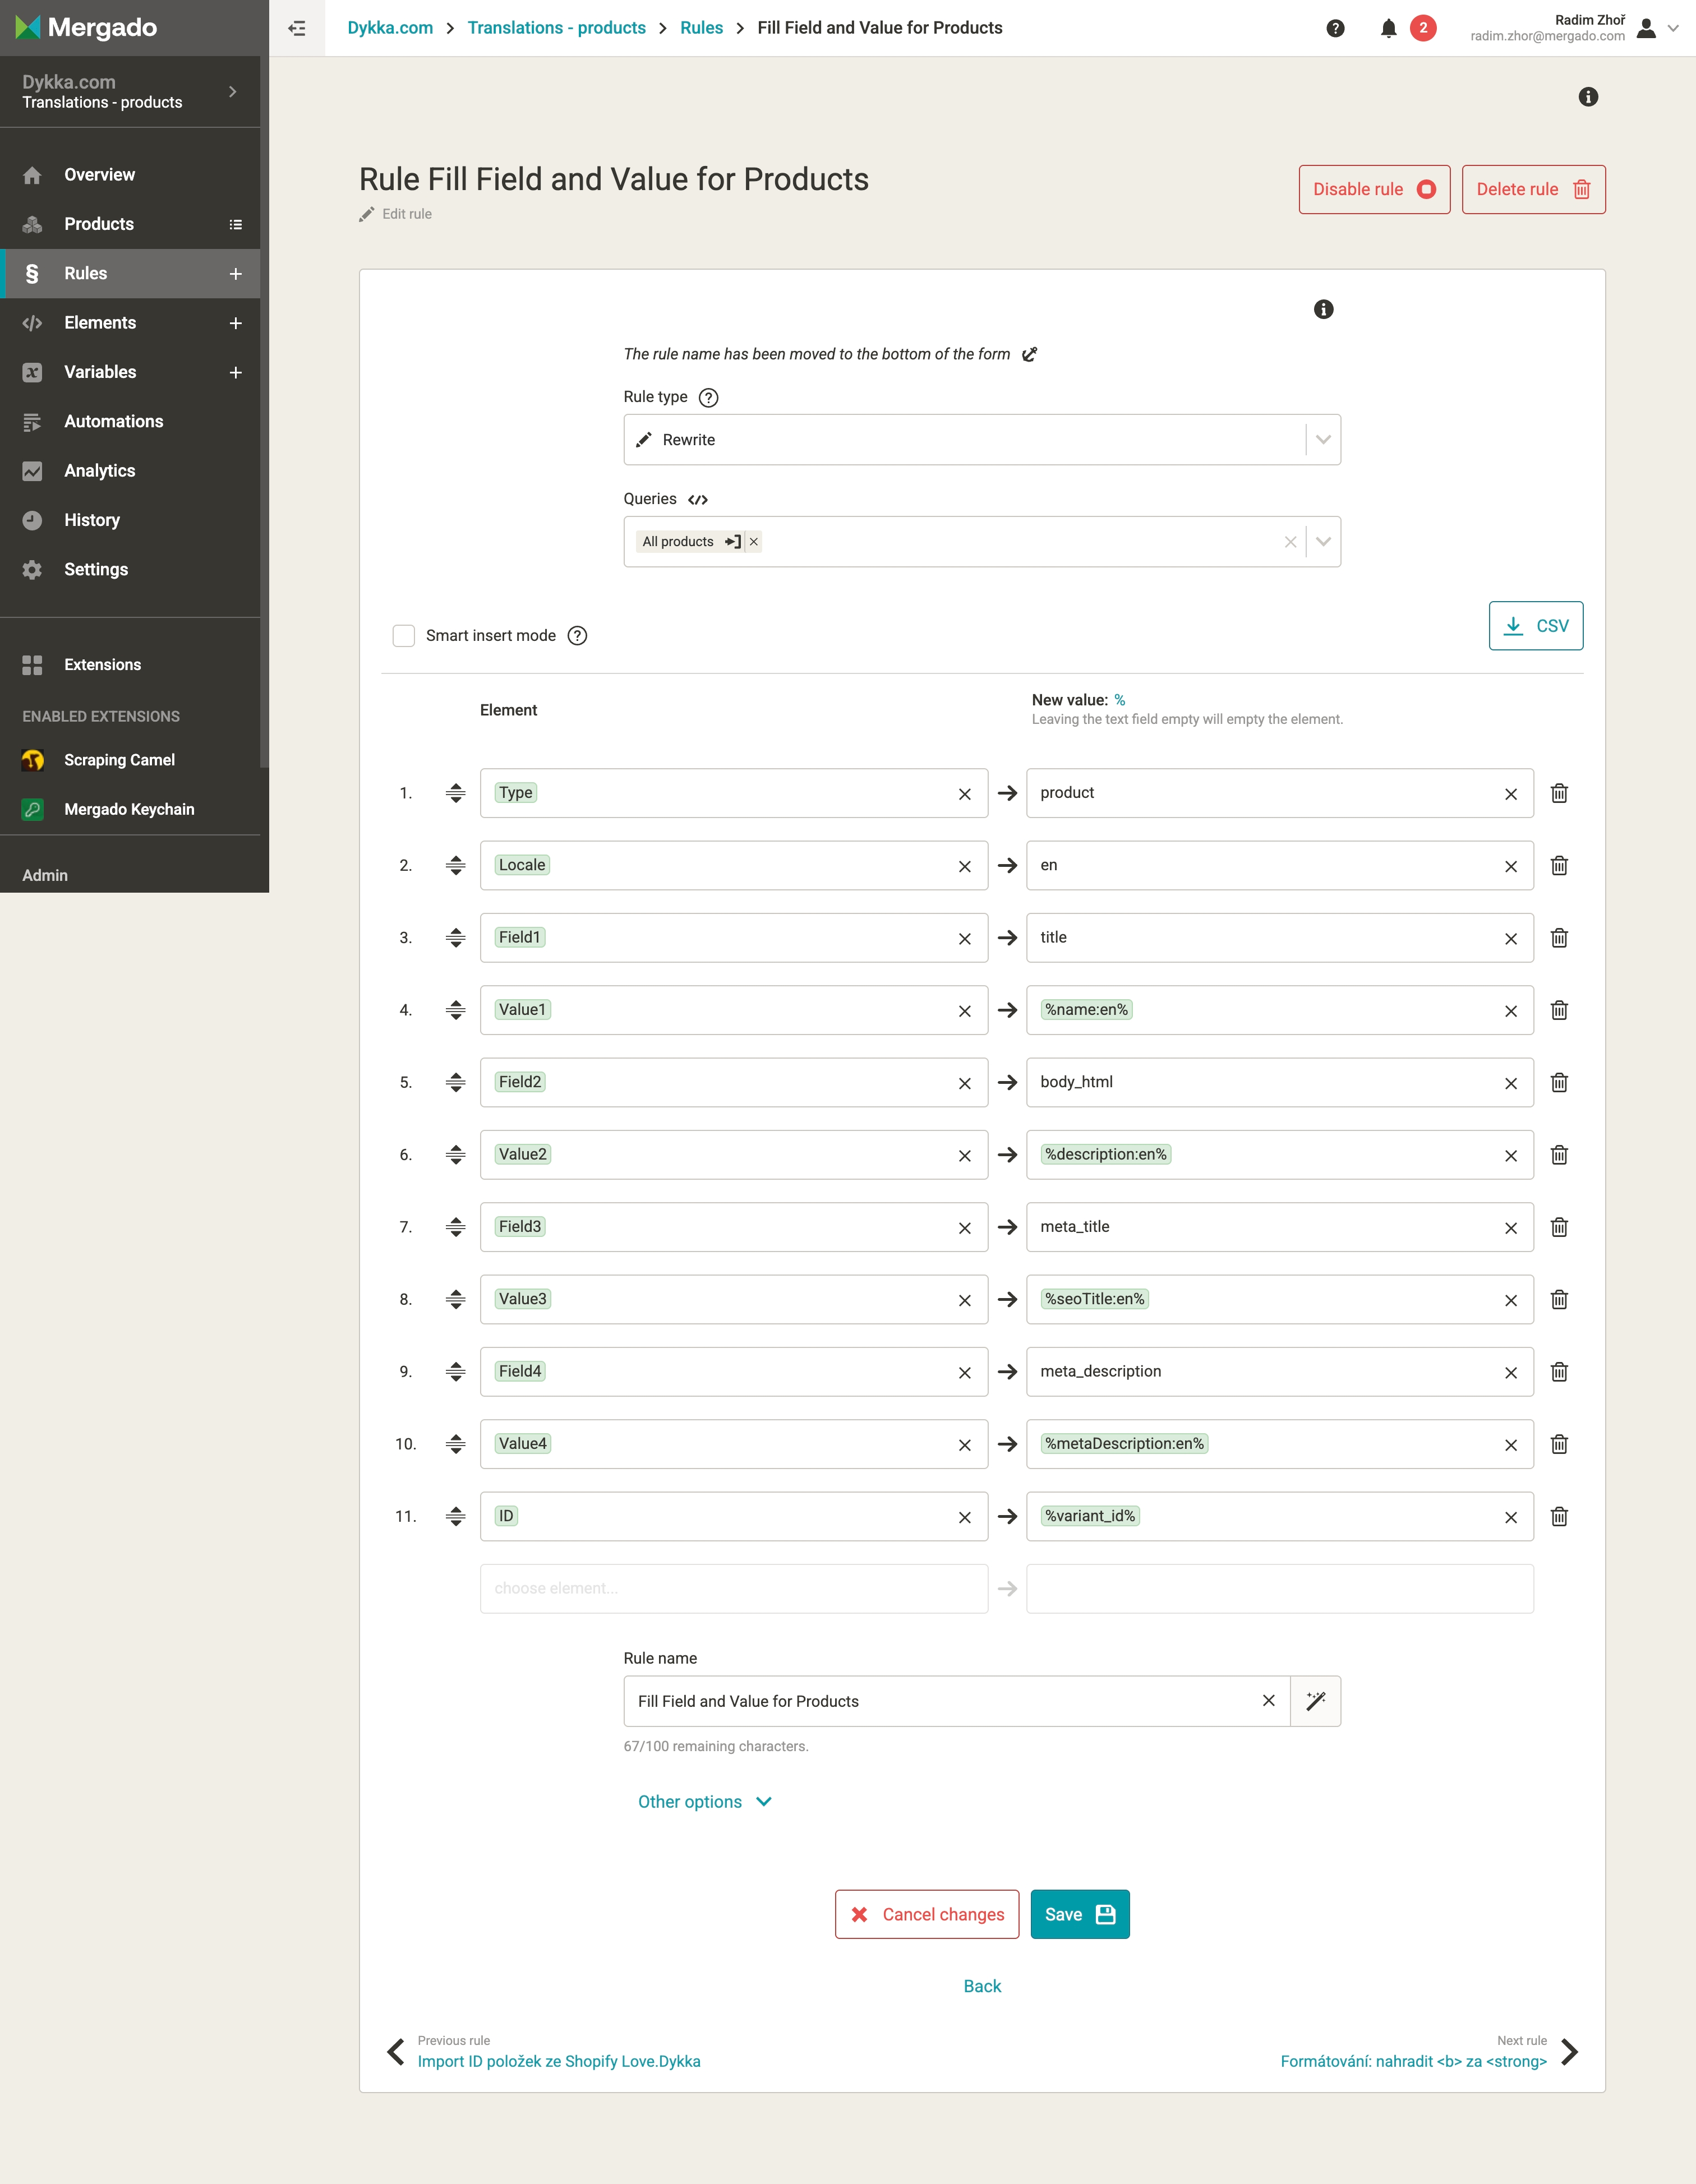
Mergado
- Import the CSV file into Mergado — input format Plain CSV, output Plain CSV.
- For products, create two projects — a product project (core information) and a variants project (parameters and their values).
- Create new elements for a functional import into Shopify:
- Type — object type (e.g., product, article, category)
- ID — pairing ID of the item (for products, e.g., CODE; in Shopify, the ID)
- Locale — language (e.g., en)
- Field1, Field2… — field name (e.g., title, body_html)
- Value1, Value2… — translation value
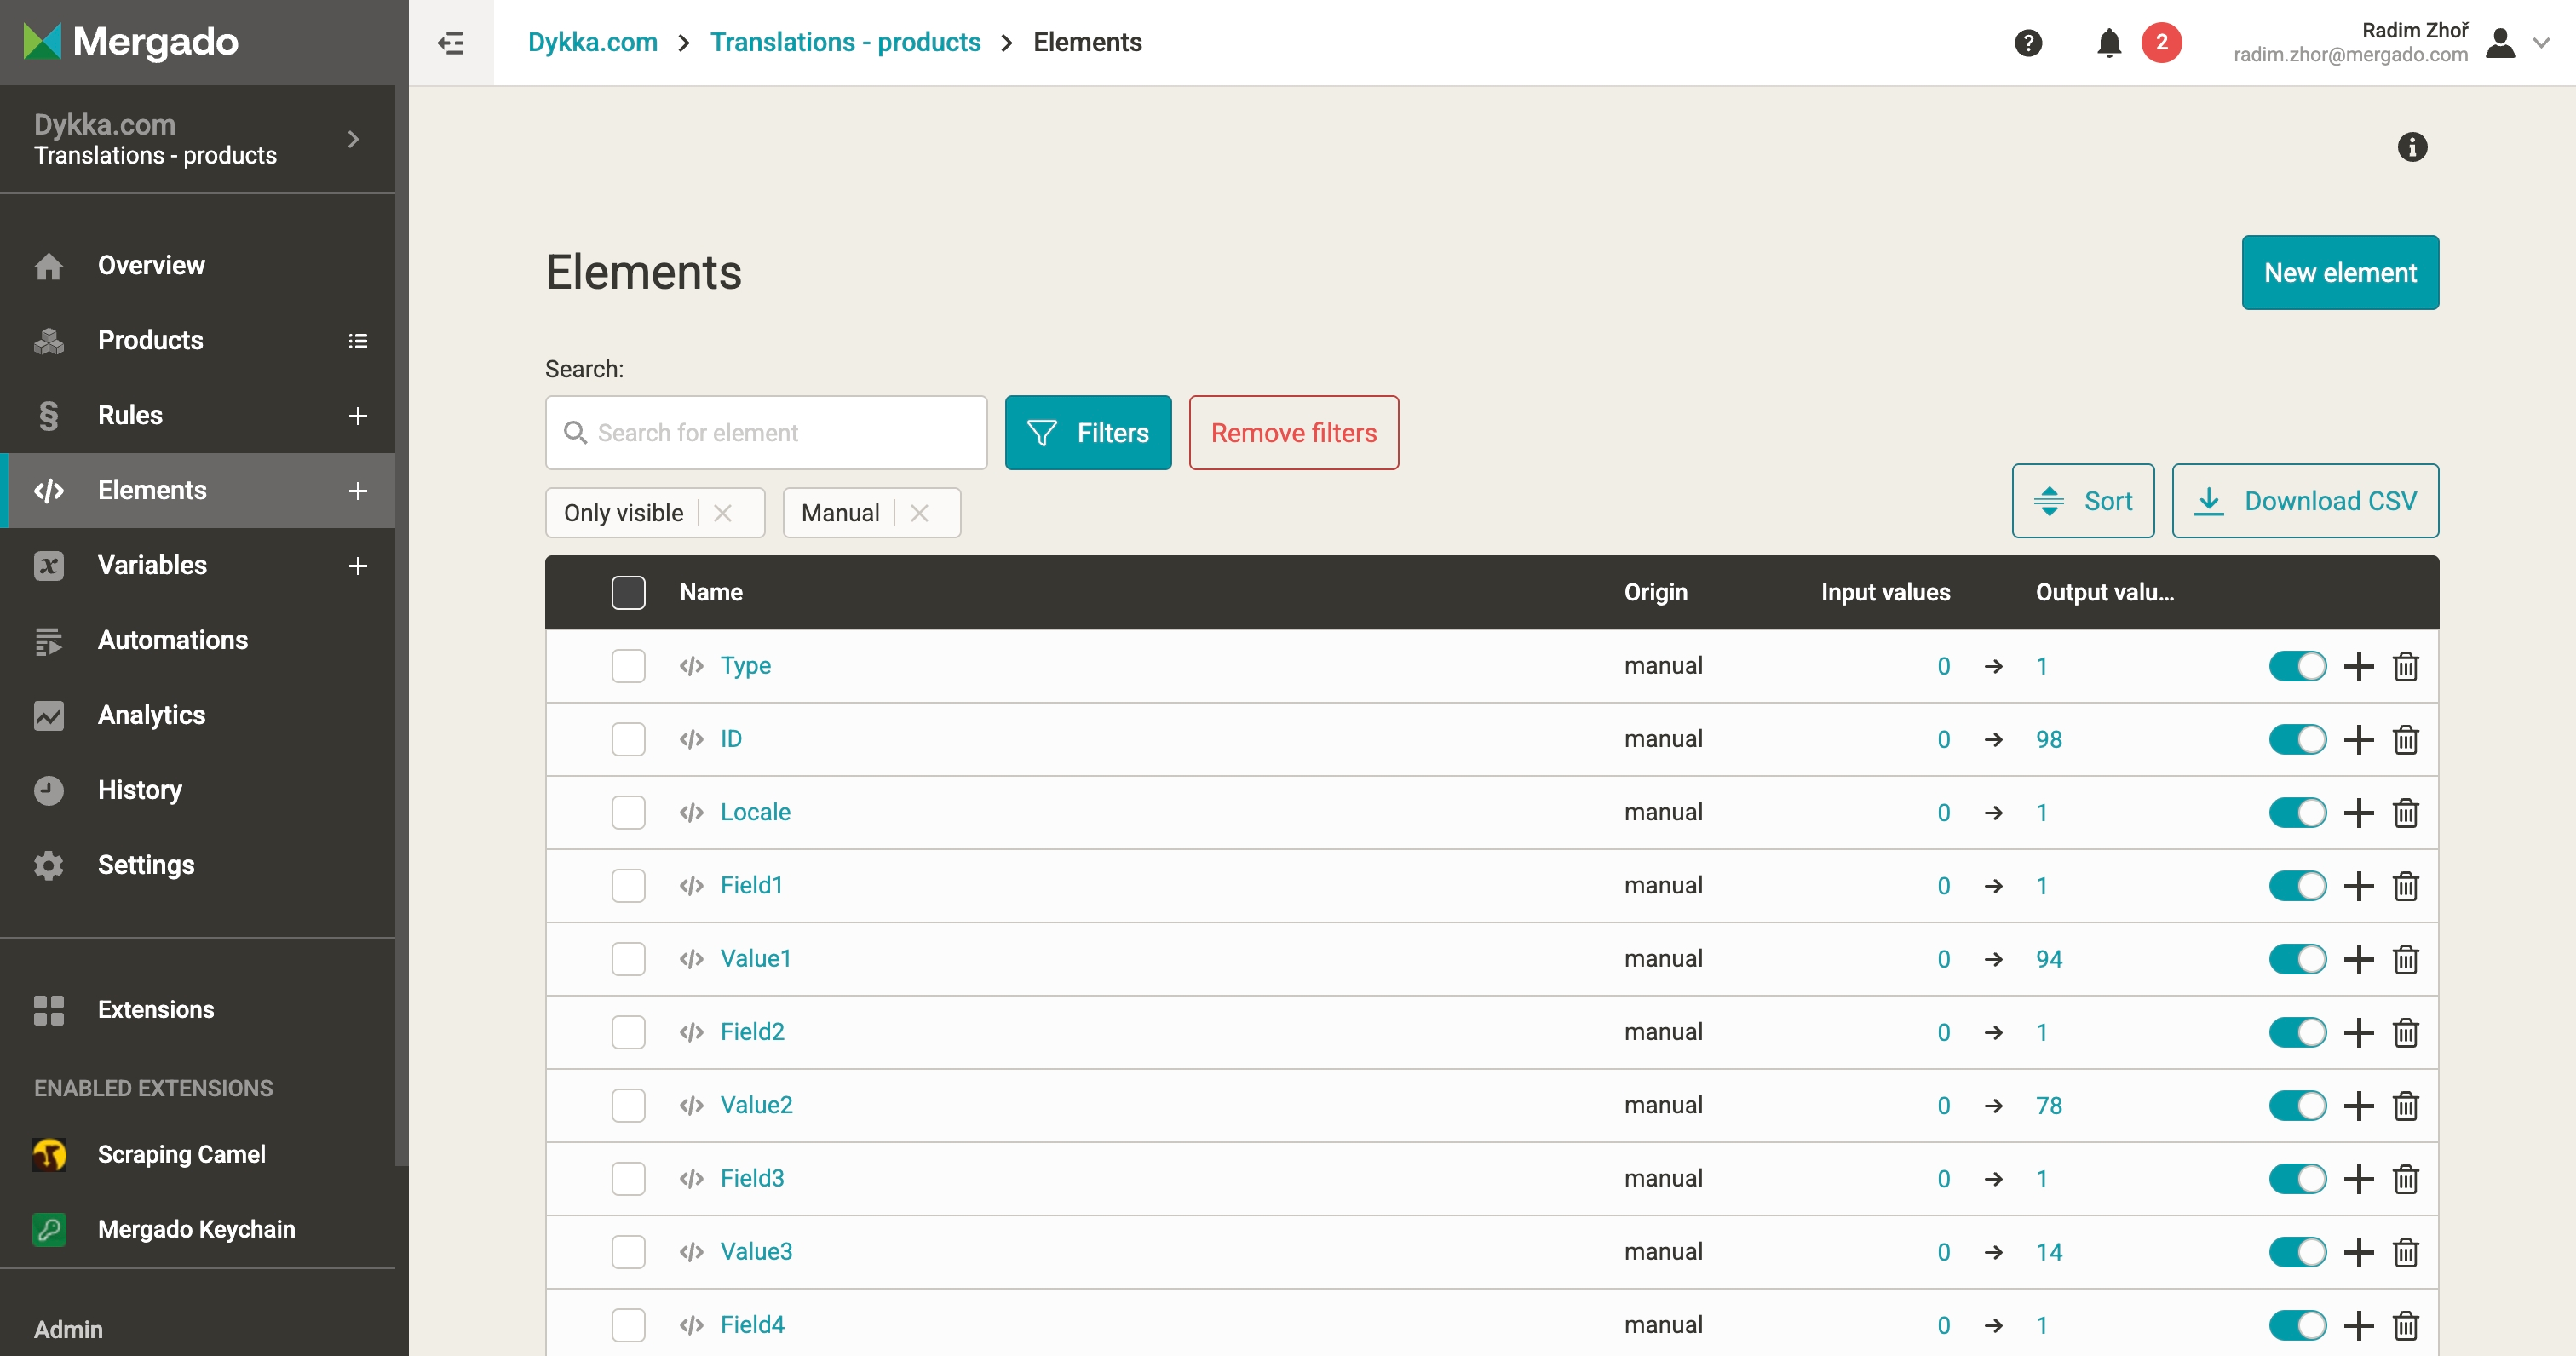
- Example mapping:
- Type → product
- Locale → en
- Field1 → title
- Value1 → %name:en%
- Field2 → body_html
- Value2 → %description:en%
- Field3 → meta_title
- Value3 → %seoTitle:en%
- Field4 → meta_description
-
Value4 → %metaDescription:en%
- Import Shopify IDs:
- Why: every translation must be attached to an object that already exists in Shopify.
- Products: pull product IDs back via the Shopify integration in Mergado during the products import.
- Other objects: use the mapping CSV from the Shopify Importer extension.
- Text formatting — for any element that contains formatted text (in our case, e.g., Value2 → %description:en%), run the Shoptet export: HTML formatting cleanup automation.
Shopify
- Upload the CSV via the Shopify Importer extension.
- Verify in Settings → Languages → English → Translate & Adapt app (this free Shopify app must be installed first).
- Select the object (e.g., Products) and check the translations. Not all fields are shown in the preview.
Repeat this process for all objects that contain text.
3.12 Menu in Shopify
3.12.1 What we need
In Shopify, the user-facing navigation is defined by Menus. After uploading categories (Collections), you need to add them to the respective Menus manually.
For this procedure you need:
- Access to Shopify admin — to edit menus
3.12.2 Step-by-step
- In Shopify admin, go to Content → Menus.
- Click Create menu or open an existing one.
- Click Add menu item.
- In the Link field, select Collections and then the desired category (the Label field fills in automatically).
- Use drag and drop to nest categories.
- Save the changes.
4. Conclusion
Results summary
- 99 migrated products
- love.dykka.com: 36
- dykka.com: 63
- 30 man-days — migration duration
- 100% successful import
Team and process
Five people participated in the project. The heaviest lifting was done by Radim Zhoř, and for most of the time 2 to 3 people worked on it intensively. Collaboration took the form of task hand-offs between team members, focused working sessions, and ongoing checks with quick evaluation, which helped us keep the pace and minimize errors.
Unexpected findings
During the migration we used AI to build our own app that not only imports data via API, but also adjusts it automatically; we’ll keep developing this app further.
Recommendations for other online stores
💡 Tip: Plan for up to a full month of migration time and assign a dedicated person who will spend 100% of their time on it, while others to help as needed.
⚠️ Note: Monitor progress at every step and don’t assume it will be an entirely straightforward process.