Create custom macro in Mergado

We have recently presented the option of creating custom macros. Therefore, we will show you how to create such a macro. By learning how to add and set up macros, you can automate many tasks in Mergado.

We have recently presented the option of creating custom macros. Therefore, we will show you how to create such a macro. By learning how to add and set up macros, you can automate many tasks in Mergado.

How to create a macro in Mergado

From the main Mergado page, go to the Custom Macros page and select + Create New.

Task:

Let’s create a two-step macro for Google DSA export that hides cheap products and fills the CUSTOM LABEL element with availability information and product manufacturers.

This macro will be helpful for exports used in Google Ads for DSA campaigns.

Instructions

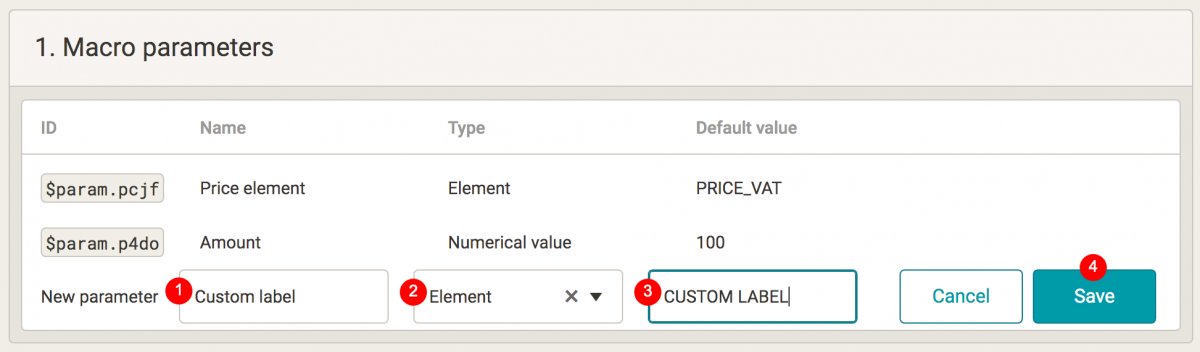
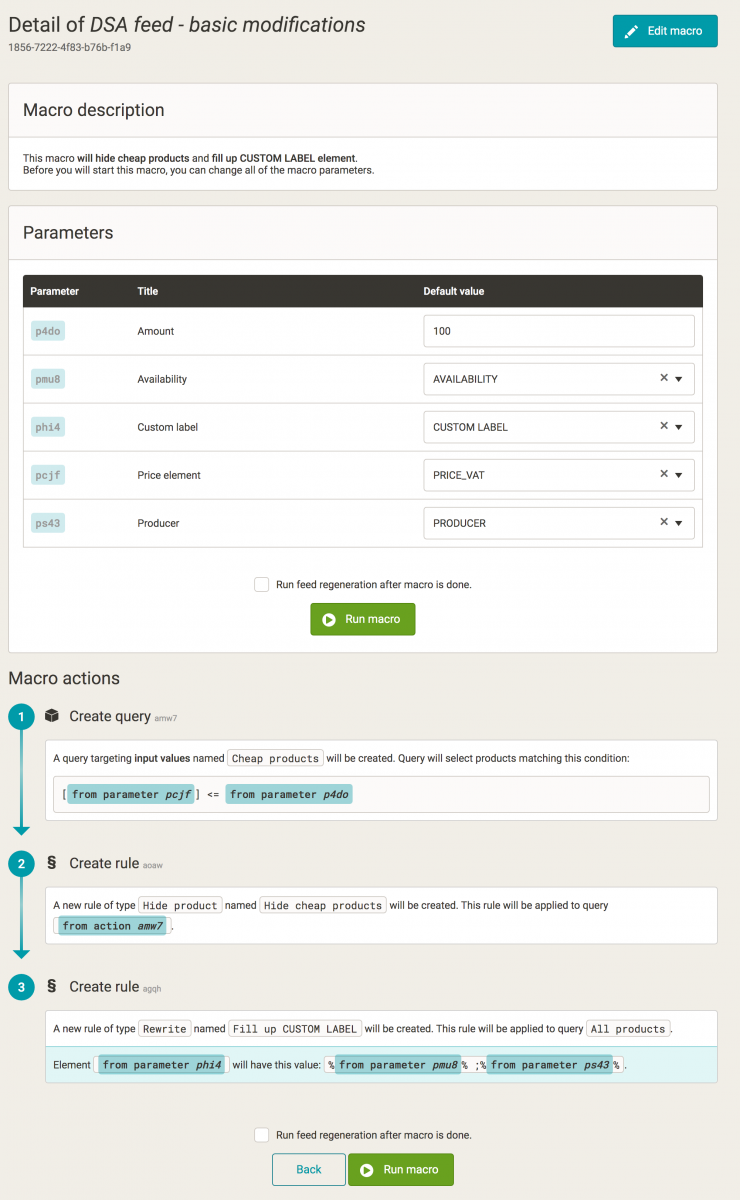
  • We can define parameters in a macro that can be customized to a particular export before it is run. In our case we define two parameters:

    • price element
    • element with the amount from which we consider the product as cheap

    Before running the macro, we can either change or individually set both.

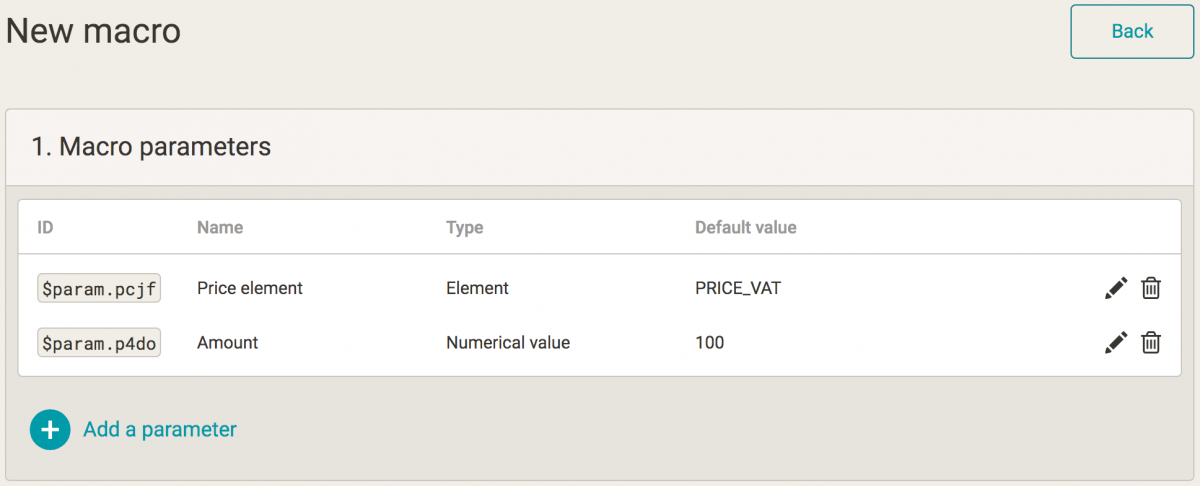
    How to add parameters.

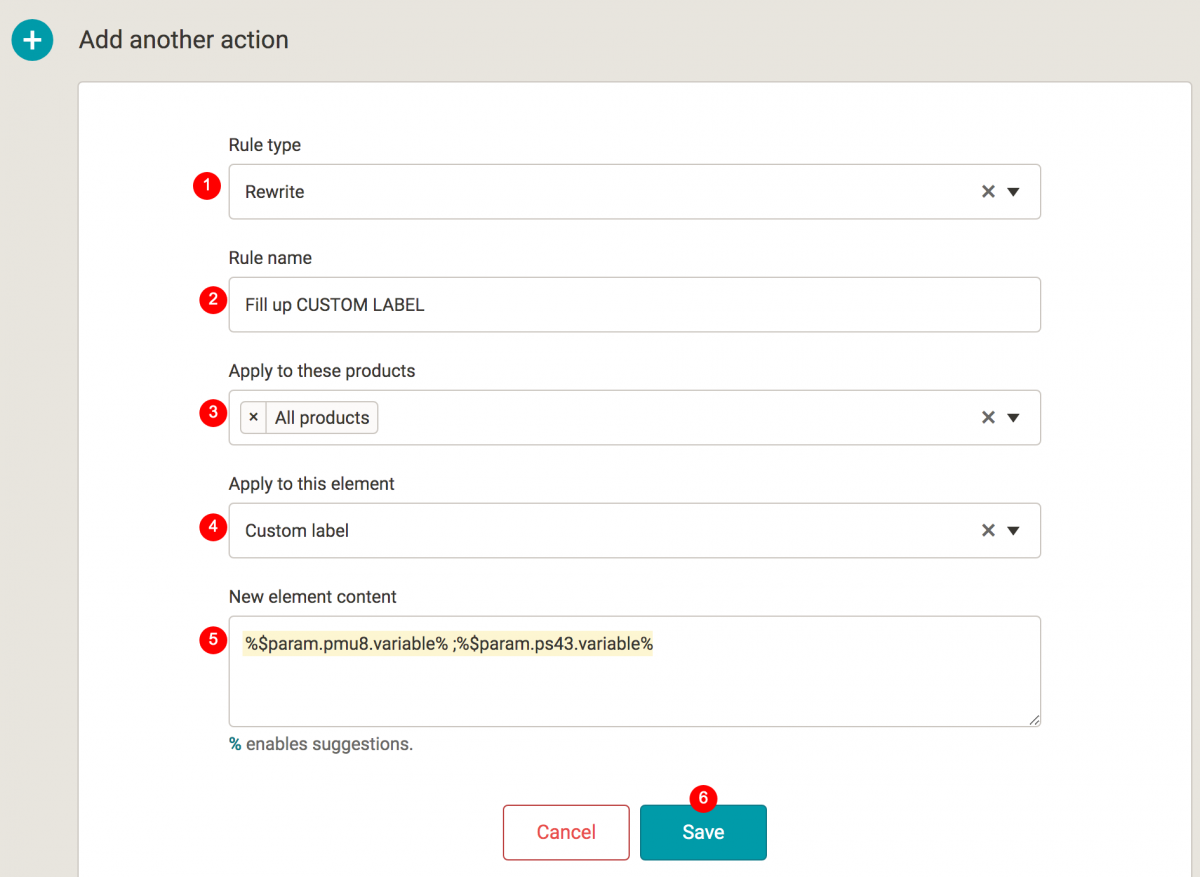
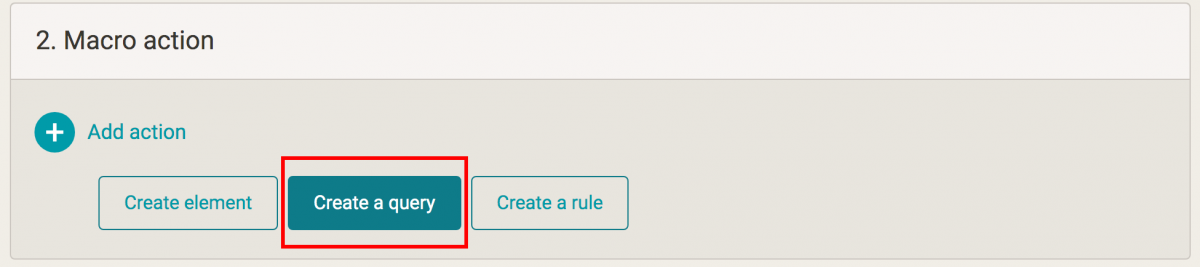
    Now let’s add two actions:

    1. Choose cheap products:

    1. Click Add action and choose Create a query.


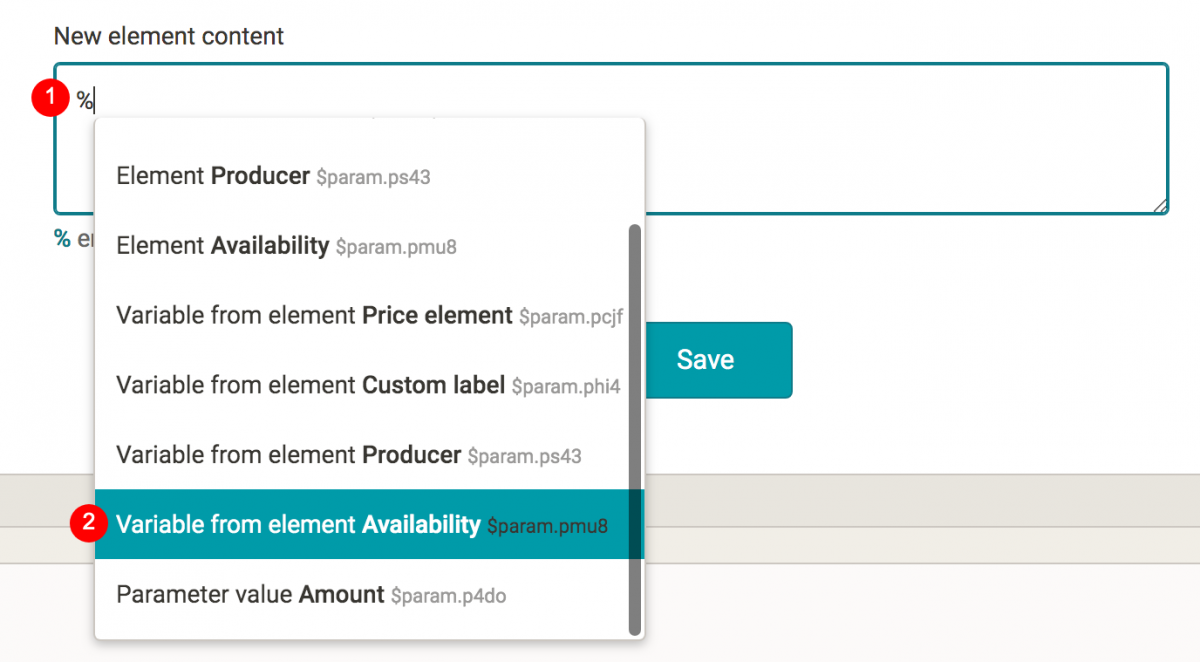
    2. When writing the query condition, use the previously defined macro parameters and write it as follows:

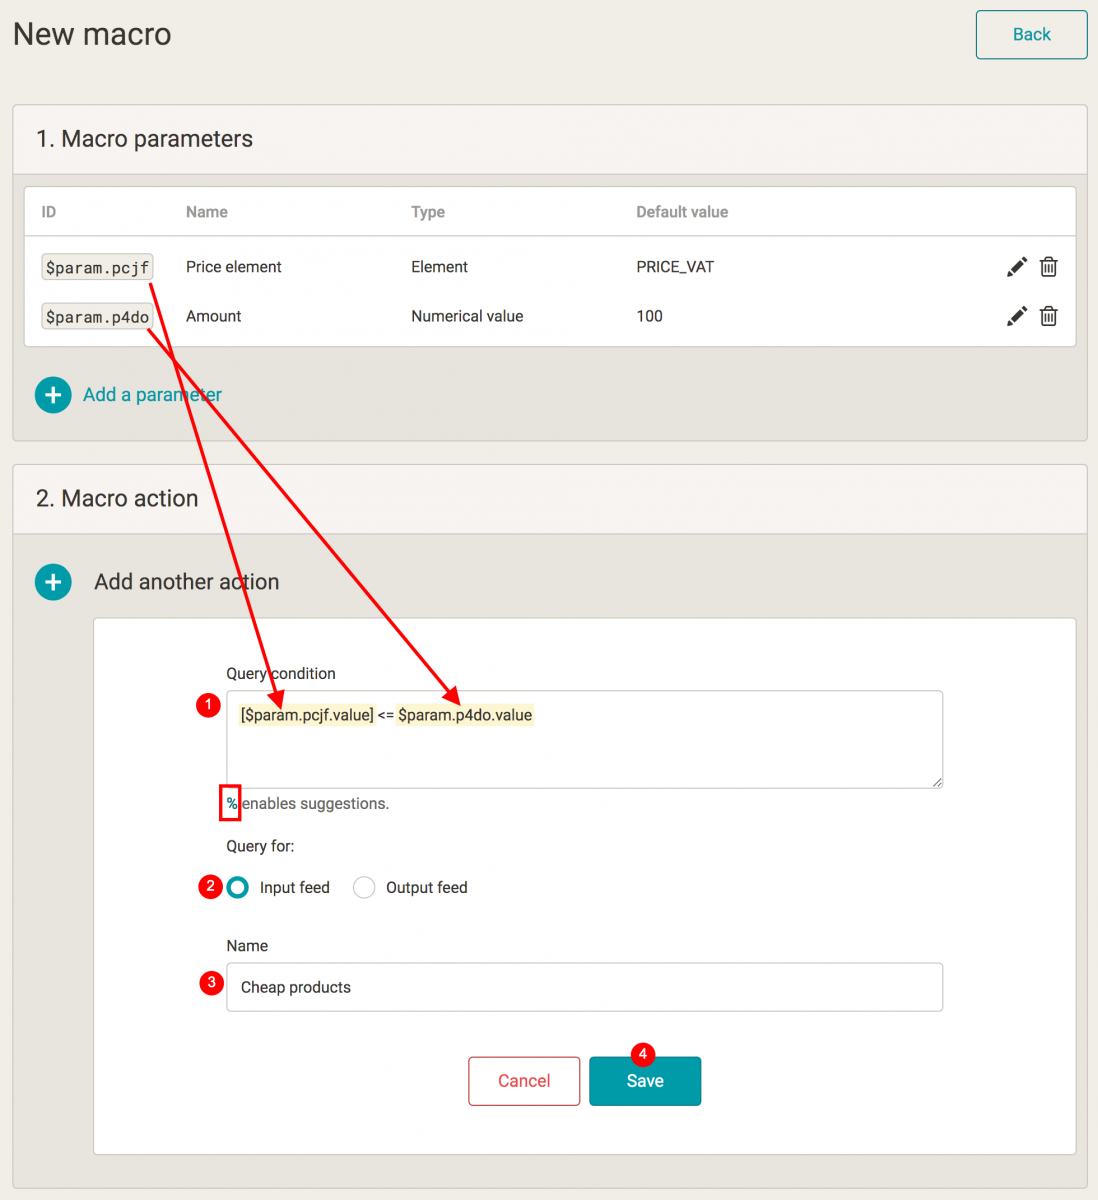
    Note: As soon as we enter the % sign for the condition, we will activate the autocomplete, and we just select a particular value.


    3. Name and save the query.

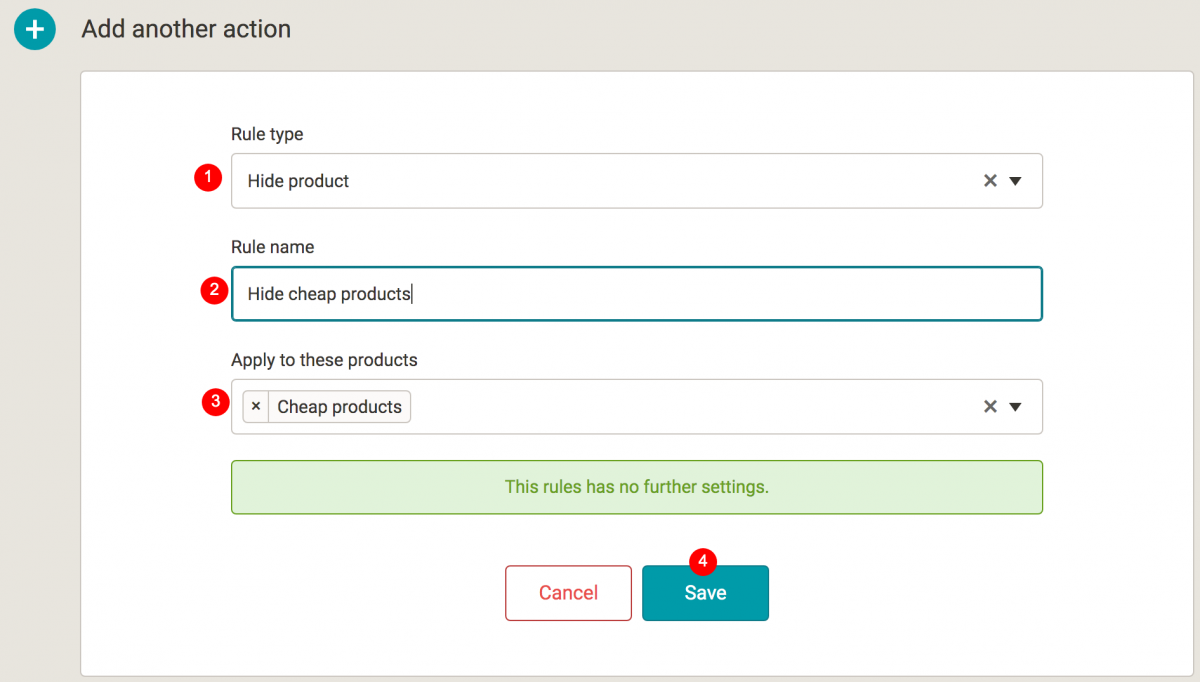
    2. Hide the selected query with a hiding rule:

    1. Click on Add action and select Create rule

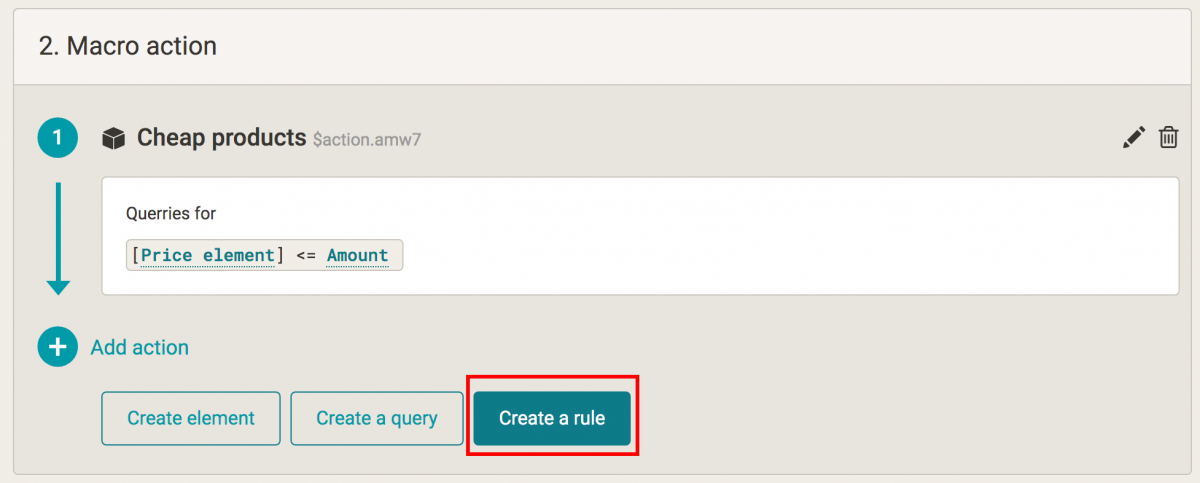
    2. Choose the Hide product rule, name it, select a query of cheap products created by us, and save:

  • We will return to the macro parameter table and add one more: the CUSTOM LABEL element.

    Adding a custom label element.

    We add it so we can then use it in the rewriting rule (still within the macro).

    In addition to the macro parameters, we add two more: the availability information and the product manufacturer, which we will also use in the rewriting rule in the field for the new value.

    Adding parameters with availability information and product manufacturer.

    Now we create a rewriting rule:

    1. Click on Add action and select Create rule.

    2. Choose the Overwrite rule, name it, set the query on all products (here we could create a different query in advance if appropriate), select the query of cheap products and in the field for the new value insert the variables from our parameters, more precisely, get the following variables (after entering the character %) by autocomplete:

    3. This is how it will look:

    4. Save the rule.

  • Now we just name the whole macro, fill in the description, and save it.

    Adding a macro name and description.
  • 1. First, go to a particular export, specifically the Macros page:

    Overview of available macros in a particular export.

    2. Then click through to the macro detail, check or modify the parameters and finally run the macro.

    Preview of the created macro before the final run.

Although there are quite a few steps to create a new macro, the procedure is not difficult at all. Go through our tutorial — in a minute, you will learn how to create macros like a pro. Do you have questions regarding macros? Ask them in our forum.

You could be interested in:

Lukáš Horák

Lukáš takes care of most of the Czech and English communication in Mergado. Through blogs, e‑mail, and social networks, he regularly supplies readers with e‑commerce news and news and tips from Mergado. In his time off, he enjoys simple things like badminton, digging the hidden gems of the 80’s, and seafood served with red wine.